Configuration
This document will guide you through the process of setting up a commercetools project that you'll then be able to connect to Alokai. This guide intentionally only describes the basic working configuration to get you up and running as fast as possible. To learn more about commercetools, see the commercetools documentation.
Prerequisites
This guide assumes you already have access to the commercetools Merchant Center.
Create a new commercetools project
Log into your commercetools account and create a new project following the Create a project guide from commercetools. One project can provide data for multiple selling channels, but you can have more than one project with different settings and catalogs if you need it.
By default, you can only connect the Alokai project to one commercetools project. However, you can modify the middleware.config.js and nuxt.config.js files to export different configurations based on environment variables. This way, you can use one Alokai project for multiple commercetools projects.
Configuring commercetools project
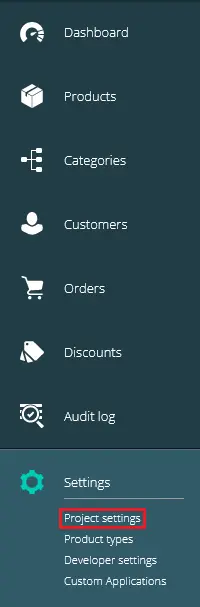
Once you already have a project in commercetools, you can start configuring it in the Project settings page of the Merchant Center.
More information For more information about the project set up in commercetools, see the Project settings page in commercetools documentation.
Configuring International tab
When you open the Project settings page from the menu, you will see a few tabs at the top. The first step in configuring a commercetools store is to configure options in the International tab.
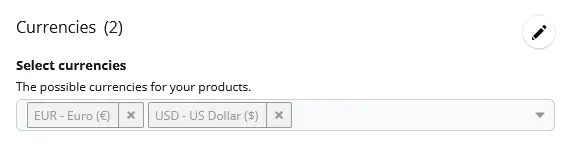
Start by selecting currencies available in your store:
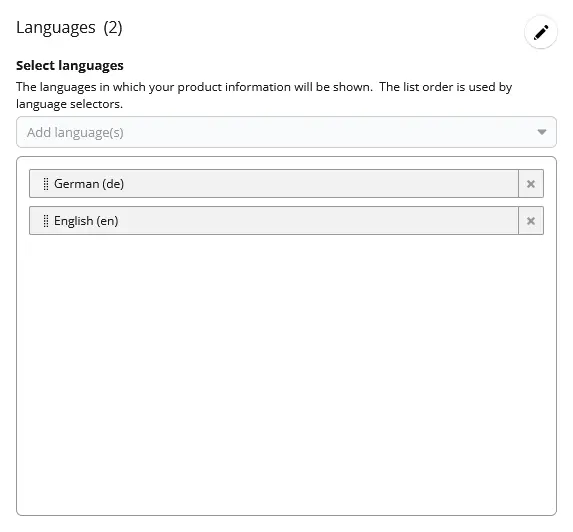
Then, select supported languages:
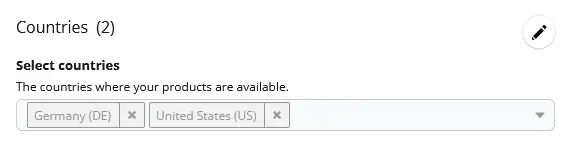
Next, select the available countries:
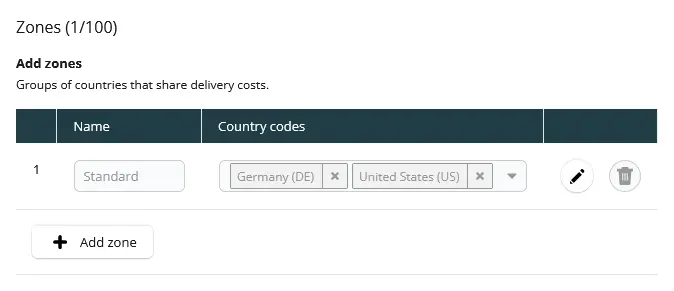
Finally, set zones. They are helpful when few countries share the same delivery costs. You need to configure at least one shipping zone to be able to set up shipping methods later.
Configuring Taxes tab
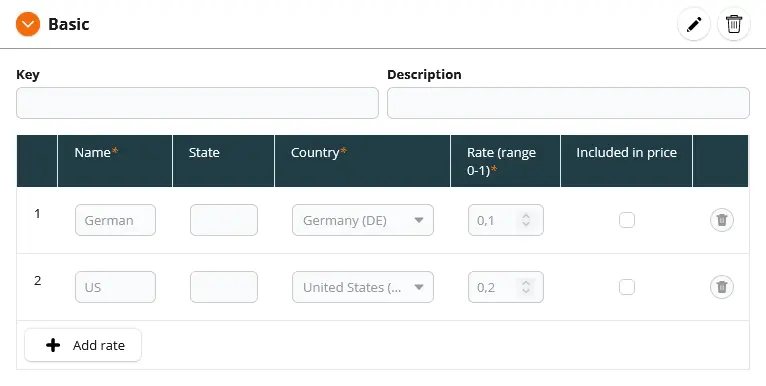
In the Taxes tab on the Project settings page, you can configure tax rates for the countries configured in the International tab.
Configuring Shipping methods tab
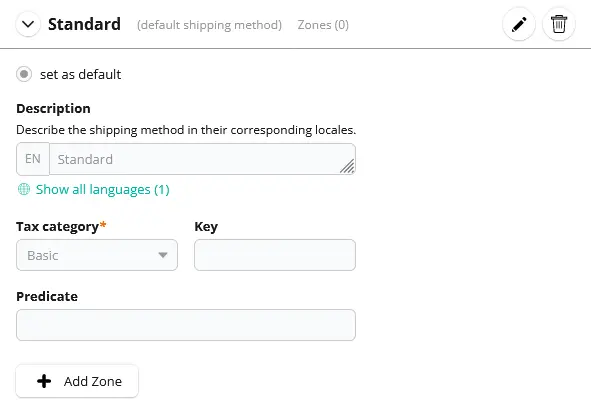
You can add a shipping method in the Shipping methods tab on the Project settings page. First, select if the price will be fixed or tiered. Then, enter specific methods for each zone and currency.
Adding a new category
Categories allow you to organize the products in groups and make them easy to find by the customer.
More information For more information about categories, see the Modeling Categories page in commercetools documentation.
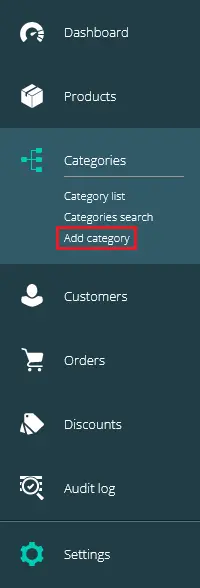
To create a category, go to the Add category page from the sidebar menu.
Enter the name and category order.
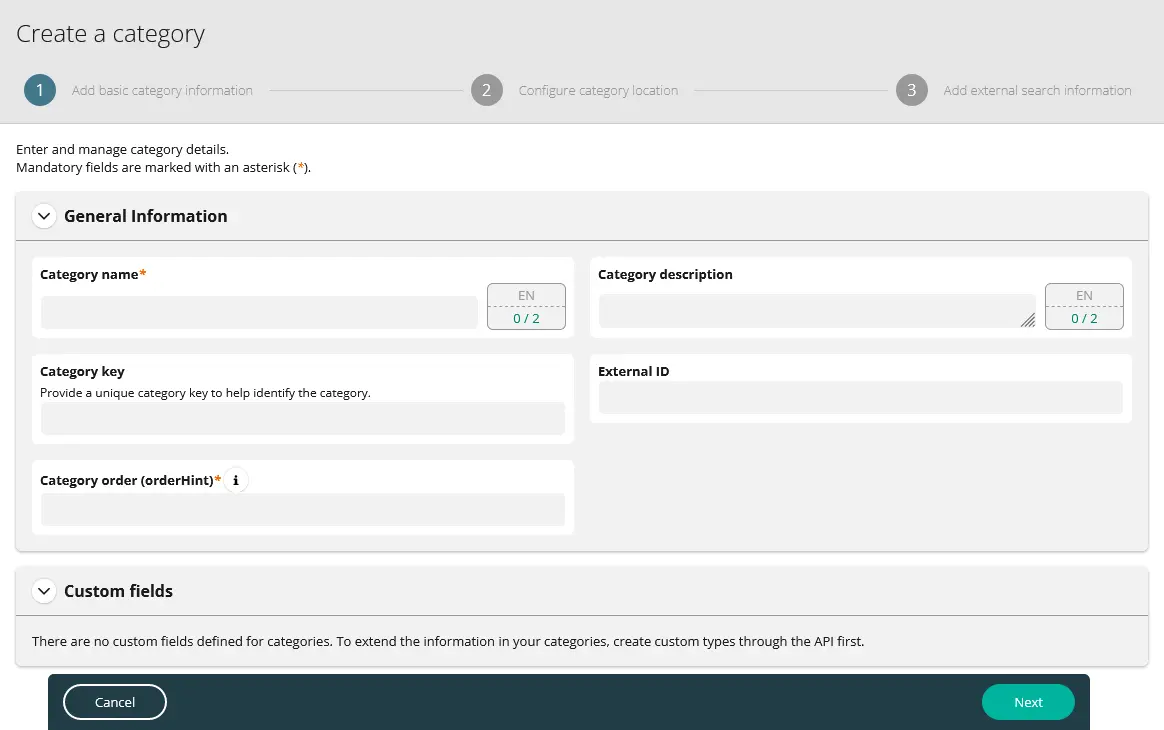
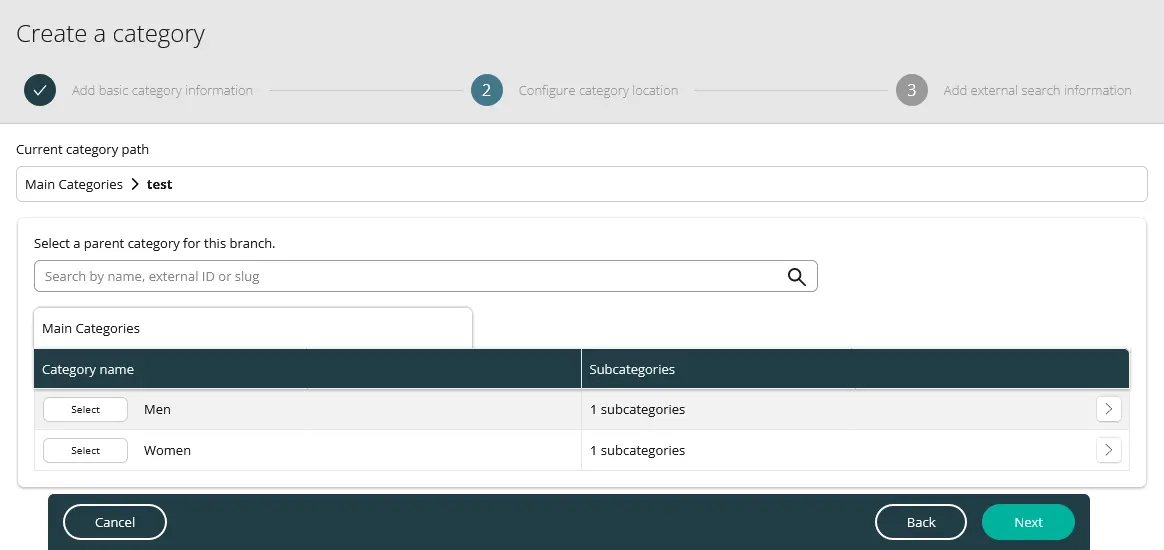
If applicable, select the parent category to which this category belongs.
Enter the category slug. It will be part of the URL for this category.
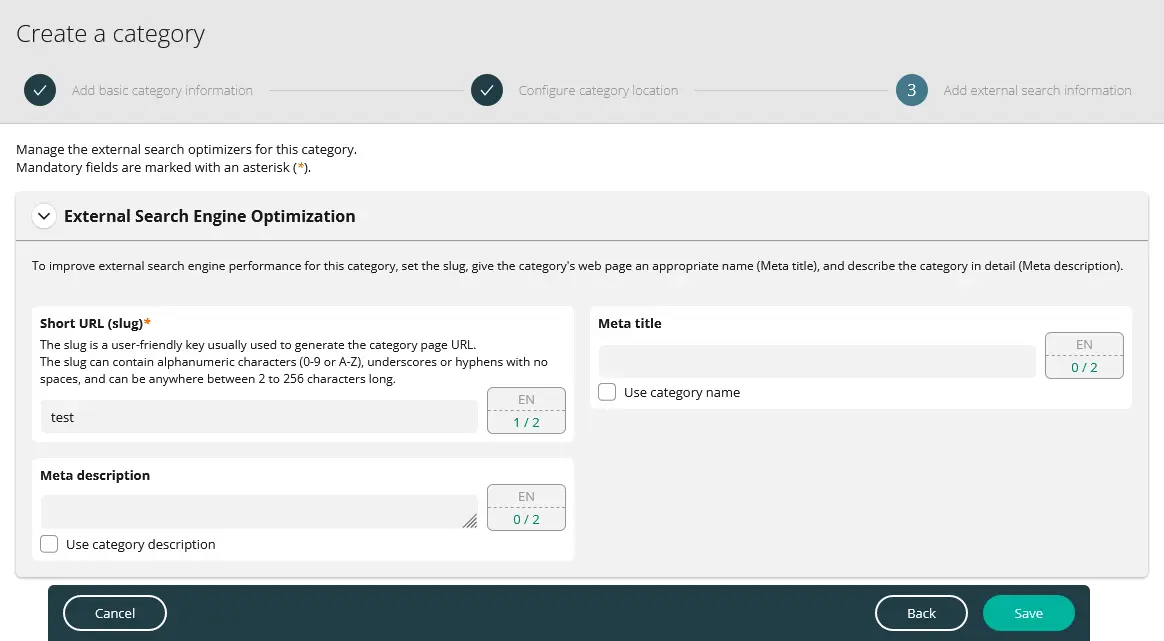
You have to create a category structure with at least two levels to display the category page in the Alokai project correctly.
You can see your categories in the categories search menu:

Adding a new product type
Before we can add any new product in commercetools, we need at least one product type. Product types are templates with specific attributes for products of the same type.
More information For more information about product types, see the Modeling Product Types and Attributes page in commercetools documentation.
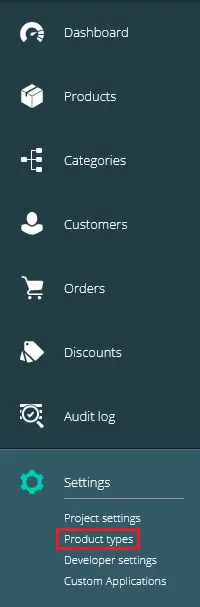
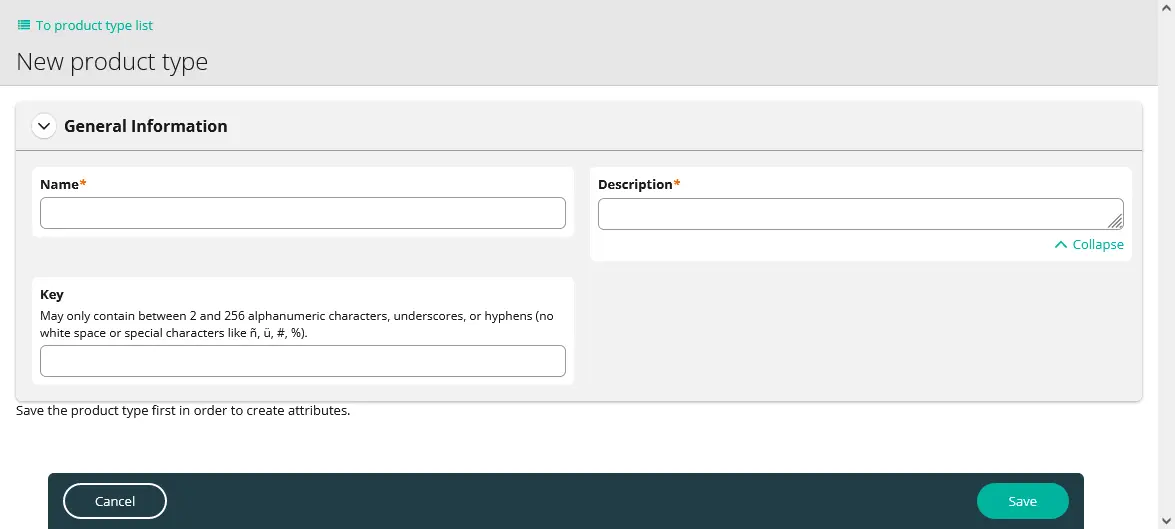
To create a product type, go to the Product types page from the sidebar menu and click the Add product type button.
Enter name and description and click the Save button. Without saving, you won't be able to add attributes in the next step.
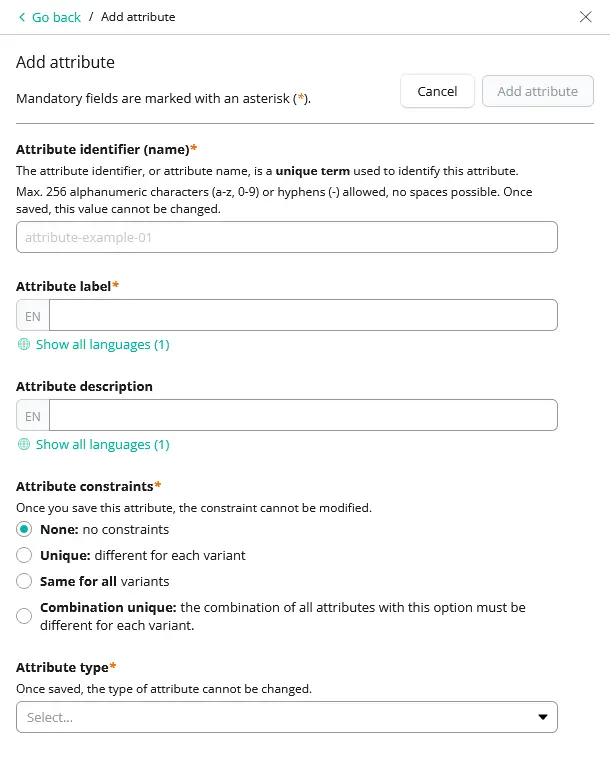
Click the Add an attribute button and enter the name, label, constraints, and type fields.
Adding a new product
After creating at least one product type, you can add a new product.
More information For more information about products, see the Modeling Products page in the commercetools documentation.
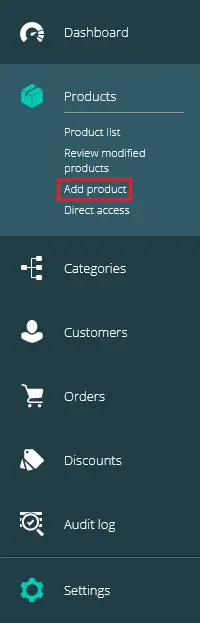
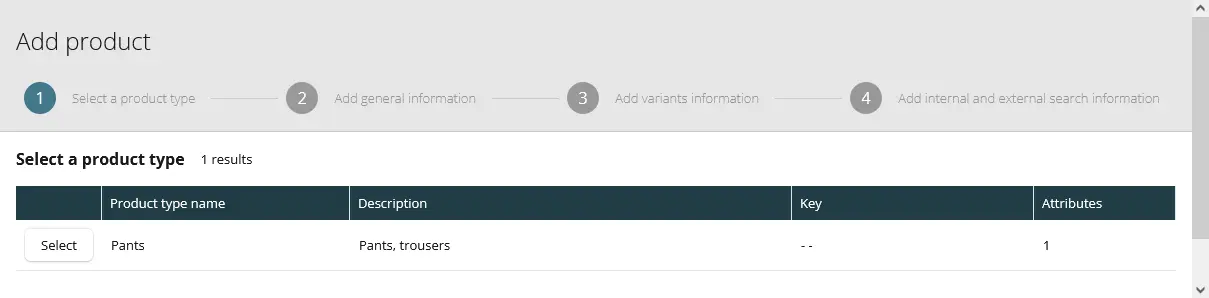
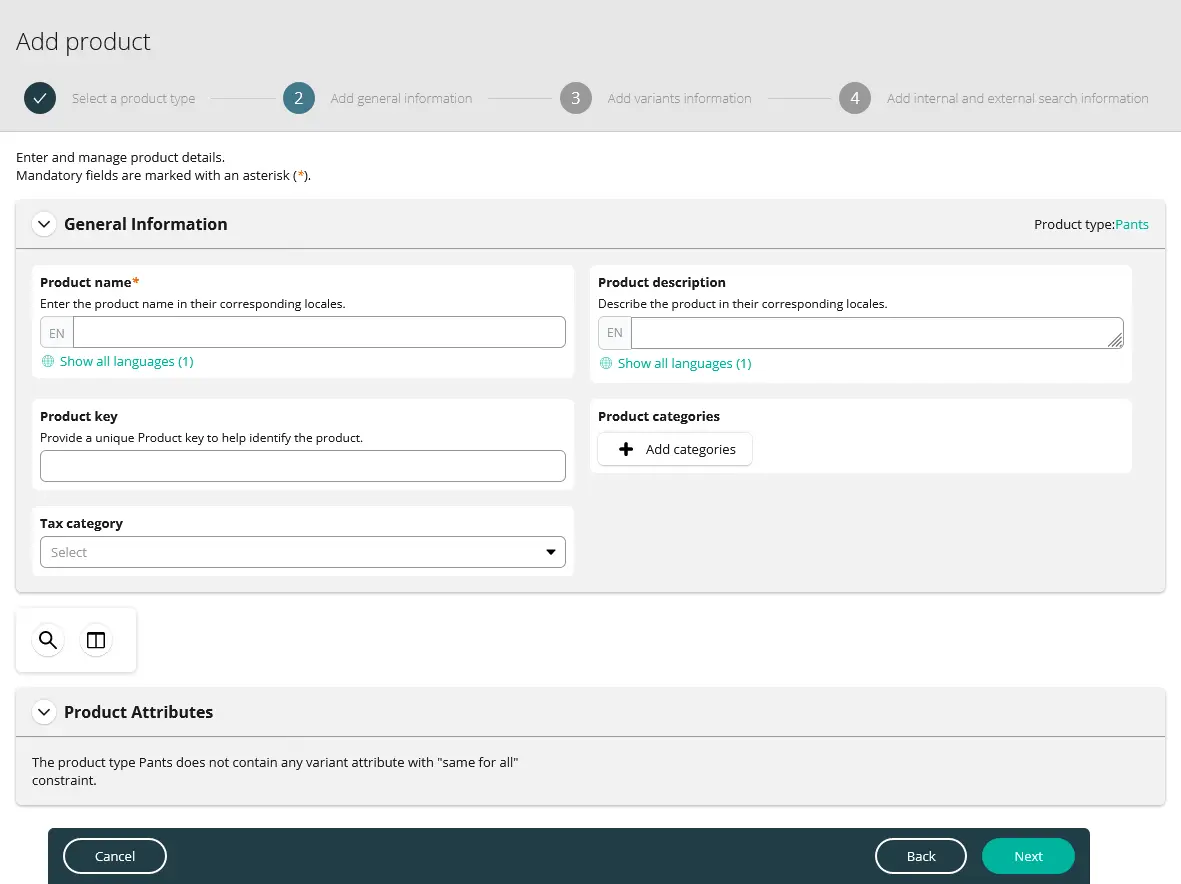
To create a product, go to the Add product page.
Start by selecting the product type.
Type the name and assign the tax category.
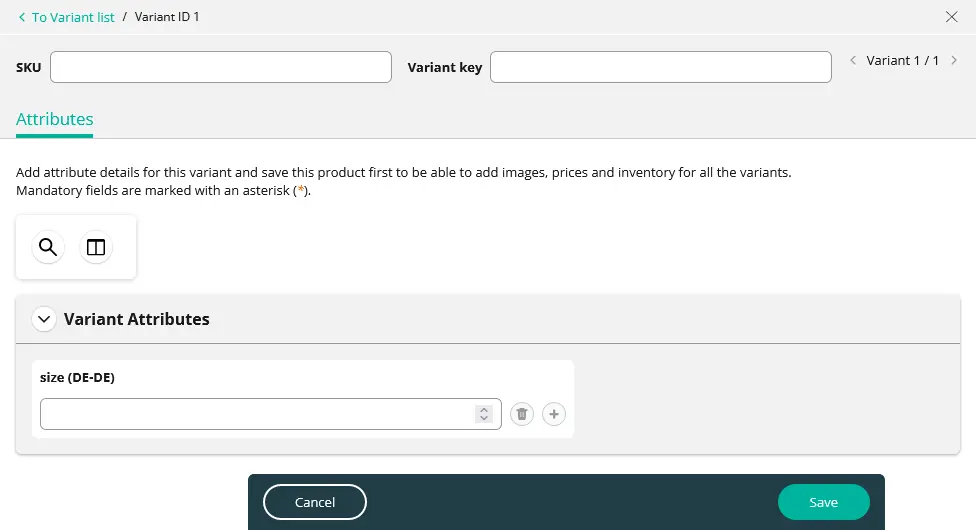
Click the Add variant button and add at least one variant of the product with attributes and SKU number.
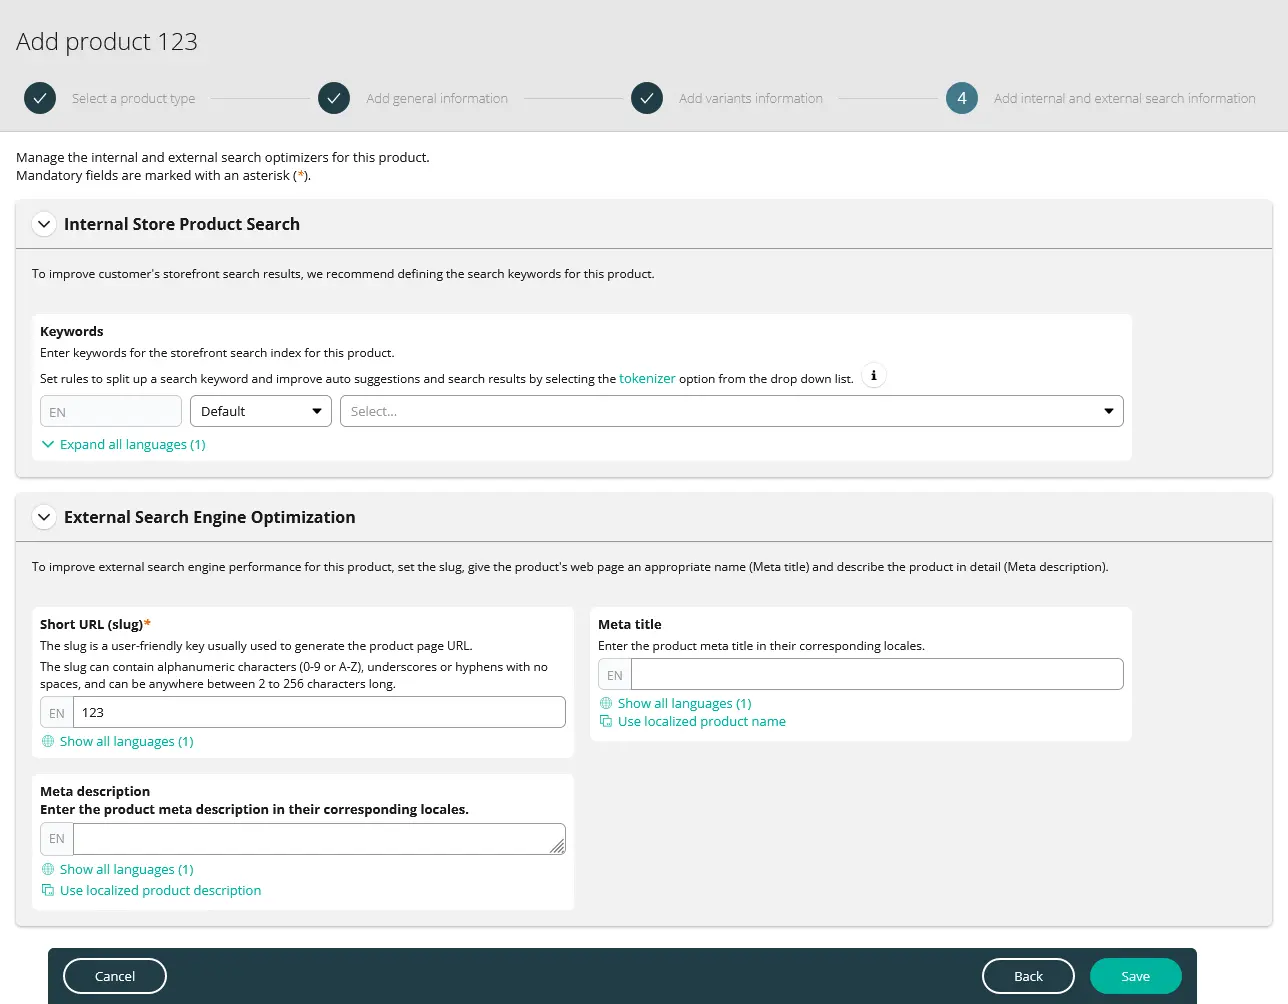
Enter a slug, keywords, and metadata to optimize searching. Once you are finished, click the Save button.
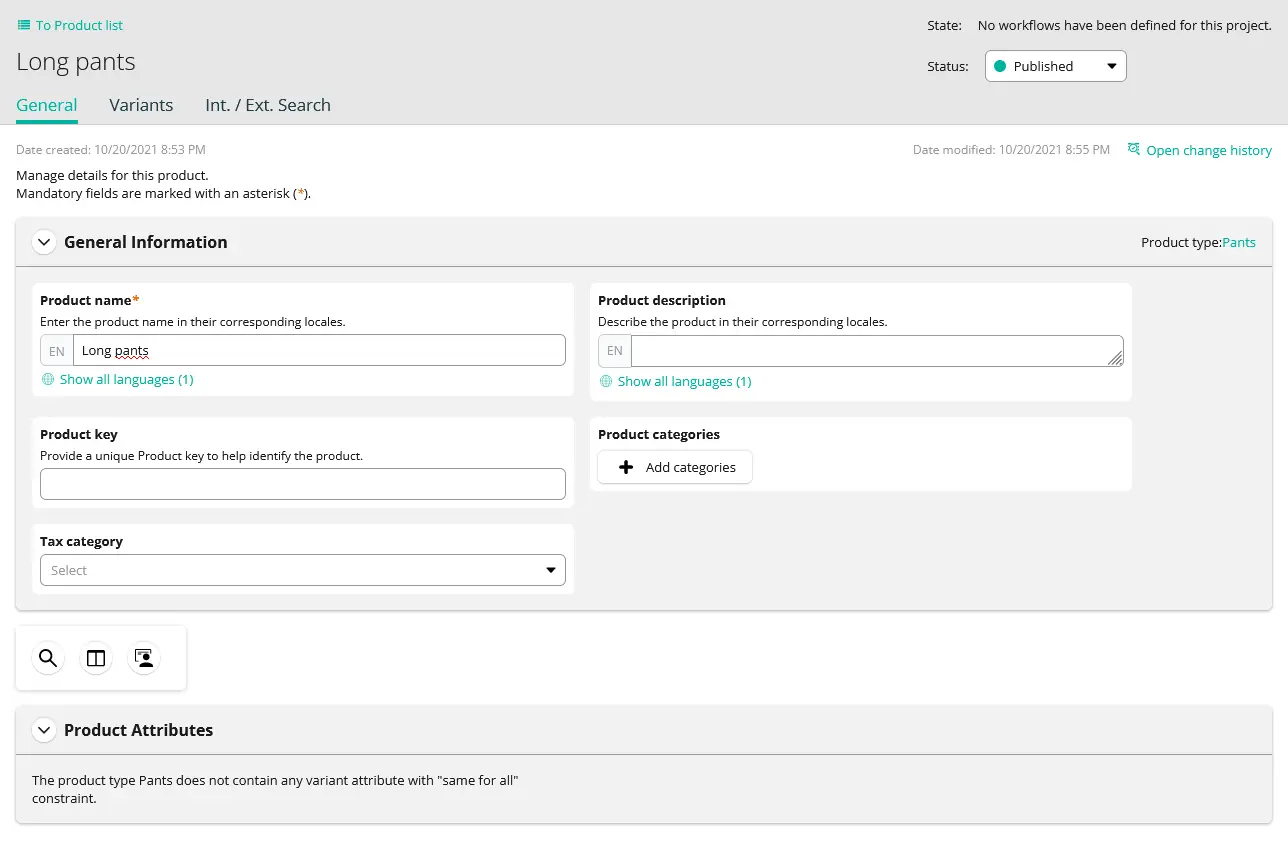
Once the product is saved and you are redirected to the product summary page, change product status to Published in the top right part of the product screen.
Creating an API client
With commercetools project already configured, we can connect it to our Alokai application. To do so, we need to generate two separate API clients.
Save the credentials for later! After creating an API client, download or write down its credentials because they will be displayed only once. You will need them later to connect your project to Alokai.
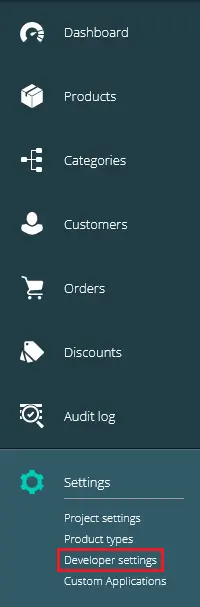
Go to the Developer settings page.
Click the Create new API client button and enter the name for the first API client.
The application will use this API client to generate an access token for guests and customers visiting your shop.
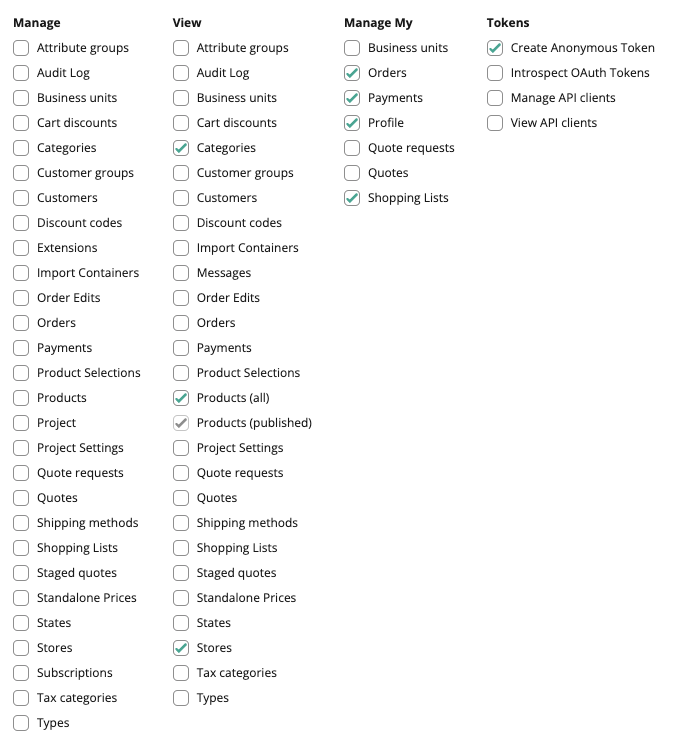
Then in the Scopes section, select the Mobile & single-page application client option from the list of available templates.
Additionally, select the Stores checkbox in the View column.
The image below shows which permissions you should select.
More information For more information about scopes, see the Scopes page in the commercetools documentation.
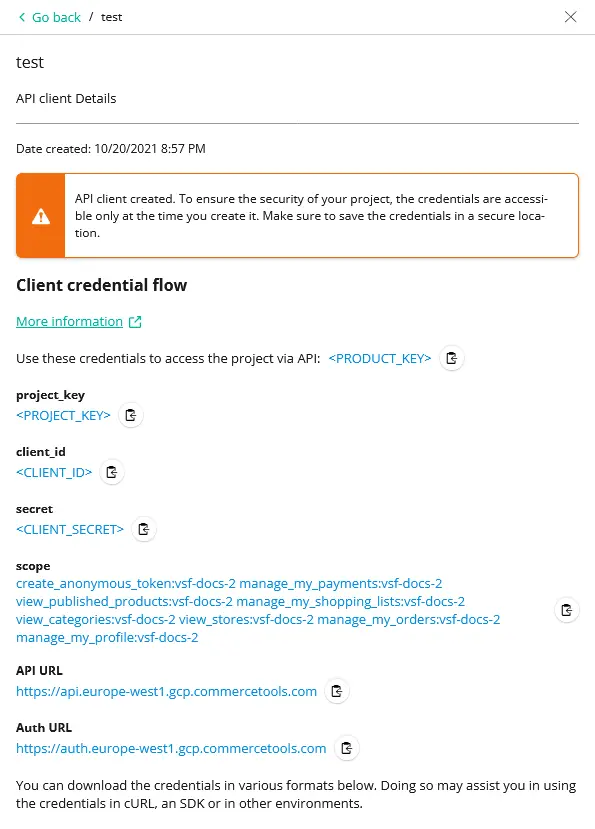
When you click on the Create API client button, you will see all the credentials. They are only displayed once, so you need to store them securely. You can also download them in the format you need.
Save the credentials for later! After creating an API client, download or write down its credentials because they will be displayed only once. You will need them later to connect your project to Alokai.
Congratulations! You've just created your first commercetools API client. You will use it later in the api section of your commercetools configuration in Alokai.
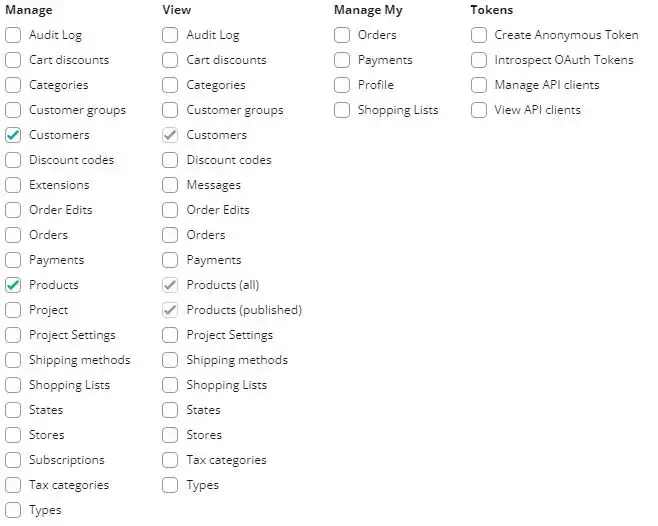
Repeat the same process to create a second API client. This time, select only the Customers and Products permissions from the Manage column. Alokai application will use this API client to generate access tokens used by the Server Middleware to perform operations requiring higher permissions than regular guests and customers should have.
Server Middleware configuration
In the middleware.config.js file, you can configure the commercetools SDK, Apollo client, and integration extensions.
It includes URLs, secret keys, custom GraphQL queries, and custom API endpoints.
api (required)
The api object contains the information necessary to request data from the commercetools GraphQL API and request user
access tokens. Values for all these options are displayed
after Creating an API Client.
Be careful about user permissions
Access tokens requested for visitors will have permissions defined in the scopes array.
You should be careful not to include scopes starting with manage_ because those allow changing
store configuration. However, scopes starting with manage_my are safe because they allow to change the user-specific
configuration, such as profile information or saved addresses.
// middleware.config.js

module.exports = {
  integrations: {
    ct: {
      location: '@vsf-enterprise/commercetools-api/server',
      configuration: {
        api: {
          uri: '',
          authHost: '',
          projectKey: '',
          clientId: '',
          clientSecret: '',
          scopes: [
            // Replace all "<PROJECT_KEY>"
            'create_anonymous_token:<PROJECT_KEY>',
            'view_categories:<PROJECT_KEY>',
            'view_published_products:<PROJECT_KEY>',
            'view_stores:<PROJECT_KEY>',
            'manage_my_profile:<PROJECT_KEY>',
            'manage_my_orders:<PROJECT_KEY>',
            'manage_my_payments:<PROJECT_KEY>',
            'manage_my_shopping_lists:<PROJECT_KEY>'
          ]
        }
      }
    }
  }
};uri- URL of the commercetools GraphQL API.authHost- URL of the commercetools authentication server. For the list of available URLs, see the Authorization page.projectKey- the name of your commercetools project.clientId- unique ID specific to the API client.clientSecret- unique secret string specific to the API client.scopes- list of user permissions. For the list of available scopes and their descriptions, see the Scopes page.
Scopes update After changing the configuration of scopes in commercetools, cookies already created for users will still include the old scope.
serverApi (required)
The serverApi object contains the information necessary to request data from the commercetools GraphQL API with
elevated permissions that users should not have.
Some operations that require such permissions are:
- resetting user password, which requires the
manage_customersscope, - adding product reviews, which requires the
manage_productsscope.
To avoid duplicating the configuration, the uri, authHost, and projectKey properties from the api
object are used to request access tokens. These access tokens are only stored on the server and not sent to the user.
Values for all these options are displayed after Creating an API Client.
// middleware.config.js

module.exports = {
  integrations: {
    ct: {
      location: '@vsf-enterprise/commercetools-api/server',
      configuration: {
        serverApi: {
          clientId: '',
          clientSecret: '',
          scopes: [
            // Replace all "<PROJECT_KEY>"
            'manage_customers:<PROJECT_KEY>',
            'manage_products:<PROJECT_KEY>'
          ],
          operations: []
        }
      }
    }
  }
};clientId- unique ID specific to the API client.clientSecret- unique secret string specific to the API client.scopes- list of elevated server permissions. For the list of available scopes and their descriptions, see the Scopes page.operations- list of GraphQL operations for which the server access token will be used. Here are some of the predefined operations:customerResetPassword,customerCreatePasswordResetToken,createReview,inventoryEntries,reviews.
inventoryMode (optional)
Commercetools offers a few ways of tracking the inventory, which affects product availability. Three possible values are:
TrackOnly,ReserveOnOrder,None.
To learn more, see the InventoryMode documentation.
// middleware.config.js

module.exports = {
  integrations: {
    ct: {
      location: '@vsf-enterprise/commercetools-api/server',
      configuration: {
        inventoryMode: 'TrackOnly'
      }
    }
  }
};
mergeGuestOrders (optional)
If a guest signs in/up after placing an order, commercetools automatically merges its order history with authenticated user's order history. We disabled this feature by default, as it may not always be a desired behaviour (e.g. when two people are using the same computer and don't want their orders to be mixed). The feature can be re-enabled by setting this property to true.
To learn more, see the commercetools documentation.
// middleware.config.js

module.exports = {
  integrations: {
    ct: {
      location: '@vsf-enterprise/commercetools-api/server',
      configuration: {
        mergeGuestOrders: true
      }
    }
  }
};
acceptLanguage (optional)
An array of supported locales. Values in the array should match codes of the languages configured on
the Project settings page, under the International tab in Merchant Center.
// middleware.config.js

module.exports = {
  integrations: {
    ct: {
      location: '@vsf-enterprise/commercetools-api/server',
      configuration: {
        acceptLanguage: [
          'en-US',
          'de-DE',
          'pl-PL'
        ]
      }
    }
  }
};
languageMap (optional)
An object used to map a locale to the accepted languages.
// middleware.config.js

module.exports = {
  integrations: {
    ct: {
      location: '@vsf-enterprise/commercetools-api/server',
      configuration: {
        languageMap: {
          'en-gb': ['en-gb', 'en-us'],
          'en-us': ['en-us', 'en-gb'],
        }
      }
    }
  }
};
Localization and cookies (optional)
The server loads localization settings, such as currency, locale, country, and store from cookies. To change the
name of the cookies or default values (used if cookies don't exist), use the options listed below.
// middleware.config.js

module.exports = {
  integrations: {
    ct: {
      location: '@vsf-enterprise/commercetools-api/server',
      configuration: {
        currencyCookieName: '',
        localeCookieName: '',
        countryCookieName: '',
        storeCookieName: '',
        currency: '',
        locale: '',
        country: '',
        store: ''
      }
    }
  }
};
Some cookies are set by the middleware server and are out of the theme scope, therefore we introduce the possibility to
customize its options. To override the default cookie options you must use the cookie name as a key and CookieOptions
as a configuration object. The list of cookies set by the server:
vsf-commercetools-token- token cookie
// middleware.config.js

module.exports = {
  integrations: {
    ct: {
      location: '@vsf-enterprise/commercetools-api/server',
      configuration: {
        cookie_options: { // CookieOptions
          'vsf-commercetools-token': {
            httpOnly: true,
            secure: true,
            sameSite: 'lax'
          }
        },
      }
    }
  }
};