Unified Data Layer
The Unified Data Layer is an enterprise-only feature which means you need to have Alokai Enterprise License in order to be able to use it.
The Unified Data Layer (UDL) is a new concept introduced by Alokai. This is a layer in the Alokai Middleware and Storefront that allows for unification of data from different sources. The UDL provides a standardized way to interact with data, regardless of the eCommerce platform you're using. The UDL provides a structured way to manage this data, ensuring that regardless of the platform — be it Commercetools, SAPCC, or BigCommerce — the data is consistently represented.
Prerequisites
Before we proceed, please take your time and learn more about the UDL in the Unified Data Layer section of Storefront documentation.
UDL in Alokai React Native Application
In order to help you understand Unified Data Layer better, let's add it to our Alokai React Native application. This will allow us to connect our application to different eCommerce platforms preserving the same data structure and UI components.
If you don't have any other ecommerce platform installed - no worries, you can just follow this guide to have a better understanding of how UDL works.
Installation and Configuration
In order to install Unified Data Model, we need to install @vsf-enterprise/unified-api-sapcc package. This package is a set of Unified API Extensions for SAP Commerce Cloud.
Preparations
When working with Alokai Unified Data Layer, we are following a specific project structure for Middleware. Let's implement the same structure in our Alokai React Native application.
First, let's create a new directory inside storefront-middleware called integrations:
mkdir storefront-middleware/integrationsNext, let's create a new sapcc directory inside integrations directory:
mkdir storefront-middleware/integrations/sapccInside, we will store the configuration for the SAP Commerce Cloud API. Create a new file called config.ts and add the following code:
import 'dotenv/config';
import type { MiddlewareConfig } from '@vsf-enterprise/sapcc-api';
import type { Integration } from '@vue-storefront/middleware';

const {
  SAPCC_OAUTH_URI,
  SAPCC_OAUTH_CLIENT_ID,
  SAPCC_OAUTH_CLIENT_SECRET,
  SAPCC_OAUTH_TOKEN_ENDPOINT,
  SAPCC_OAUTH_TOKEN_REVOKE_ENDPOINT,
  SAPCC_API_URI,
  NODE_ENV
} = process.env;

if (!SAPCC_OAUTH_URI)
  throw new Error('Missing env var: SAPCC_OAUTH_URI');

if (!SAPCC_OAUTH_CLIENT_ID)
  throw new Error('Missing env var: SAPCC_OAUTH_CLIENT_ID');

if (!SAPCC_OAUTH_CLIENT_SECRET)
  throw new Error('Missing env var: SAPCC_OAUTH_CLIENT_SECRET');

if (!SAPCC_OAUTH_TOKEN_ENDPOINT)
  throw new Error('Missing env var: SAPCC_OAUTH_TOKEN_ENDPOINT');

if (!SAPCC_OAUTH_TOKEN_REVOKE_ENDPOINT)
  throw new Error('Missing env var: SAPCC_OAUTH_TOKEN_REVOKE_ENDPOINT');

if (!SAPCC_API_URI)
  throw new Error('Missing env var: SAPCC_API_URI');

export const config = {
  location: '@vsf-enterprise/sapcc-api/server',

  configuration: {
    OAuth: {
      uri: SAPCC_OAUTH_URI,
      clientId: SAPCC_OAUTH_CLIENT_ID,
      clientSecret: SAPCC_OAUTH_CLIENT_SECRET,
      tokenEndpoint: SAPCC_OAUTH_TOKEN_ENDPOINT,
      tokenRevokeEndpoint: SAPCC_OAUTH_TOKEN_REVOKE_ENDPOINT,

      cookieOptions: {
        'vsf-sap-token': {
          secure: NODE_ENV !== 'development'
        }
      }
    },

    api: {
      uri: SAPCC_API_URI,
      baseSiteId: 'apparel-uk',
      catalogId: 'apparelProductCatalog',
      catalogVersion: 'Online',
      defaultLanguage: 'en',
      defaultCurrency: 'USD'
    }
  },
} satisfies Integration<MiddlewareConfig>;
This file exports a config object that contains the configuration for the SAP Commerce Cloud API. It is used to configure Middleware to work with the SAP Commerce Cloud API.
Next, let's modify out middleware.config.ts file to include the SAP Commerce Cloud API configuration. Replace the content of the middleware.config.ts file with the following code:
import { config as commerceConfig } from "./integrations/sapcc/config";

export const config = {
  integrations: {
    commerce: commerceConfig,
  },
};
You can see that we have renamed the sapcc object to commerce object. This is because we are going to use the Unified Data Layer, which is a generic layer that can be used with different eCommerce platforms.
Now, let's install and configure the Unified Data Layer in our Alokai React Native application. Inside the storefront-middleware directory, install the @vsf-enterprise/unified-api-sapcc package:
yarn add @vsf-enterprise/unified-api-sapccCreate a new directory inside storefront-middleware/integrations/sapcc called extensions and add a new file called unified.ts:
import { createUnifiedExtension } from "@vsf-enterprise/unified-api-sapcc";

const { SAPCC_MEDIA_HOST } = process.env;

export const unifiedApiExtension = createUnifiedExtension({
  normalizers: {
    addCustomFields: [{}],
  },
  config: {
    transformImageUrl: (url) => {
      if (SAPCC_MEDIA_HOST) {
        return new URL(url, SAPCC_MEDIA_HOST).toString();
      }

      const [imagePathWithoutParams, searchParams = ""] = url.split("?");
      const segmentsParameter = imagePathWithoutParams.split("/").filter(Boolean);
      const sapContextSearchParameter = new URLSearchParams(searchParams).get("context");

      return `sap/${segmentsParameter}/context/${sapContextSearchParameter}`;
    },
    currencies: ["USD", "EUR", "GBP"],
    defaultCurrency: "USD",
    getFacetType: (facet) => {
      if (facet.name === "Colour" || facet.name === "Farbe") {
        return "COLOR";
      }
      if (facet.name === "Size" || facet.name === "Größe") {
        return "SIZE";
      }
      if (facet.name === "Category" || facet.name === "Kategorie") {
        return "CATEGORY";
      }
      return facet.multiSelect ? "MULTI_SELECT" : "SINGLE_SELECT";
    },
  },
});
This file exports the unifiedApiExtension object, which is used to configure the Unified Data Layer. The unifiedApiExtension object is the result of calling createUnifiedExtension function with normalizers and config as arguments.
Instead of doing the image URL transformation in the React Native application, we are doing it in the Middleware.
Next, let's add the unifiedApiExtension to the extensions array in the sapcc/config.ts file:
+import type { ApiClientExtension, Integration } from '@vue-storefront/middleware';
+import { unifiedApiExtension } from './extensions/unified';

// ... rest of the code

export const config = {
  location: '@vsf-enterprise/sapcc-api/server',

  configuration: {
    // ... rest of the configuration
  },
+  extensions: (extensions: ApiClientExtension[]) => [
+    ...extensions,
+    unifiedApiExtension
+  ]
} satisfies Integration<MiddlewareConfig>;
Last, let's replace the src/index.ts with the following code:
import { type CreateServerOptions, createServer } from "@vue-storefront/middleware";
import { config } from "../middleware.config";

const developmentCorsConfig: CreateServerOptions["cors"] = {
  origin: true,
  credentials: true,
};
const port = Number(process.env.API_PORT) || 4000;

runApp();

async function runApp() {
  const app = await createServer(config, {
    cors: process.env.NODE_ENV === "development" ? developmentCorsConfig : undefined,
  });

  app.listen(port, "", () => {
    console.log(`API server listening on port ${port}`);

    if (process.env.IS_MULTISTORE_ENABLED === "false") {
      console.log("Multistore is not enabled");
      return;
    }
  });
}
Essentially, it does the same thing as the previous version of the file, but it uses the config object from the middleware.config.ts file. This way, we can easily update the configuration without having to modify the entire file.
Configuring Alokai SDK
Since storefront-middleware and storefront-react-native are basically two independent applications, we need to install the @vsf-enterprise/unified-api-sapcc package in the storefront-react-native application as well.
yarn add @vsf-enterprise/unified-api-sapccThen, let's configure the Alokai SDK to work with the Unified Data Layer. Open storefront-react-native/sdk/sdk.config.ts file and replace the sapcc module with the unified module:
import { initSDK, buildModule, middlewareModule } from "@vue-storefront/sdk";
-import { Endpoints as SapccEndpoints } from "@vsf-enterprise/sapcc-api";
+import { Endpoints as UnifiedEndpoints } from "@vsf-enterprise/unified-api-sapcc";

const sdkConfig = {
-  sapcc: buildModule(middlewareModule<SapccEndpoints>, {
+  commerce: buildModule(middlewareModule<UnifiedEndpoints>, {
-    apiUrl: "http://localhost:8181/sapcc",
+    apiUrl: "http://localhost:4000/commerce",
    cdnCacheBustingId: "",
  }),
};

export const sdk = initSDK(sdkConfig);
This code imports the UnifiedEndpoints type from the @vsf-enterprise/unified-api-sapcc package and uses it to create the unified module in the SDK configuration. The unified module uses the middlewareModule method to create a module based on the UnifiedEndpoints type.
The missing pieces
We have successfully installed and configured Unified Data Layer in our Alokai React Native application. However, we are still missing the Unified Data Model types. Storefront with Unified Data Model is made to have SDK methods to automatically generate type safe methods based on Unified apiMethods object. In order to achieve this, we need to create types for the Unified Data Model.
Create a new file inside sdk directory called types.ts and add the following code:
import { Endpoints as UnifiedEndpoints } from "@vsf-enterprise/unified-api-sapcc";

export type InferSdk<TName extends keyof UnifiedEndpoints> = Awaited<ReturnType<UnifiedEndpoints[TName]>>;

export type InferSdkArgs<TName extends keyof UnifiedEndpoints> = Parameters<UnifiedEndpoints[TName]>[0];
This file exports a generic type InferSdk that takes a method name as an argument and returns the return type of that method. It also exports a generic type InferSdkArgs that takes a method name as an argument and returns the argument type of that method.
Next, let's create product types for the Unified Data Model. Create a new directory in the root of the storefront-react-native project called types and add a new file called product.ts:
import { InferSdk } from '../sdk/types';

export type SfProductCatalogItem = InferSdk<'searchProducts'>['products'][number];
export type SfProduct = InferSdk<'getProductDetails'>['product'];
For now, we have created two types: SfProductCatalogItem and SfProduct. These types are used to represent the product data from the Unified Data Model. The SfProductCatalogItem type represents the product data from the searchProducts method, while the SfProduct type represents the product data from the getProductDetails method.
Using Unified Data Layer in React Native Application
Unified Data Layer brings a lot of benefits to the Alokai React Native application. It allows us to use the same data structure and UI components across different eCommerce platforms. In order to use it though, your UI has to conform Unified Data Model structure.
Let's replace the types across the application with the Unified Data Model types. For example, in the ProductDetails component, we can replace the Product type with the SfProduct type from the Unified Data Model:
- import { Product } from '@vsf-enterprise/sap-commerce-webservices-sdk';
+import { SfProduct } from "@/types/product";
This change will allow us to use the same ProductDetails component across different eCommerce platforms.
But, it also breaks the application. Let's go and fix the errors.
Ideally, the UDL allows us to infer types when we are making any changes to the unified API methods or create custom methods. In cases like this, where Middleware and React Native are two separate applications, it's recommended to create a shared package that contains the types and share it between the two applications.
Fixing types across the application
First, we need to change how we are fetching data. Since we replaced sapcc module with commerce module, we need to change the method names across the application. For example, in the Product Details/[product_code]/index.tsx file, we need to replace the getProduct method with the getProductDetails method from the unified module:
- const data = await sdk.sapcc.getProduct({ id: product_code as string });
- setProduct(data);

+ const { product } = await sdk.commerce.getProductDetails({ id: product_code as string });
+ setProduct(product);
You will see that the product.images property is now missing. This is because we are using the SfProduct type from the Unified Data Model, which doesn't have the images property. Instead, we need to use product.gallery property from the Unified Data Model. Let's replace the product.images property with the product.gallery property:
- const galleryImages = product?.images?.filter((image) => image.imageType === "GALLERY" && image.format === "product").map((image) => transformImageUrl(image.url as string)) as [] | string[];

// ... rest of the code

<Carousel
  // ...rest of the code
-  data={galleryImages}
+  data={product.gallery}
  renderItem={({ item }) => (
    <Image
-     source={{ uri: item }}
+     source={{ uri: item.url }}
      style={{ width: width * 0.95, height: width * 0.8 }}
    />
  )}
/>
Use the approach we learned above to fix the types in the rest of the application.
Below you can find the final version of the ProductDetails component:
import { Text, View } from "@/components/Themed";
import useCart from "@/hooks/useCart";
import { sdk } from "@/sdk/sdk.config";
import { SfProduct } from "@/types/product";
import { FontAwesome } from "@expo/vector-icons";
import { useLocalSearchParams } from "expo-router"
import { useEffect, useState } from "react";
import { Alert, Dimensions, Image, Pressable, ScrollView, StyleSheet } from "react-native";
import Carousel from "react-native-reanimated-carousel";
export default function ProductScreen() {
const { product_code } = useLocalSearchParams();
const [product, setProduct] = useState<SfProduct | null>(null);
const [loading, setLoading] = useState(false);
const width = Dimensions.get("window").width;
const { addToCart } = useCart();
useEffect(() => {
async function fetchProduct() {
const { product } = await sdk.commerce.getProductDetails({ id: product_code as string });
setProduct(product);
}
fetchProduct();
}, []);
if (!product) {
return <Text>Loading...</Text>;
}
const addToCartFunction = async () => {
setLoading(true);
await addToCart(product);
setLoading(false);
Alert.alert("Product added to cart");
}
return (
<ScrollView style={styles.page}>
<View style={{
...styles.container,
backgroundColor: loading ? '#e5e5e5' : '#fff',
}}>
<View>
<Carousel
loop
pagingEnabled
snapEnabled
style={styles.imageContainer}
width={width * 0.95}
height={width * 0.8}
data={product.gallery}
renderItem={({ item }) => (
<Image
source={{ uri: item.url }}
style={{ width: width * 0.95, height: width * 0.8 }}
/>
)}
/>
</View>
<View style={styles.textContainer}>
<Text style={styles.textBold}>{product.name}</Text>
<Text style={styles.textBold}>{product.price?.value.amount}</Text>
</View>
<View style={styles.summaryContainer}>
<Text style={styles.summaryText}>{product?.description}</Text>
</View>
<Pressable style={{
...styles.addToCartButton,
backgroundColor: loading ? '#a5a5a5' : '#0d7f3f',
}} onPress={addToCartFunction}>
{loading ? <FontAwesome name="spinner" size={24} color="#fff" /> : <FontAwesome name="cart-plus" size={24} color="#fff" />}
<Text style={styles.addToCartButtonText}>{loading ? 'Adding to cart...' : 'Add to cart'}</Text>
</Pressable>
</View>
</ScrollView>
)
}
const styles = StyleSheet.create({
page: {
backgroundColor: "#fff",
flex: 1,
padding: 20,
},
container: {
flex: 1,
},
imageContainer: {
flex: 1,
justifyContent: "center",
alignItems: "center",
},
textContainer: {
flex: 1,
flexDirection: "column",
gap: 10,
marginTop: 20,
},
textBold: {
fontWeight: "bold",
fontSize: 18,
},
summaryContainer: {
marginTop: 16,
},
summaryText: {
fontSize: 16,
lineHeight: 20,
color: "#666",
},
addToCartButton: {
marginTop: 16,
display: 'flex',
flexDirection: 'row',
alignItems: 'center',
justifyContent: 'center',
gap: 8,
backgroundColor: '#0d7f3f',
padding: 12,
borderRadius: 12,
},
addToCartButtonText: {
color: '#fff',
fontSize: 18,
fontWeight: 'bold',
textAlign: 'center',
},
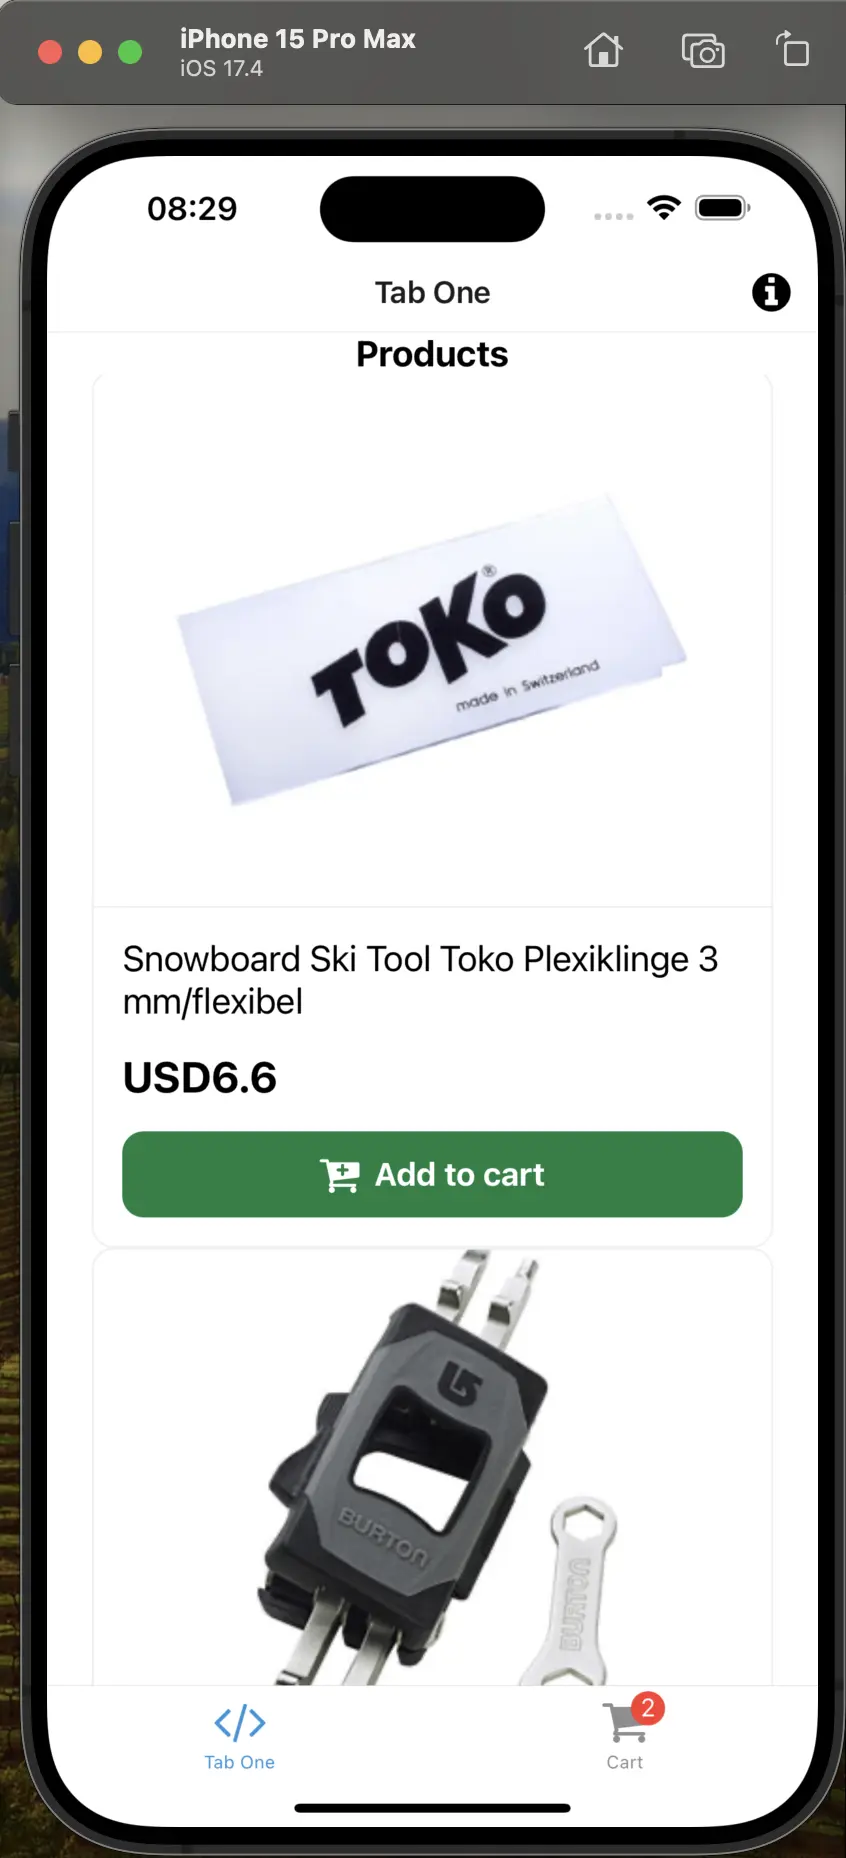
})We have applied the fixes across the application and now, let's run the app and see the results.
Everything seems to run fine, but our images are not working anymore. If you take a look at storefront-middleware/integrations/sapcc/extensions/unified.ts file, you will see that we are transforming the image URL, but we are missing the SAPCC_MEDIA_HOST environment variable. Let's add it to the .env file:
SAPCC_MEDIA_HOST=This will be the base URL for the images, almost identical to SAPCC_API_URI but without occ/v2/ part. Restart the middleware and storefront applications and you should see the images.
Conclusion
In this guide, we have learned how to add Unified Data Layer to our Alokai React Native application. We have successfully installed and configured Unified Data Layer in our Alokai Middleware and SDK. We have replaced the types across the application with the Unified Data Model types, and as well, we have fixed the errors across the application. We have learned how to use the same data structure and UI components across different eCommerce platforms.
As usual, you can find the final version of the application in the udl branch of the React Native Guide repository.