Storyblok
Storyblok is a powerful dynamic content management system that allows developers to manage, deliver, and optimize content for various digital experiences.
Read more
Check the Content Management System Overview to learn more about the features of the Storyblok module.
Bootstrapping Storyblok with Alokai Storefront
To use the Storyblok integration in your Storefront, perform the following steps:
Install the module
From the root of your Storefront project, run the following command:
npx @vsf-enterprise/storefront-cli add-module cms-storyblokFollow the instructions in the command line to complete the installation. The command will:
- copy Alokai Storyblok schemas to the Middleware directory,
- install Alokai Storyblok API Client
@vsf-enterprise/storyblok-apiin the Middleware, - install Alokai Storyblok SDK module
@vsf-enterprise/storyblok-sdkin the Storefront, - set up example environment variables.
You can find the changelogs for the installed packages here:
Update variables (optional)
By default, the module installation will connect your Storefront to our demo Storyblok space. To connect it to a different hub, update both .env.example and .env files in the Middleware directory.
- STORYBLOK_ACCESS_TOKEN=<alokai-storyblok-access-token>
+ STORYBLOK_ACCESS_TOKEN=<your-storyblok-access-token>
STORYBLOK_PREVIEW_MODE=true
Read the Storyblok docs to find out where to get your Access Token.
Make sure you have bootstrapped your Storyblok space before connecting it to your Storefront.
Bootstrapping Storyblok
Before you start using our Storyblok integration with your Storyblok space, you need to import Alokai schemas into your space. They are aligned with our out-of-the-box frontend components.
Prerequisites
Before you start, make sure you have an empty Storyblok space with:
- two locales (en and de) added in the settings.
Verify your space is empty
When you create a new Storyblok space, some default content blocks and an example story are added automatically. These must be removed before importing Alokai schemas to avoid conflicts with existing content types. To clean up a new space:
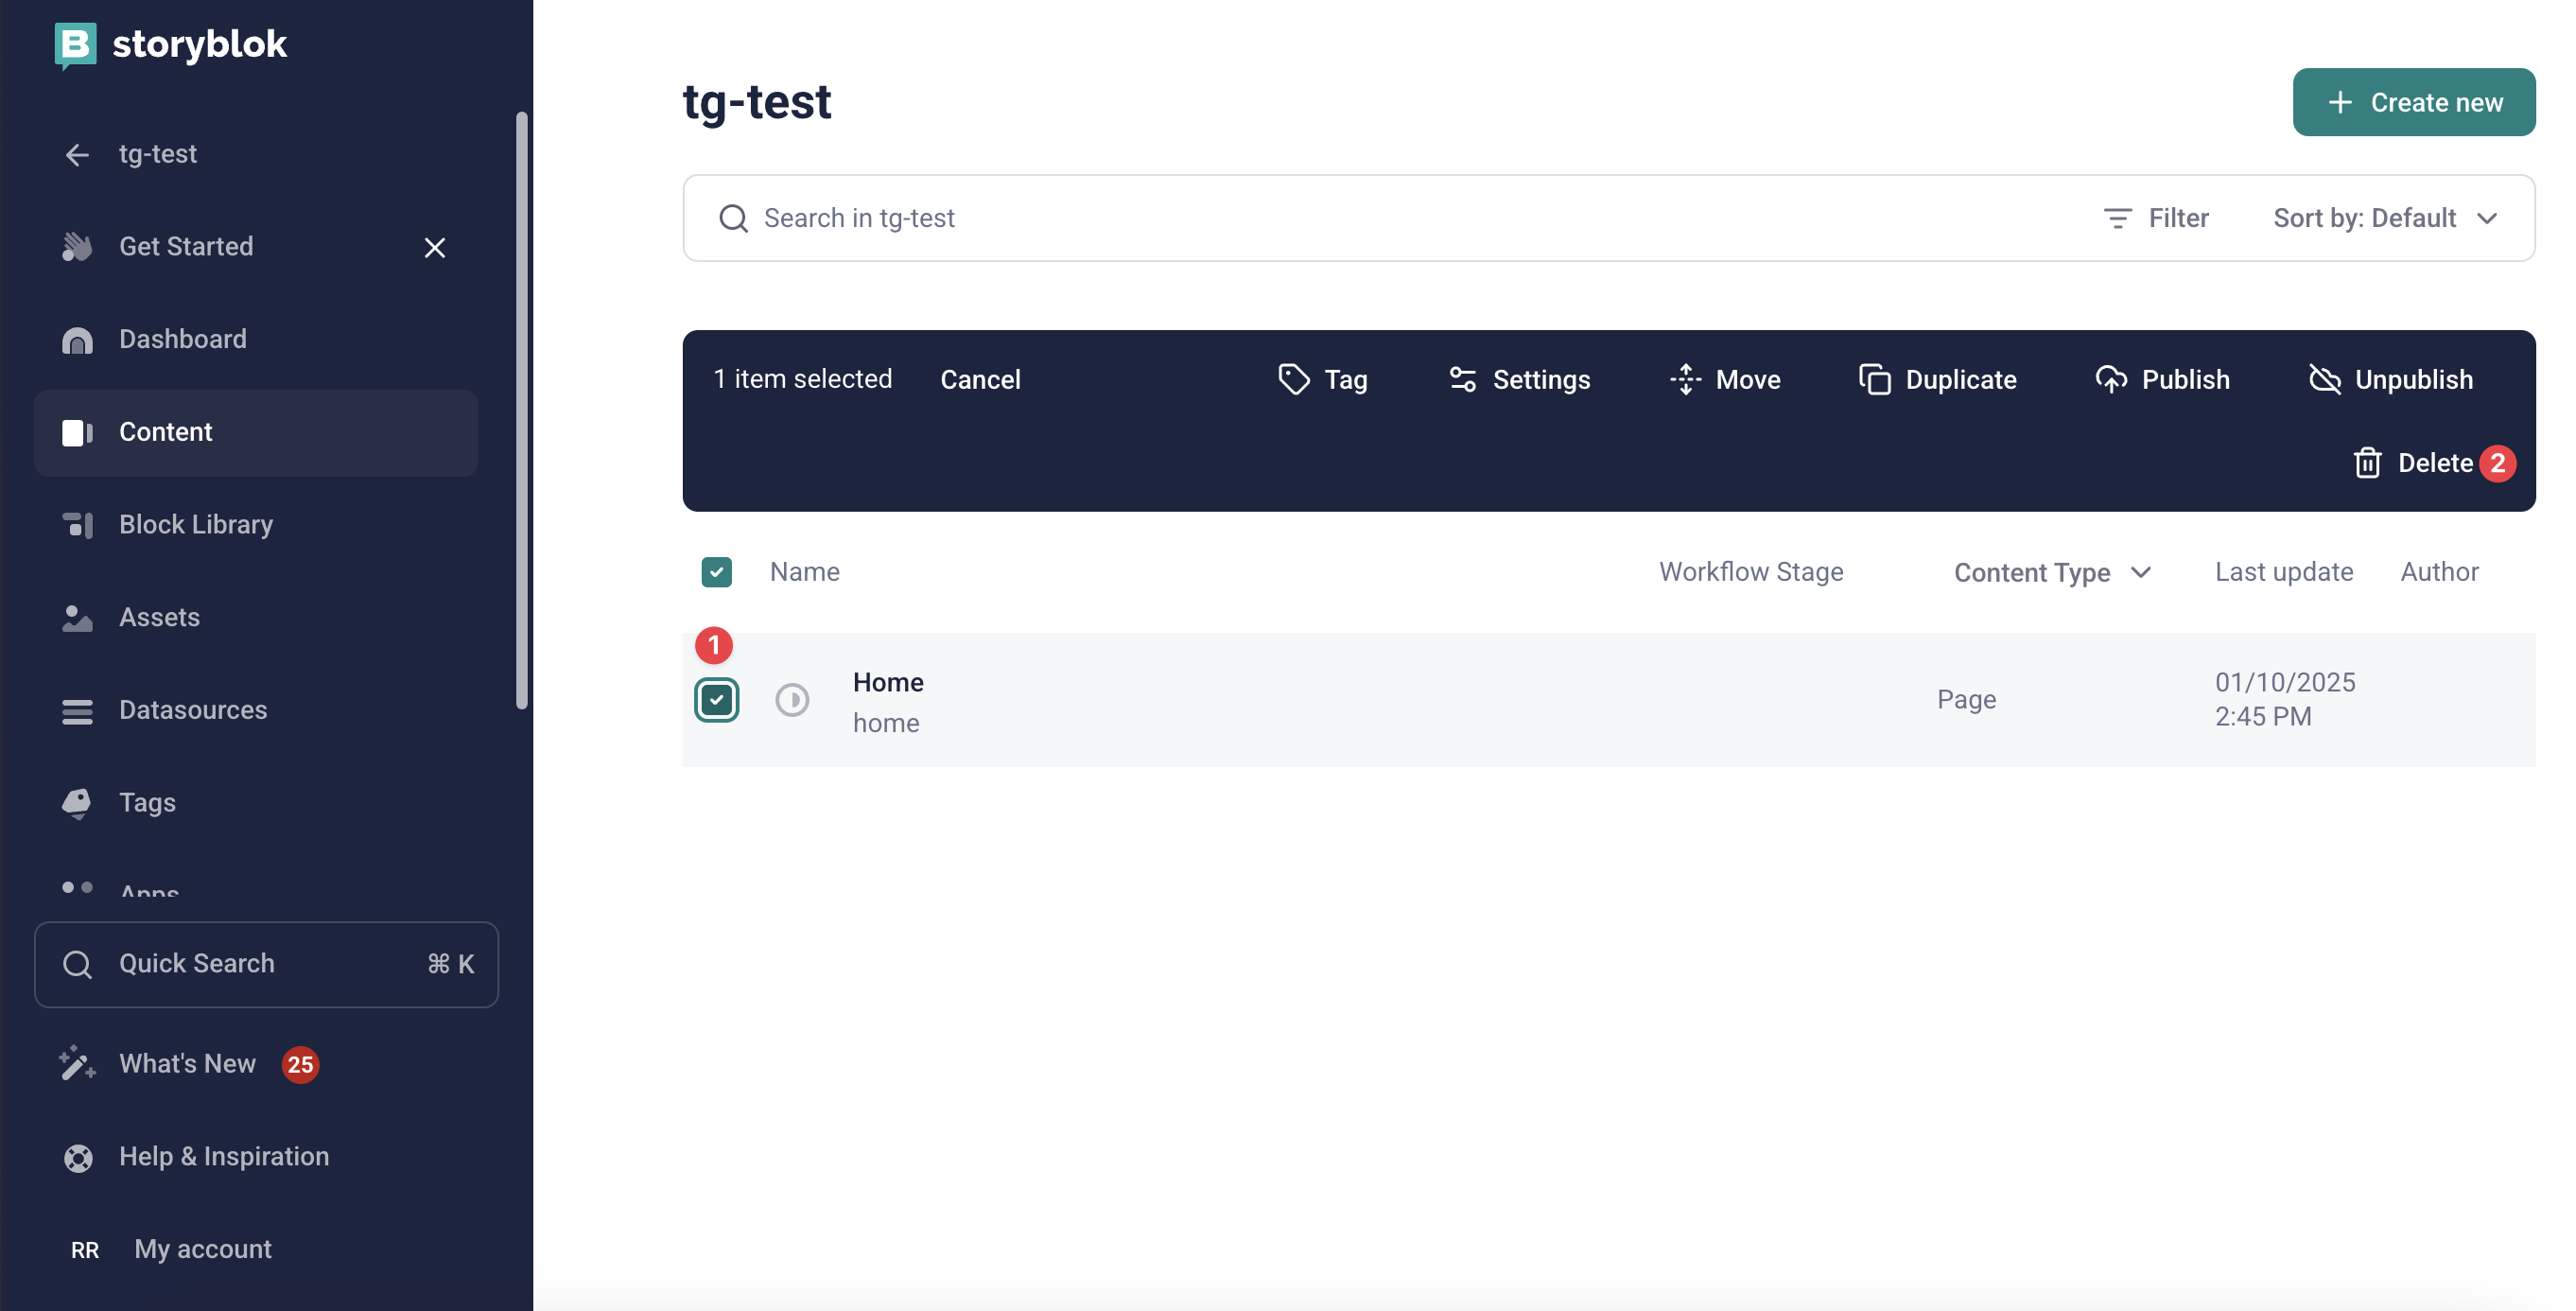
Delete default content
Go to the Content page in your Storyblok space and remove all existing content.
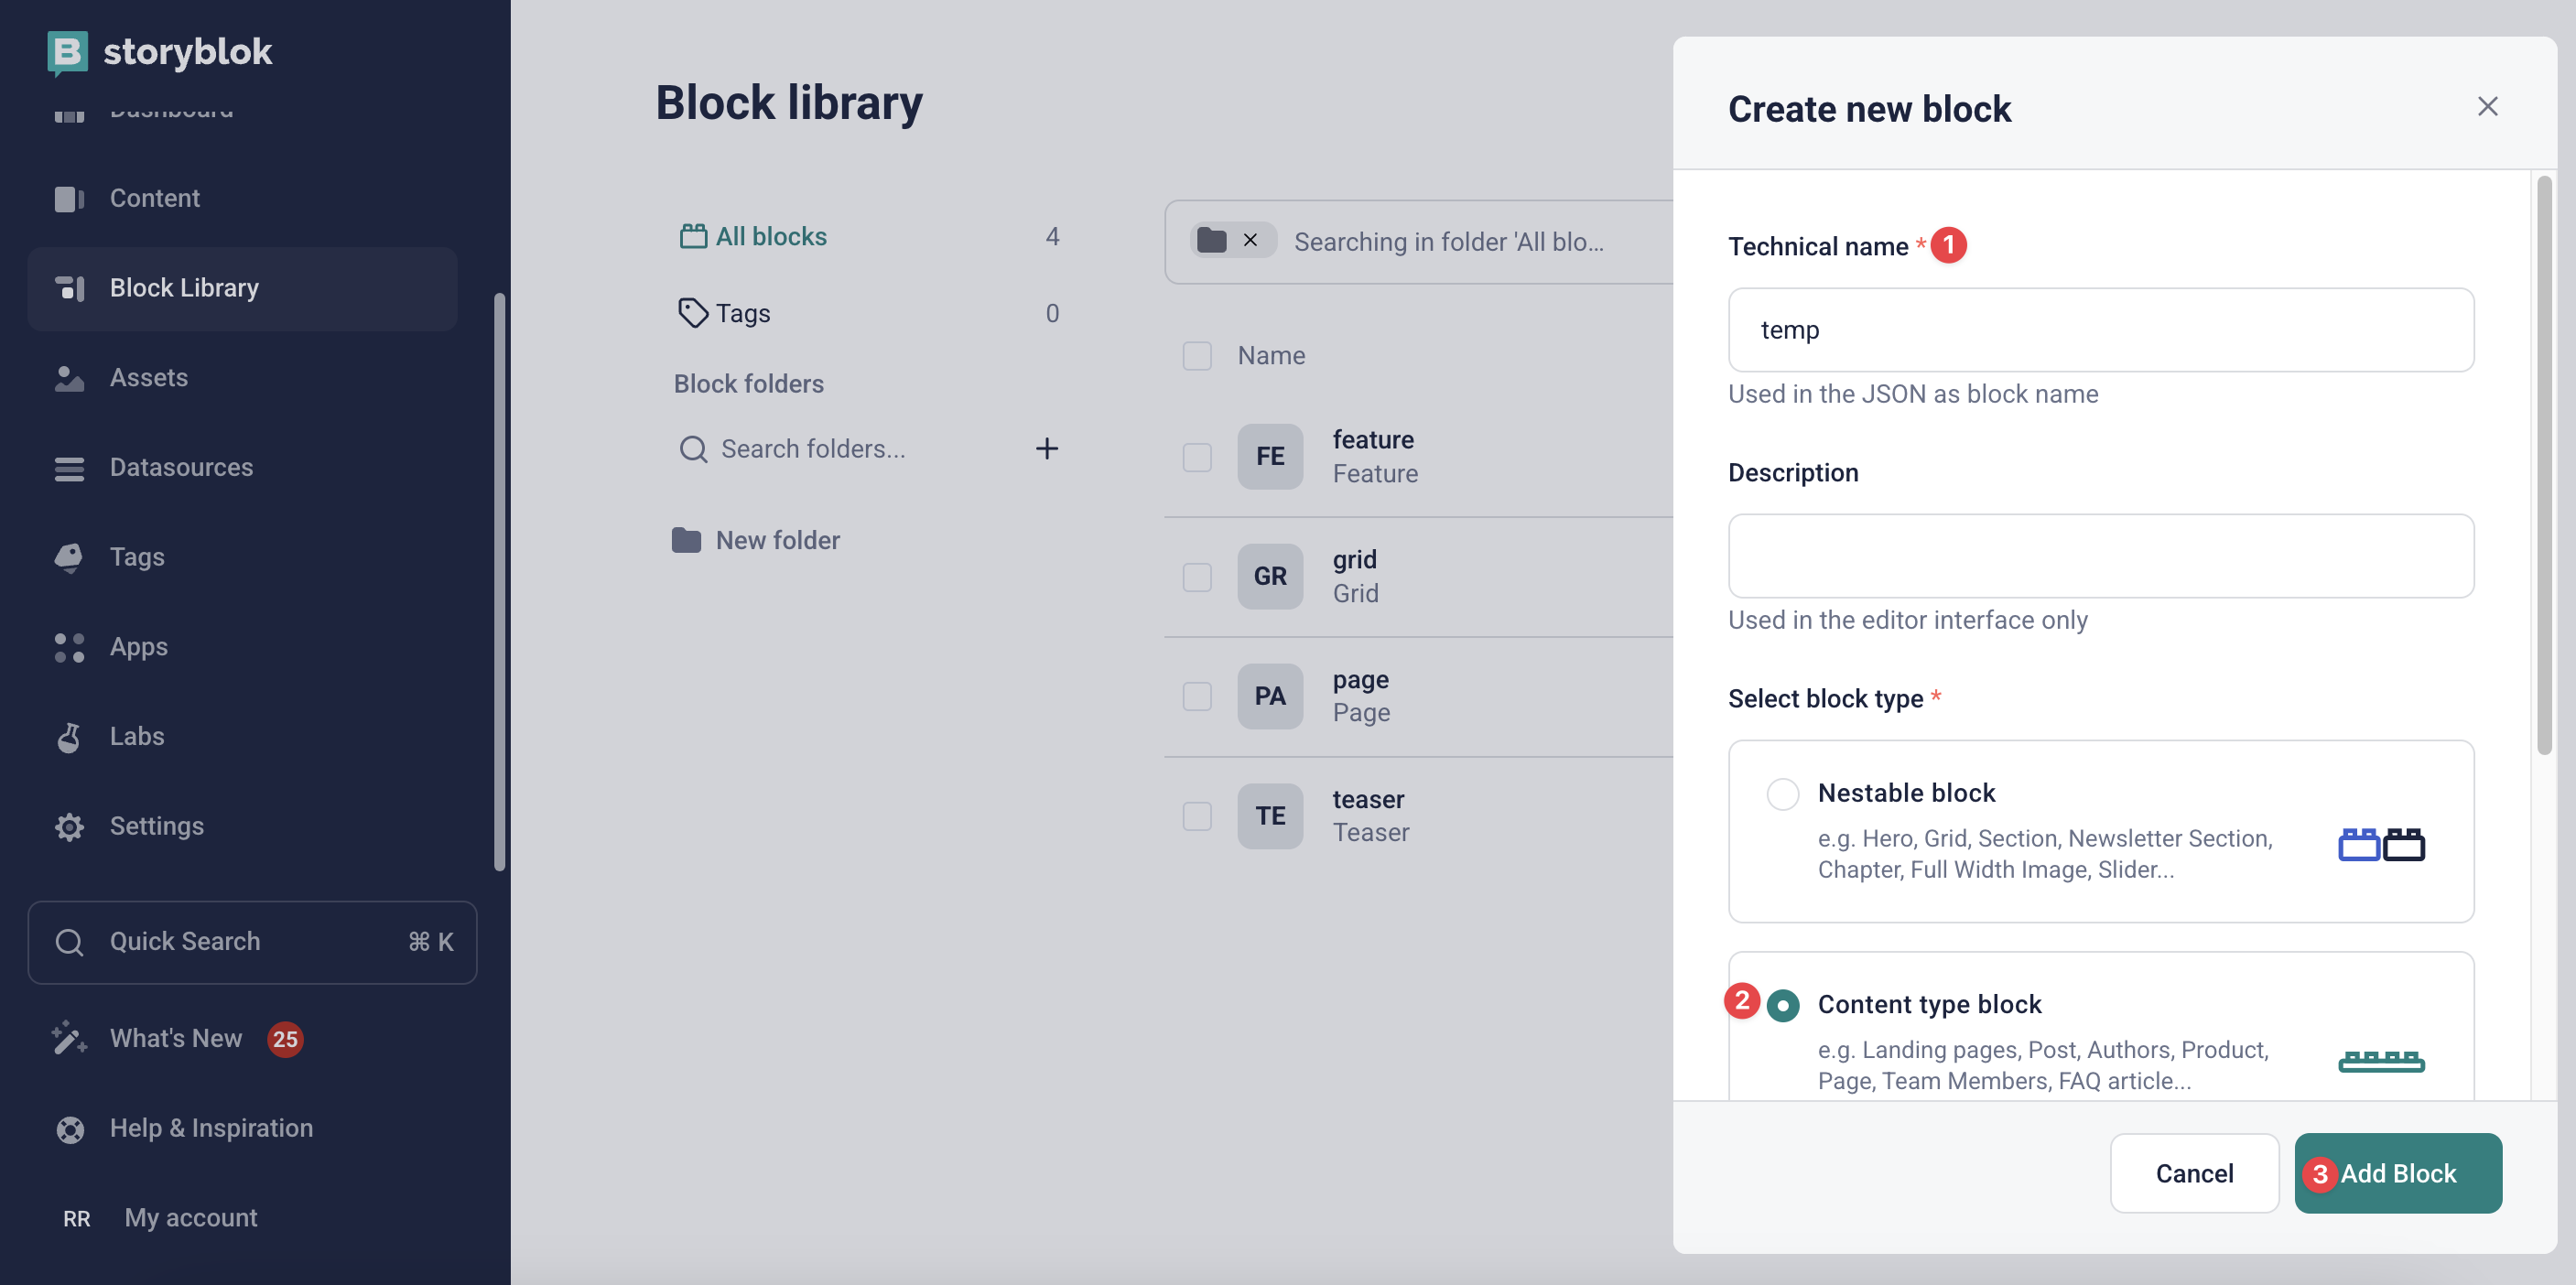
Create a temporary content type
Navigate to the Blocks Library and create a new content type. This will serve as a temporary default content type, which you can delete later.
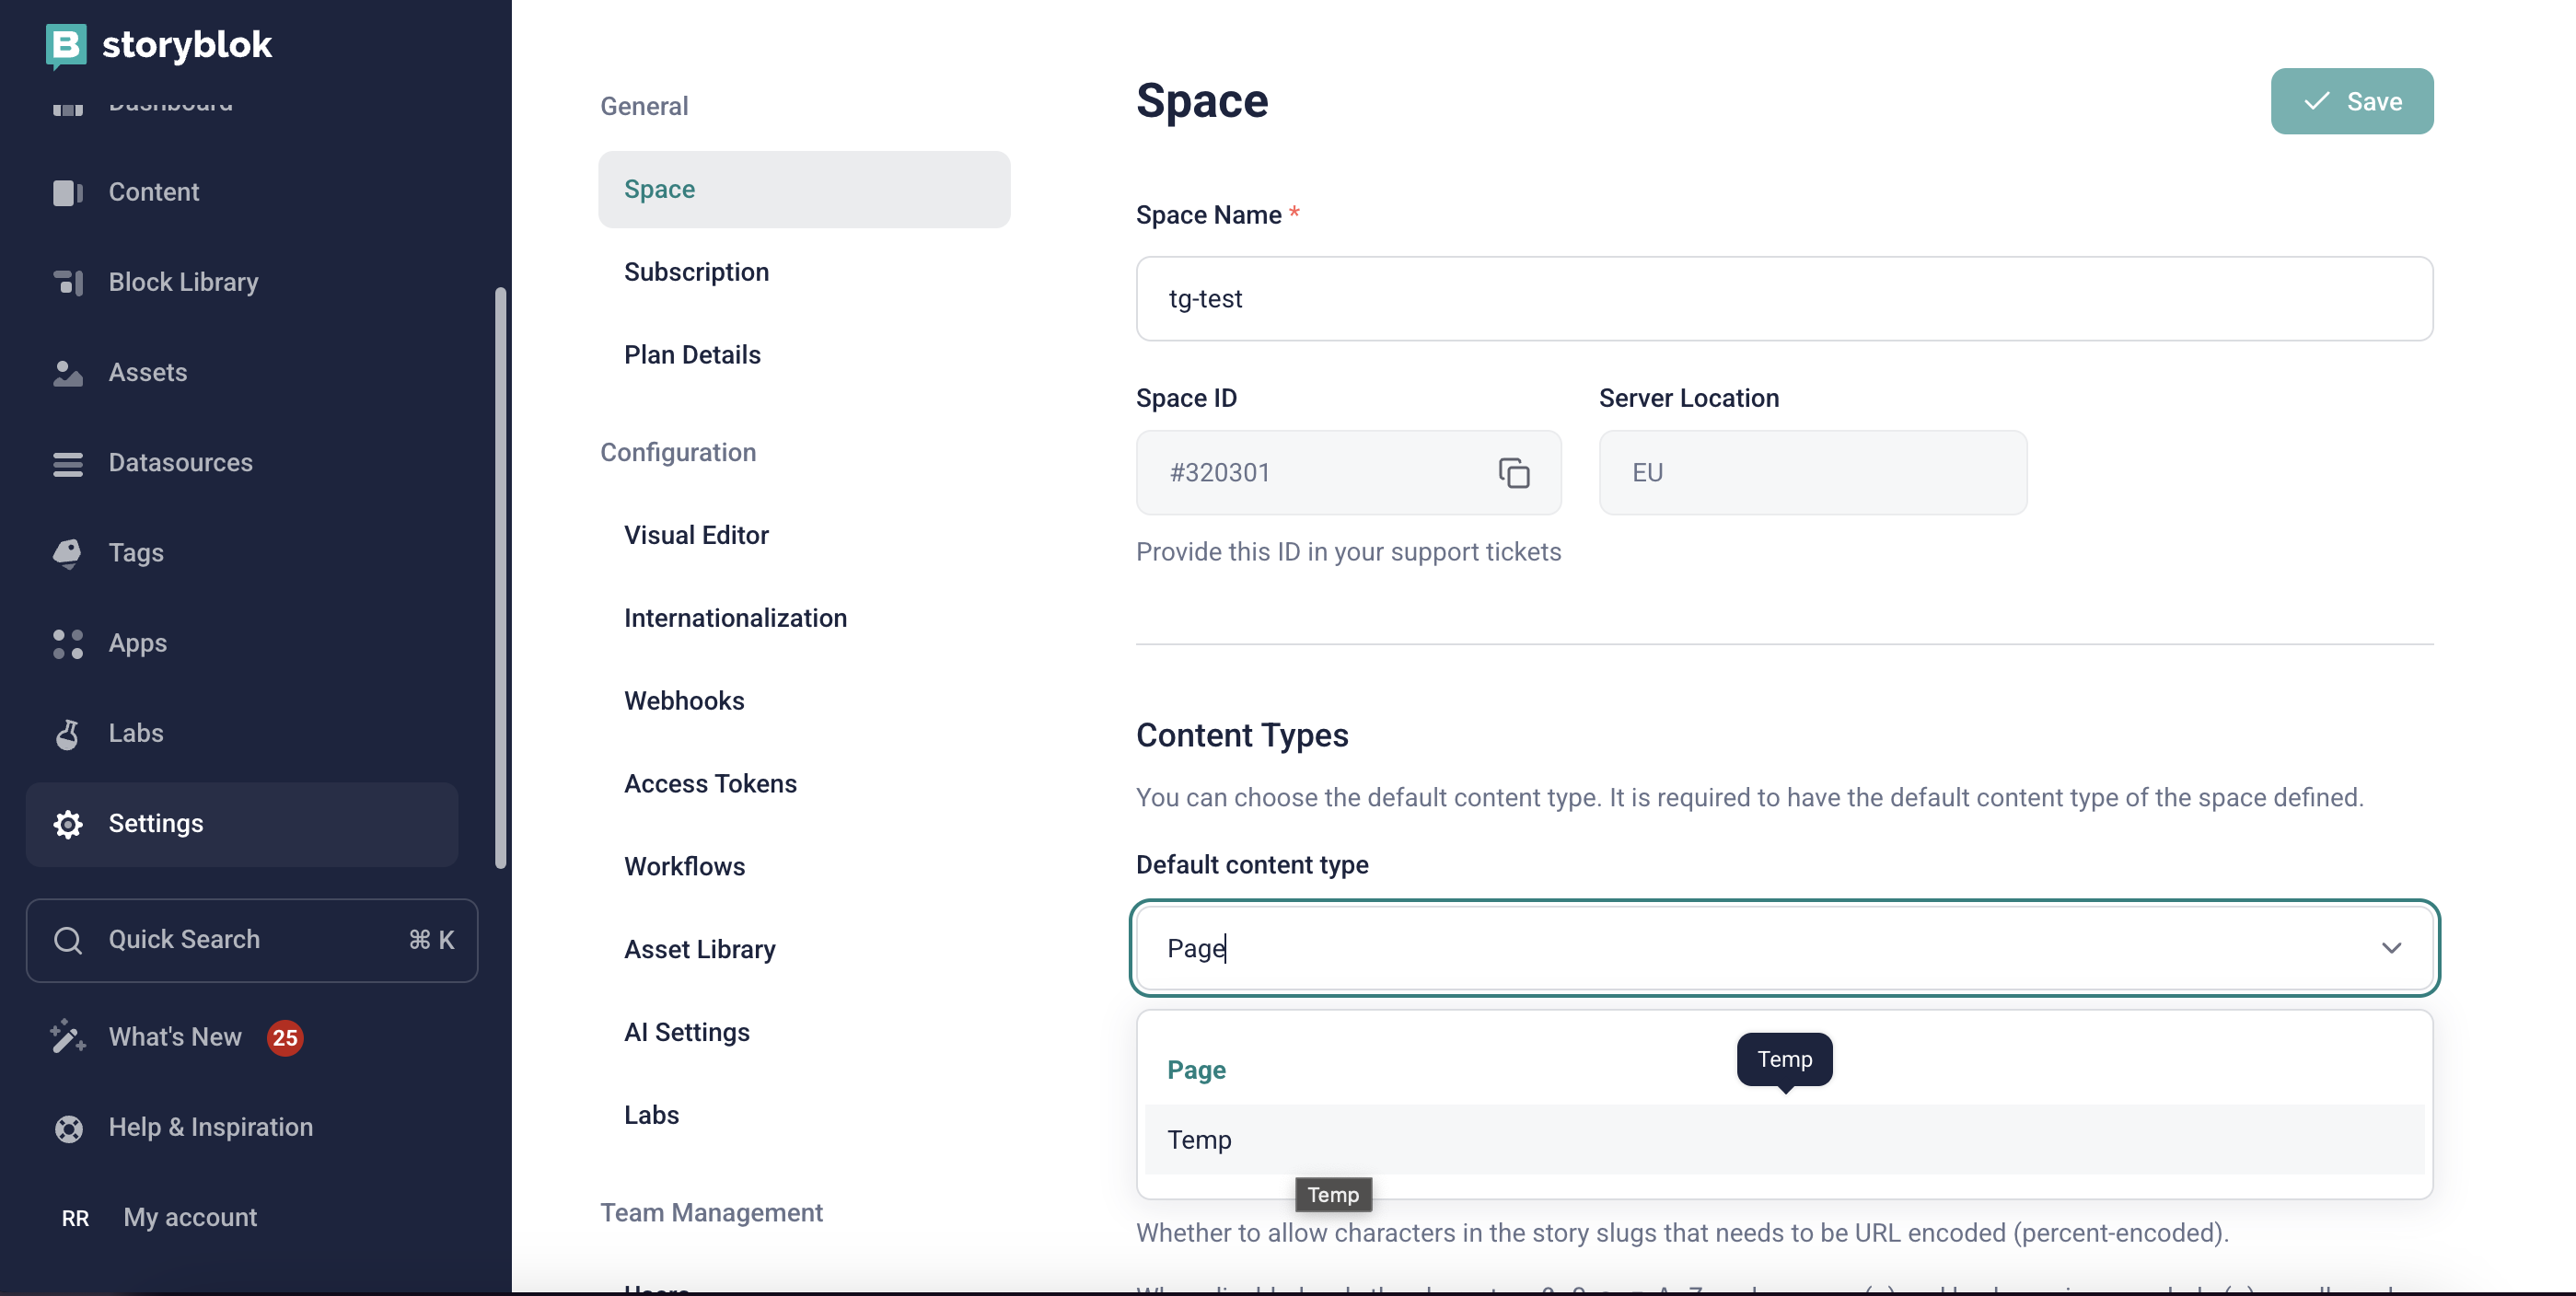
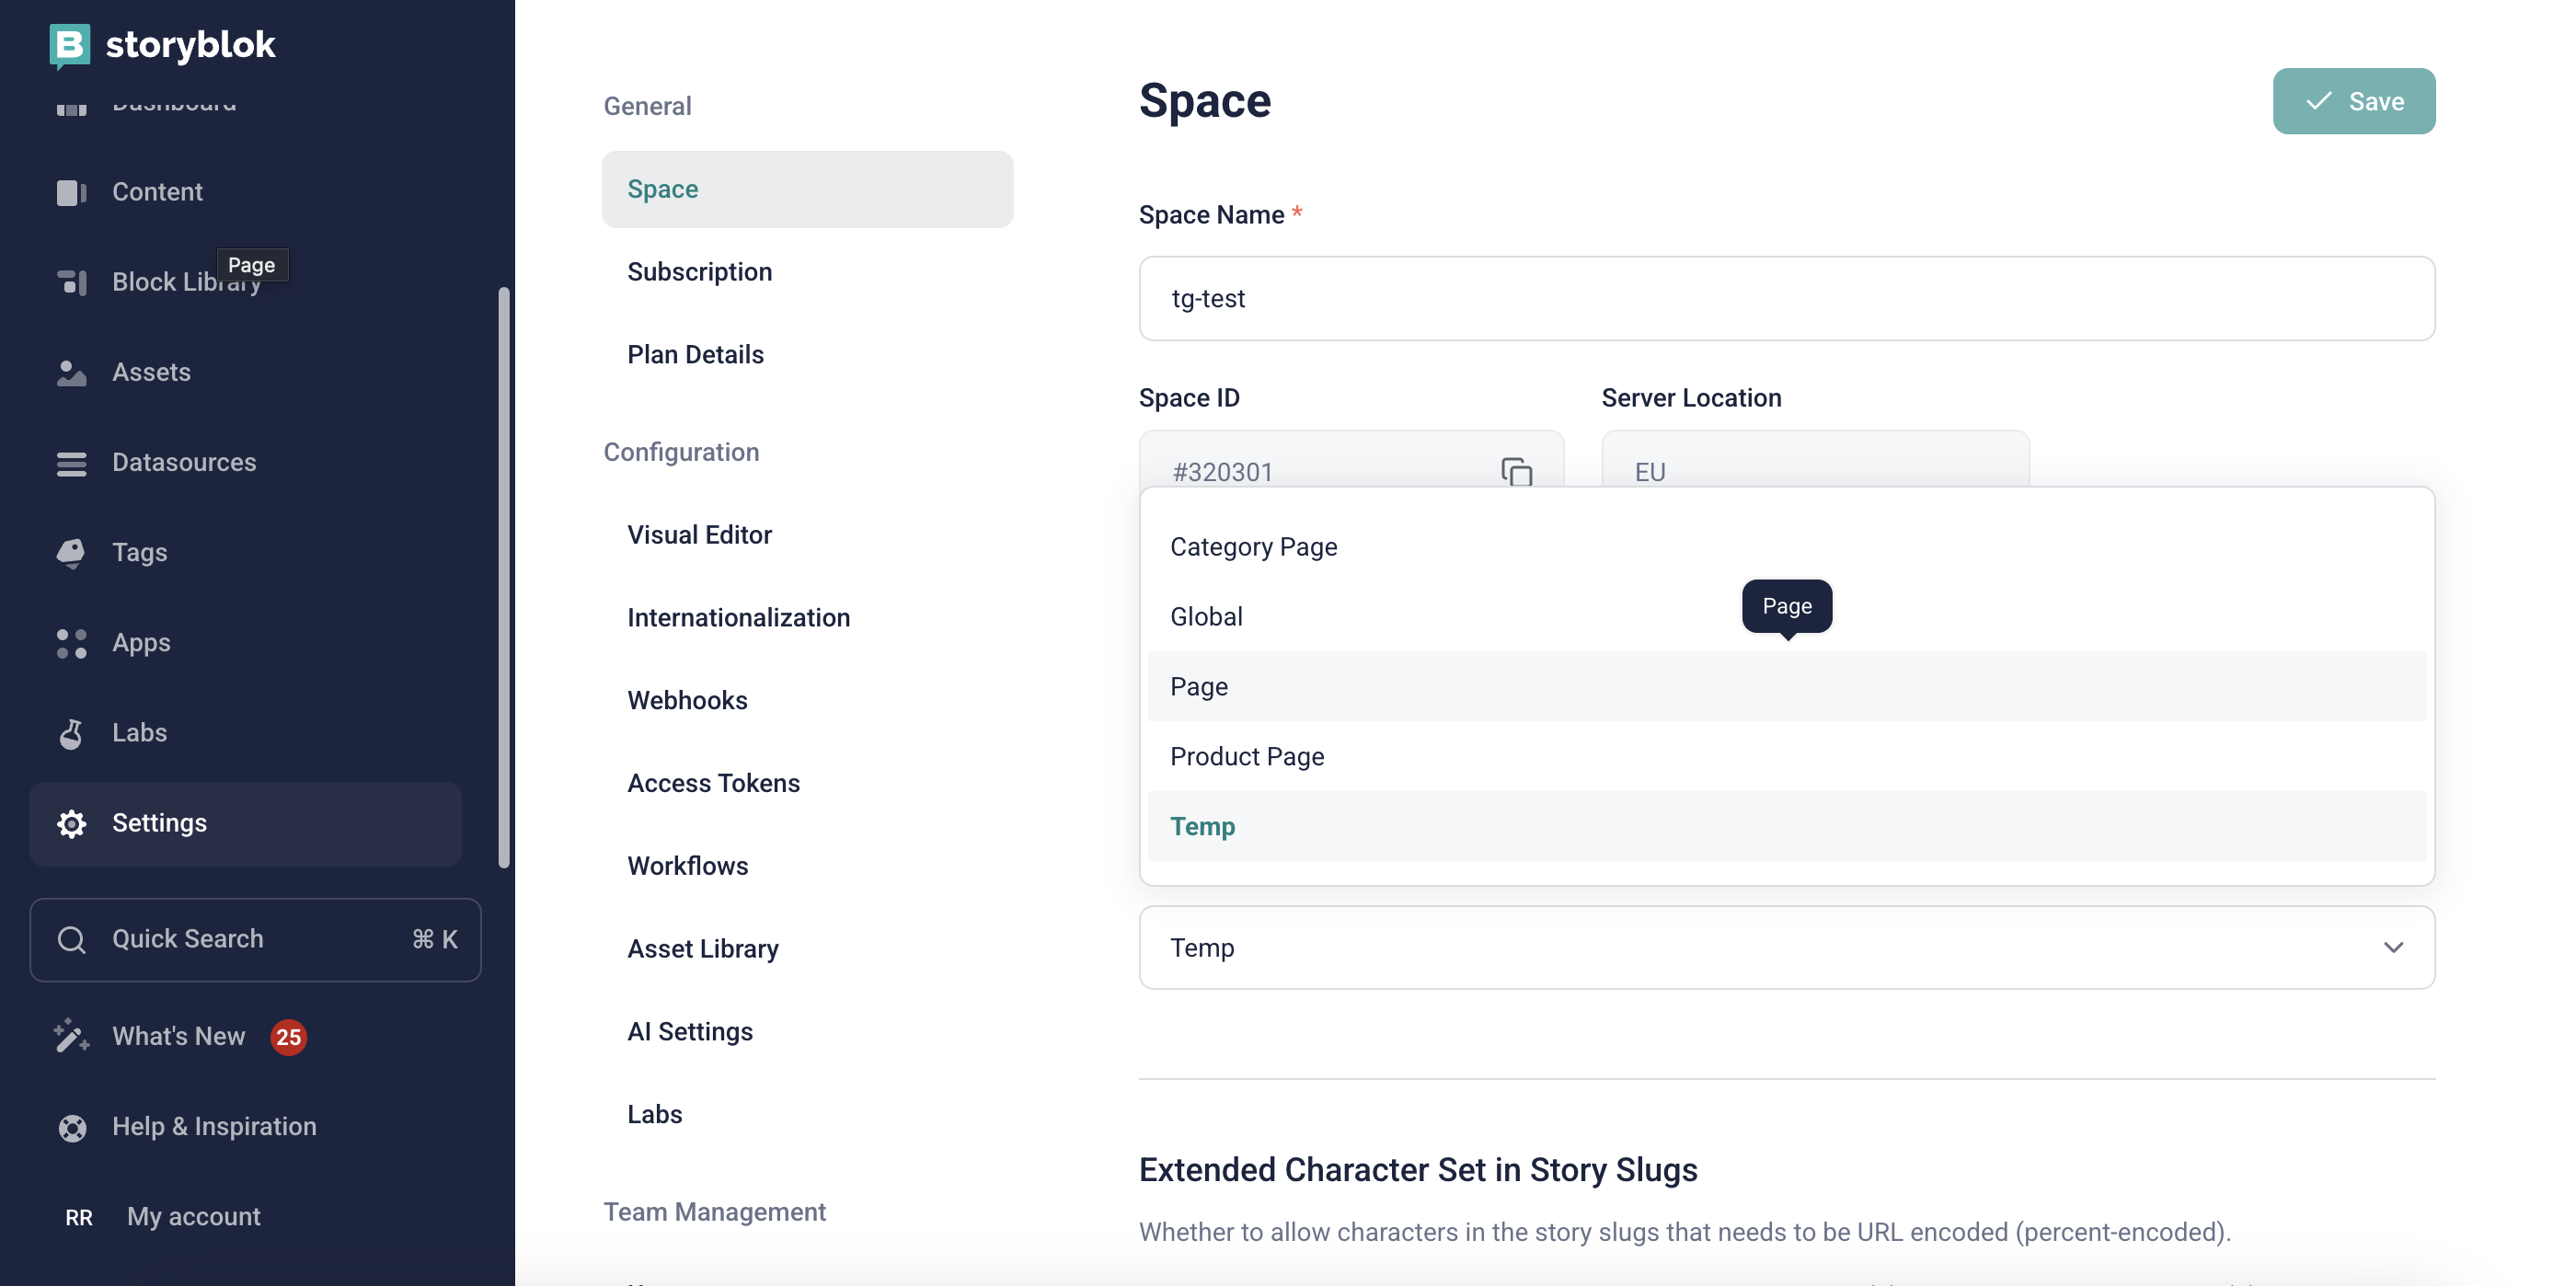
Set the temporary content type as default
Go to the Settings page and change the default content type to the one you just created.
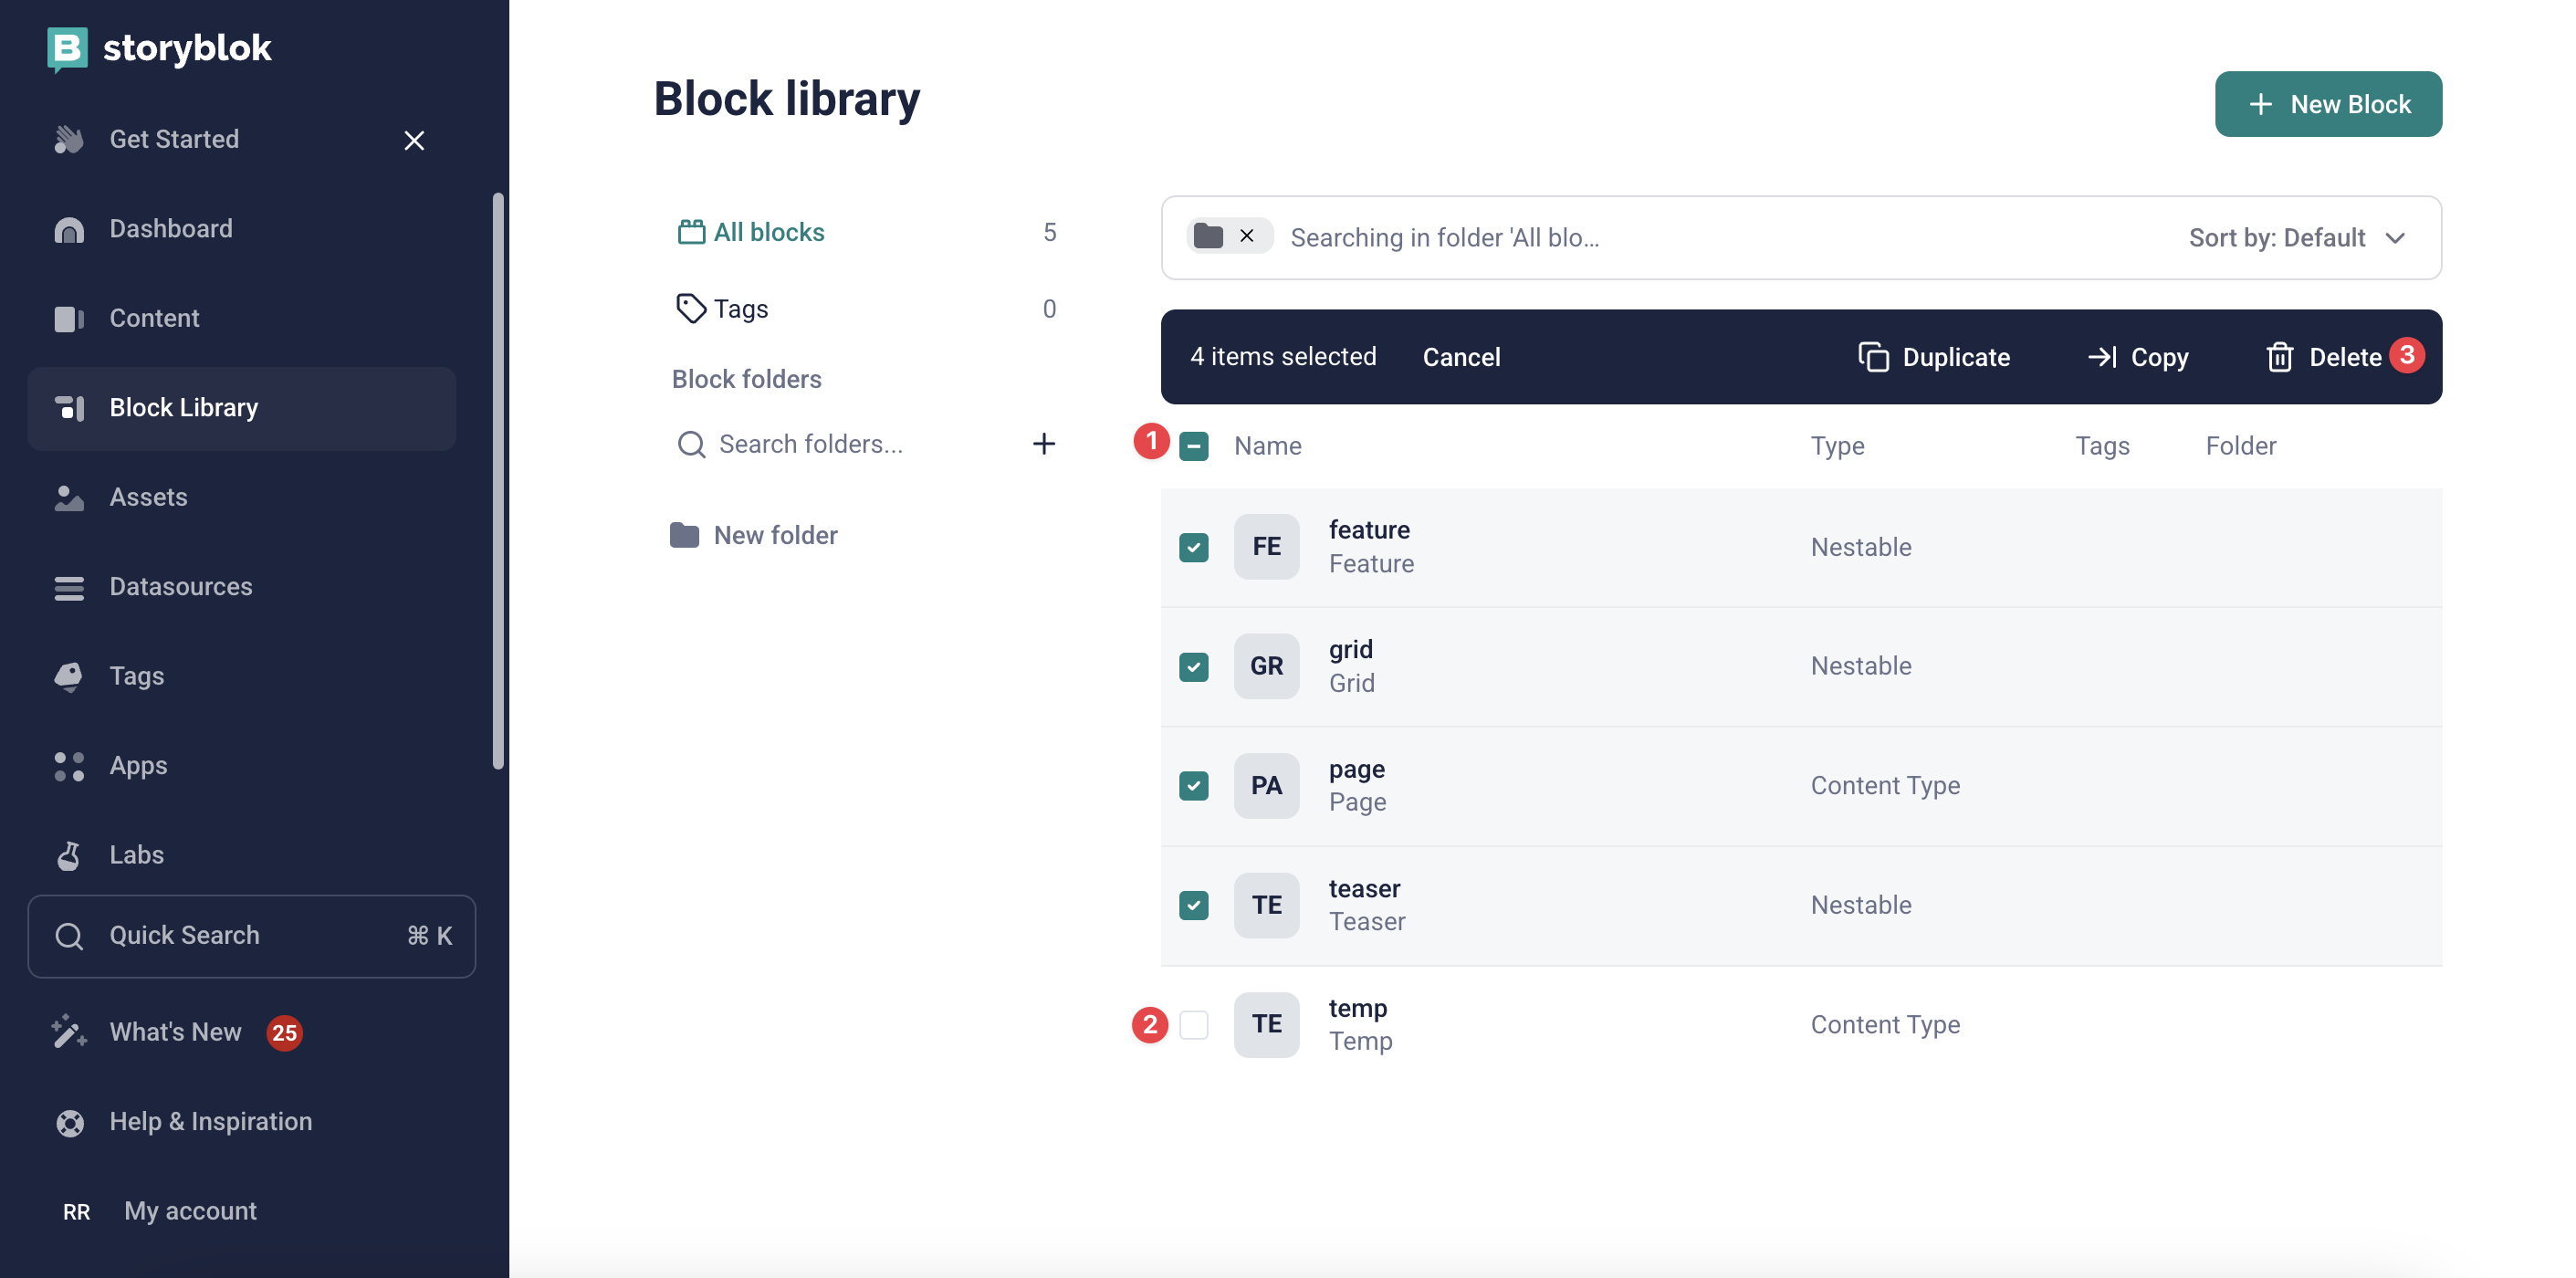
Remove existing content types
Return to the Blocks Library and delete all existing content types. Since Storyblok requires at least one content type to remain, keep the temporary one you created.
Once the cleanup is complete, you can proceed to import the integration schemas. After the import, follow these final steps:
- Update the default content type to Alokai's Page content type.
- Delete the temporary content type you created earlier.
Import integration schemas
If you have installed the Storyblok module in your Storefront, you will find the default schemas provided by Alokai in the apps/storefront-middleware/sf-modules/cms-storyblok/schemas directory. They contain the latest version of content type schemas meant to be used with the integration's frontend components.
We recommend using Storyblok CLI to import Alokai schemas into your space.
Sign in
Use the following CLI command to sign in. You will be prompted for email, password and region. If you're already signed in, you can skip this step.
npx storyblok loginPush components
From the root of your Storefront project, run the following CLI command to push components to the desired space. The space argument should be your Storyblok space ID without the hash (#) symbol.
npx storyblok push-components ./apps/storefront-middleware/sf-modules/cms-storyblok/schemas/components.alokai.json --space <your-space-id> --presets-source ./apps/storefront-middleware/sf-modules/cms-storyblok/schemas/presets.alokai.jsonRead the Storyblok docs to find out where to get your space ID.
Theoretically, you could run the push-components command from any directory of your project and adjust the source parameter. Unfortunately, as of December 2024, it does not always work as expected.
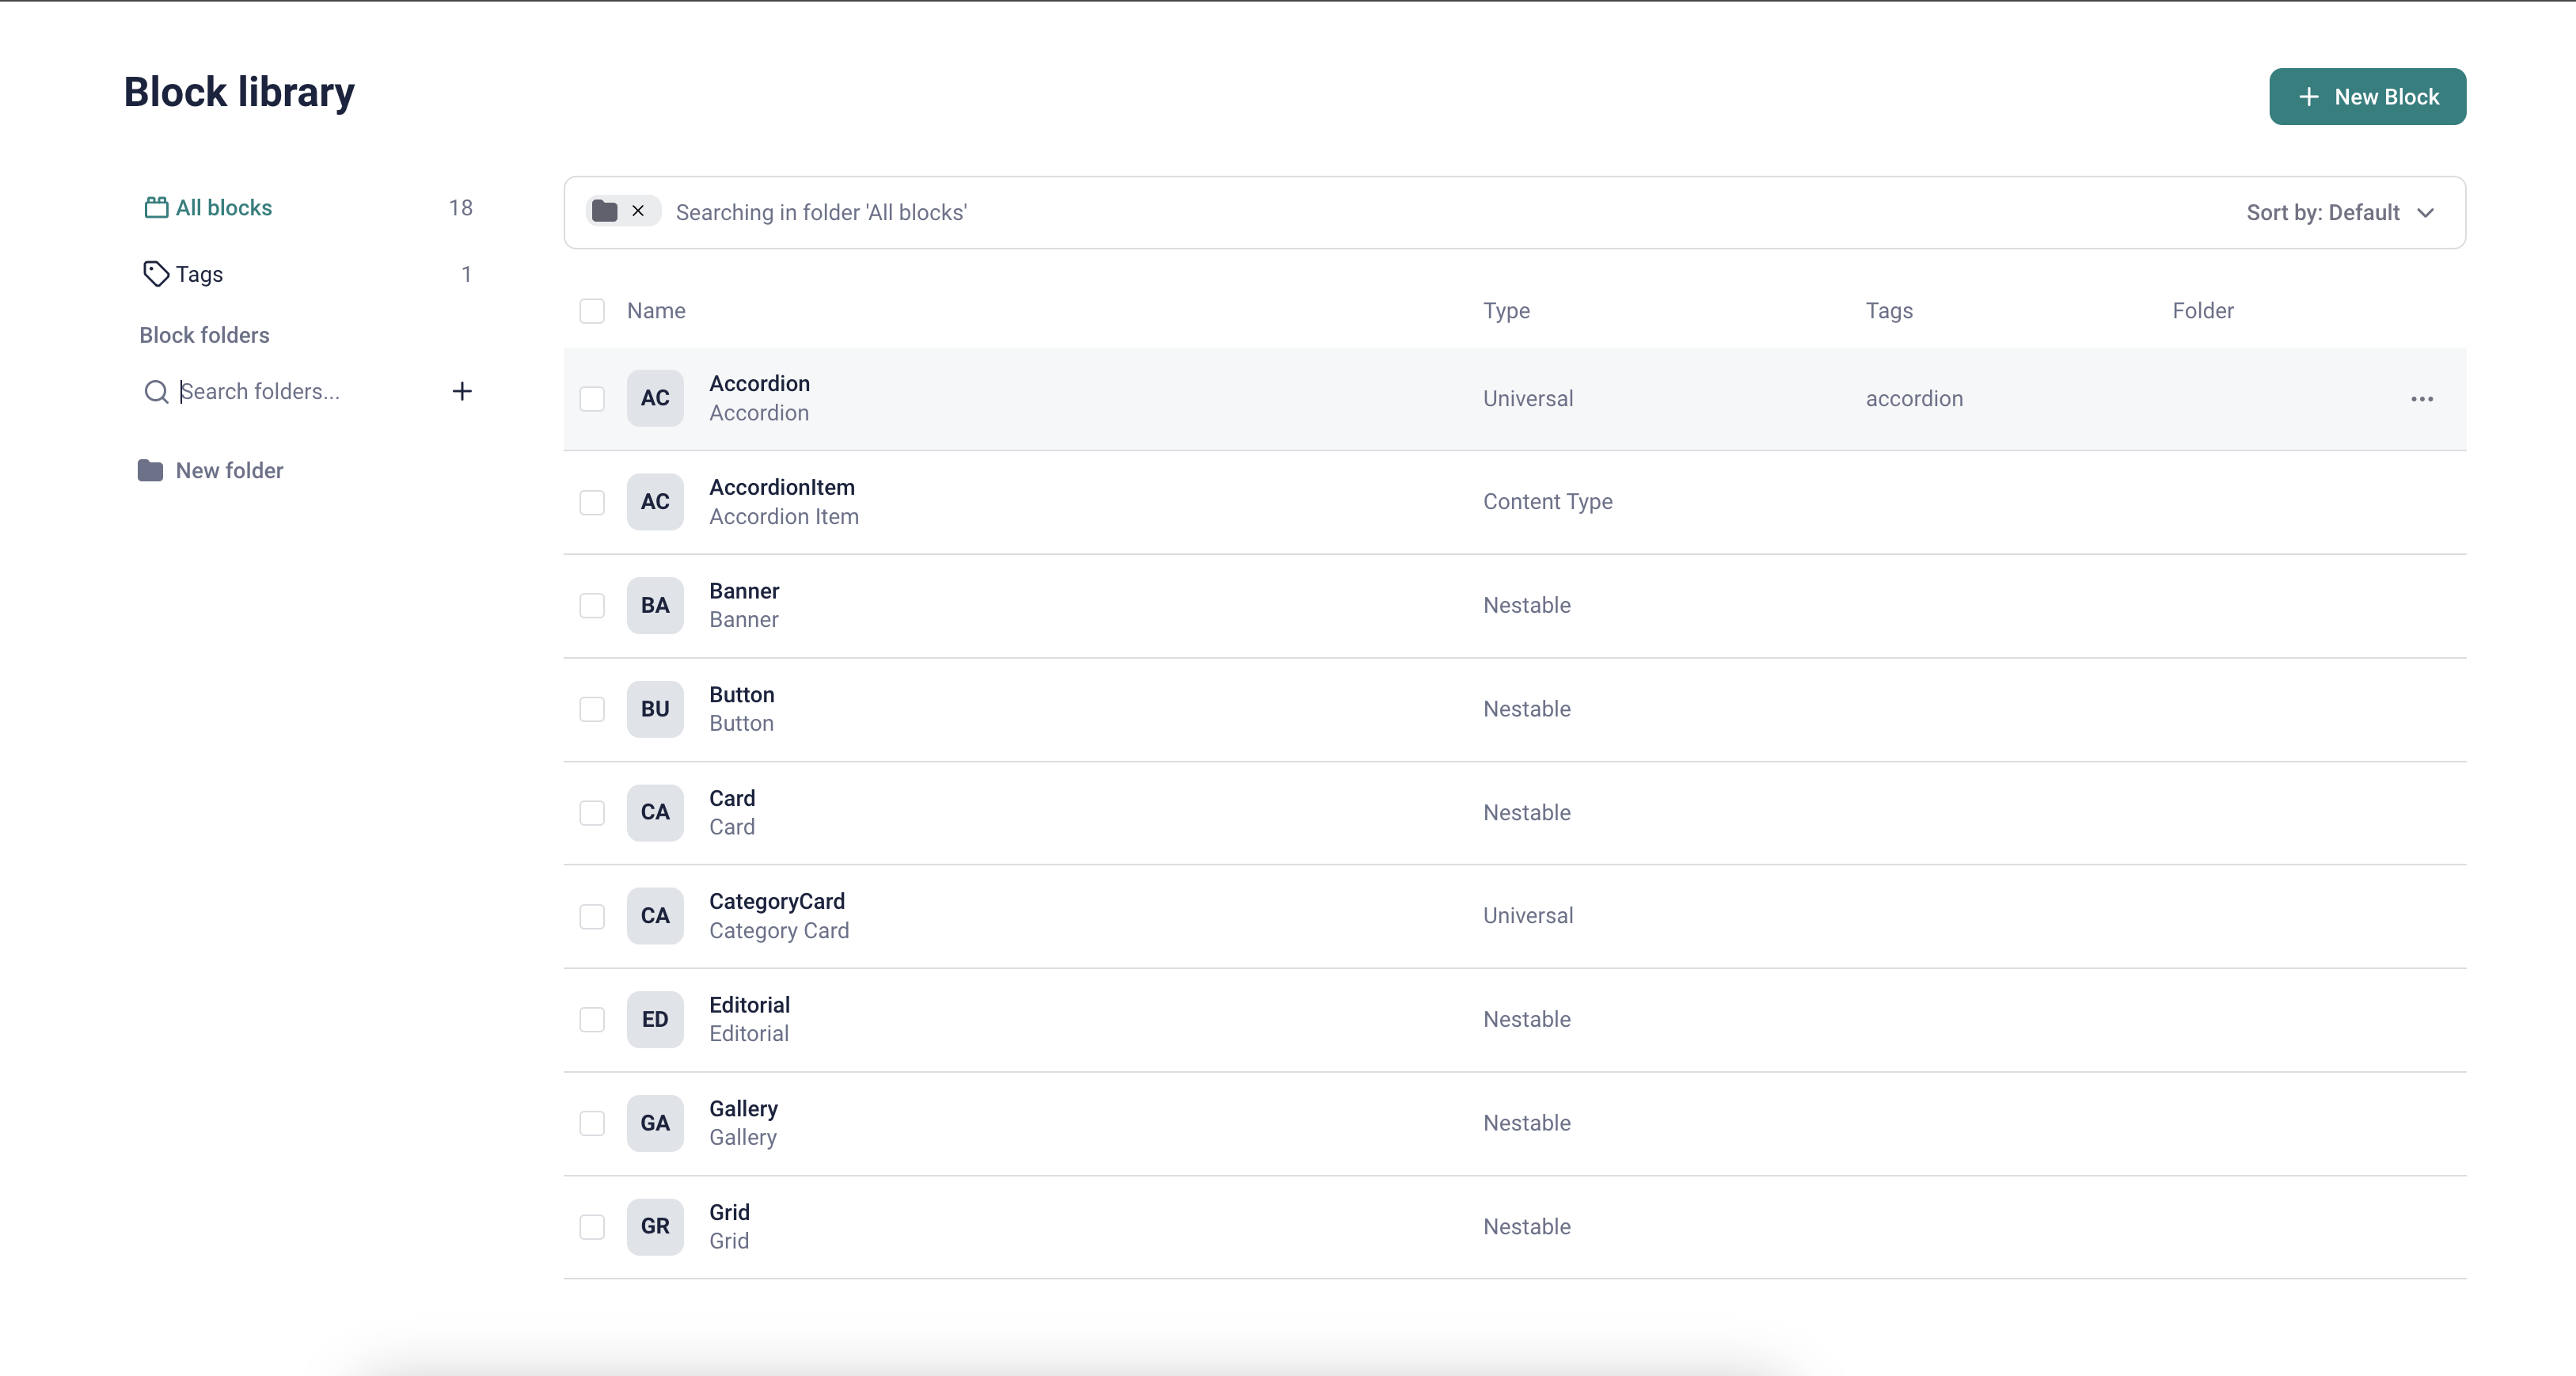
Verify the Block Library
In your Storyblok space, click the Block Library tab in the sidebar on the left. Verify that Alokai components are present there.
Visual Editor
Storyblok provides an invaluable feature known as the Visual Editor, designed to enhance the content editing experience. This feature enables content editors to seamlessly edit and manage content in real-time while previewing the corresponding frontend components directly within an embedded iframe. This integration streamlines the editing process, ensuring a more intuitive and efficient workflow tailored to Storyblok's headless CMS capabilities.
To set up the Visual Editor:
Serve your app over HTTPS
For the Visual Editor to work, Storyblok requires your application to be served over HTTPS. For a deployed application, make sure it has a proper TLS certificate assigned. For a locally running application, make sure it uses an HTTPS proxy. Read the official Storyblok documentation to find out how to set it up on MacOS or Windows.
Define your Location (default environment)
In your Storyblok space dashboard, navigate to Settings > Visual Editor. In the Location field, insert the URL of your application served over HTTPS. For example, if your application is running locally on http://localhost:3000/ through a proxy running on https://localhost:3010/, use the URL of the proxy.
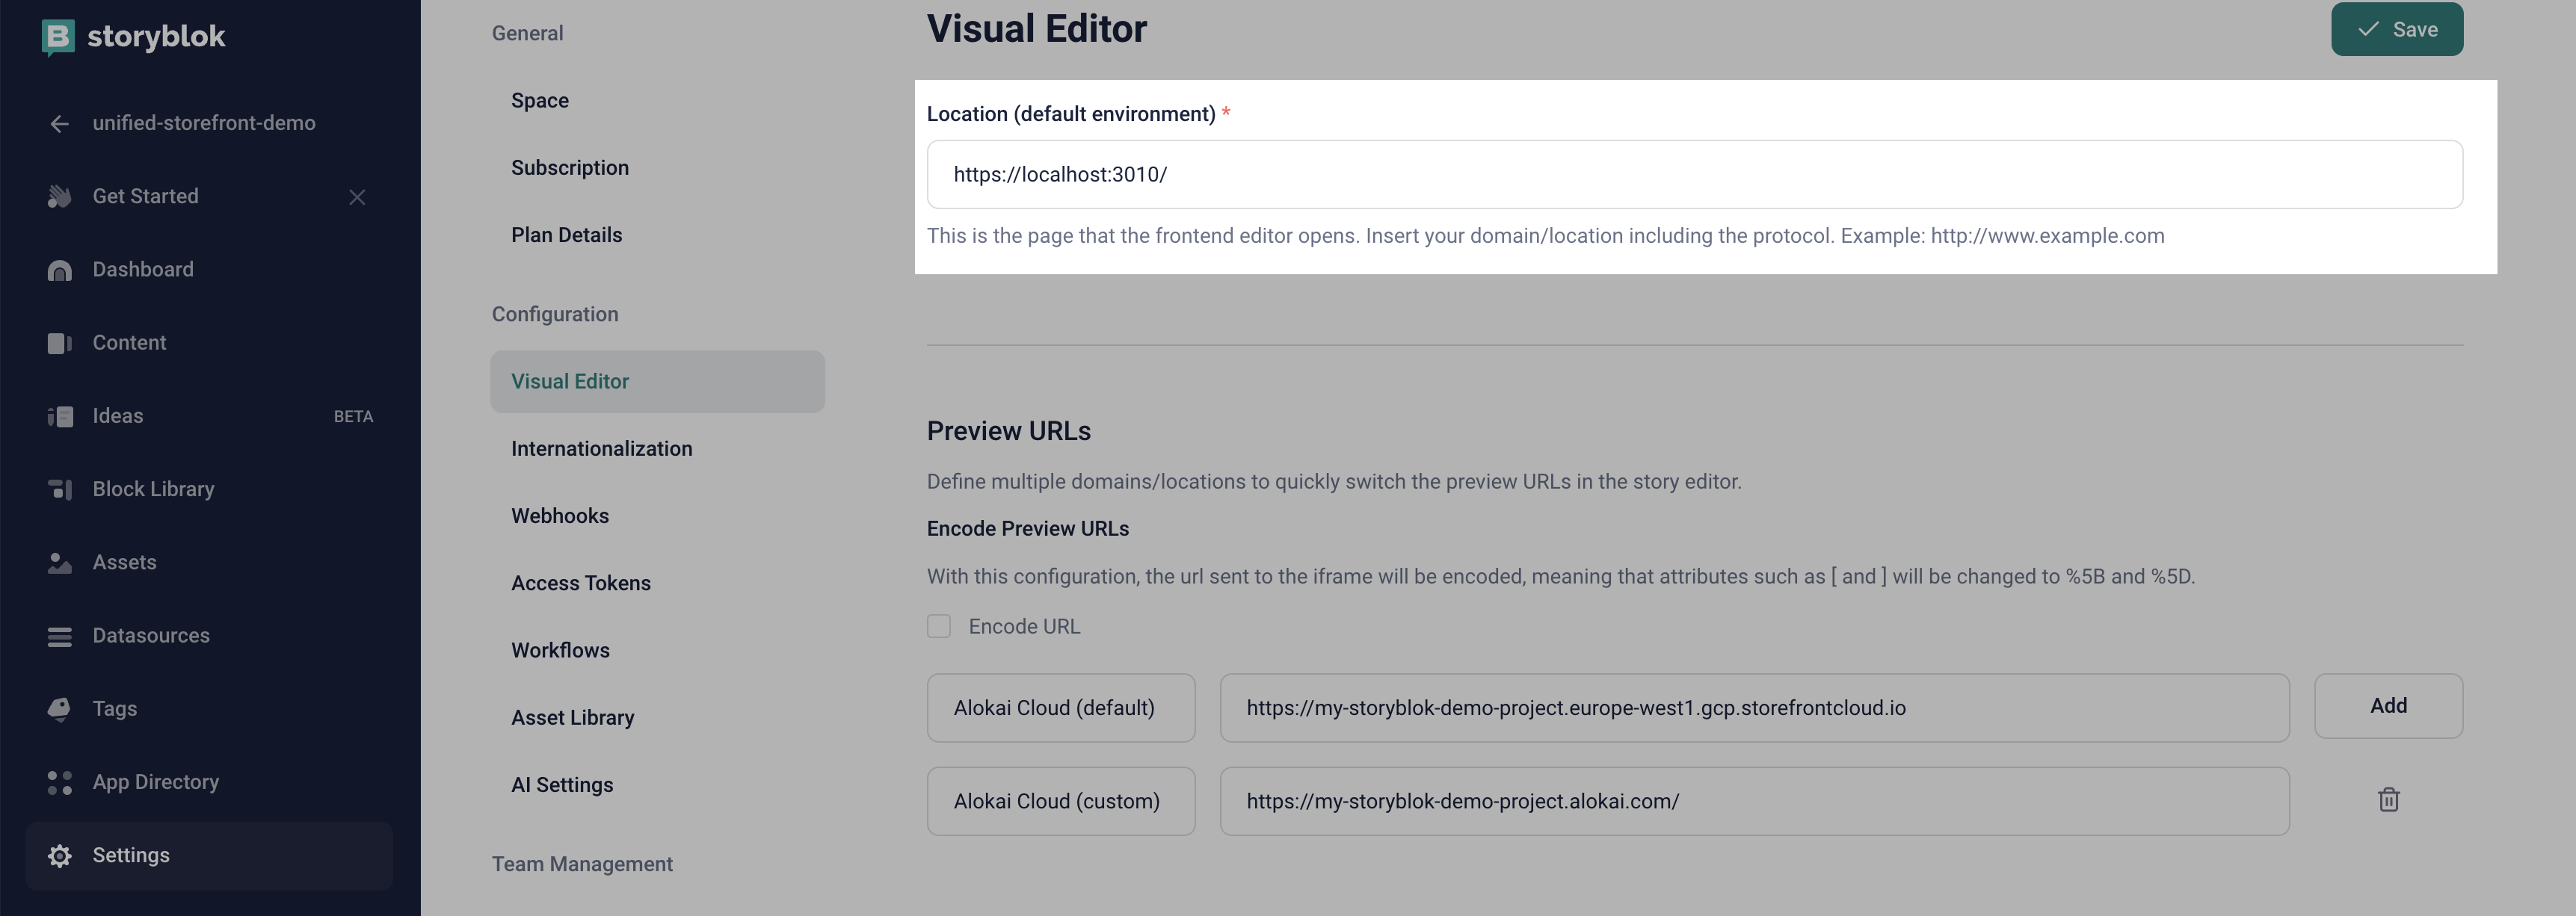
The URL should end with a forward slash (/), e.g. https://localhost:3010/.
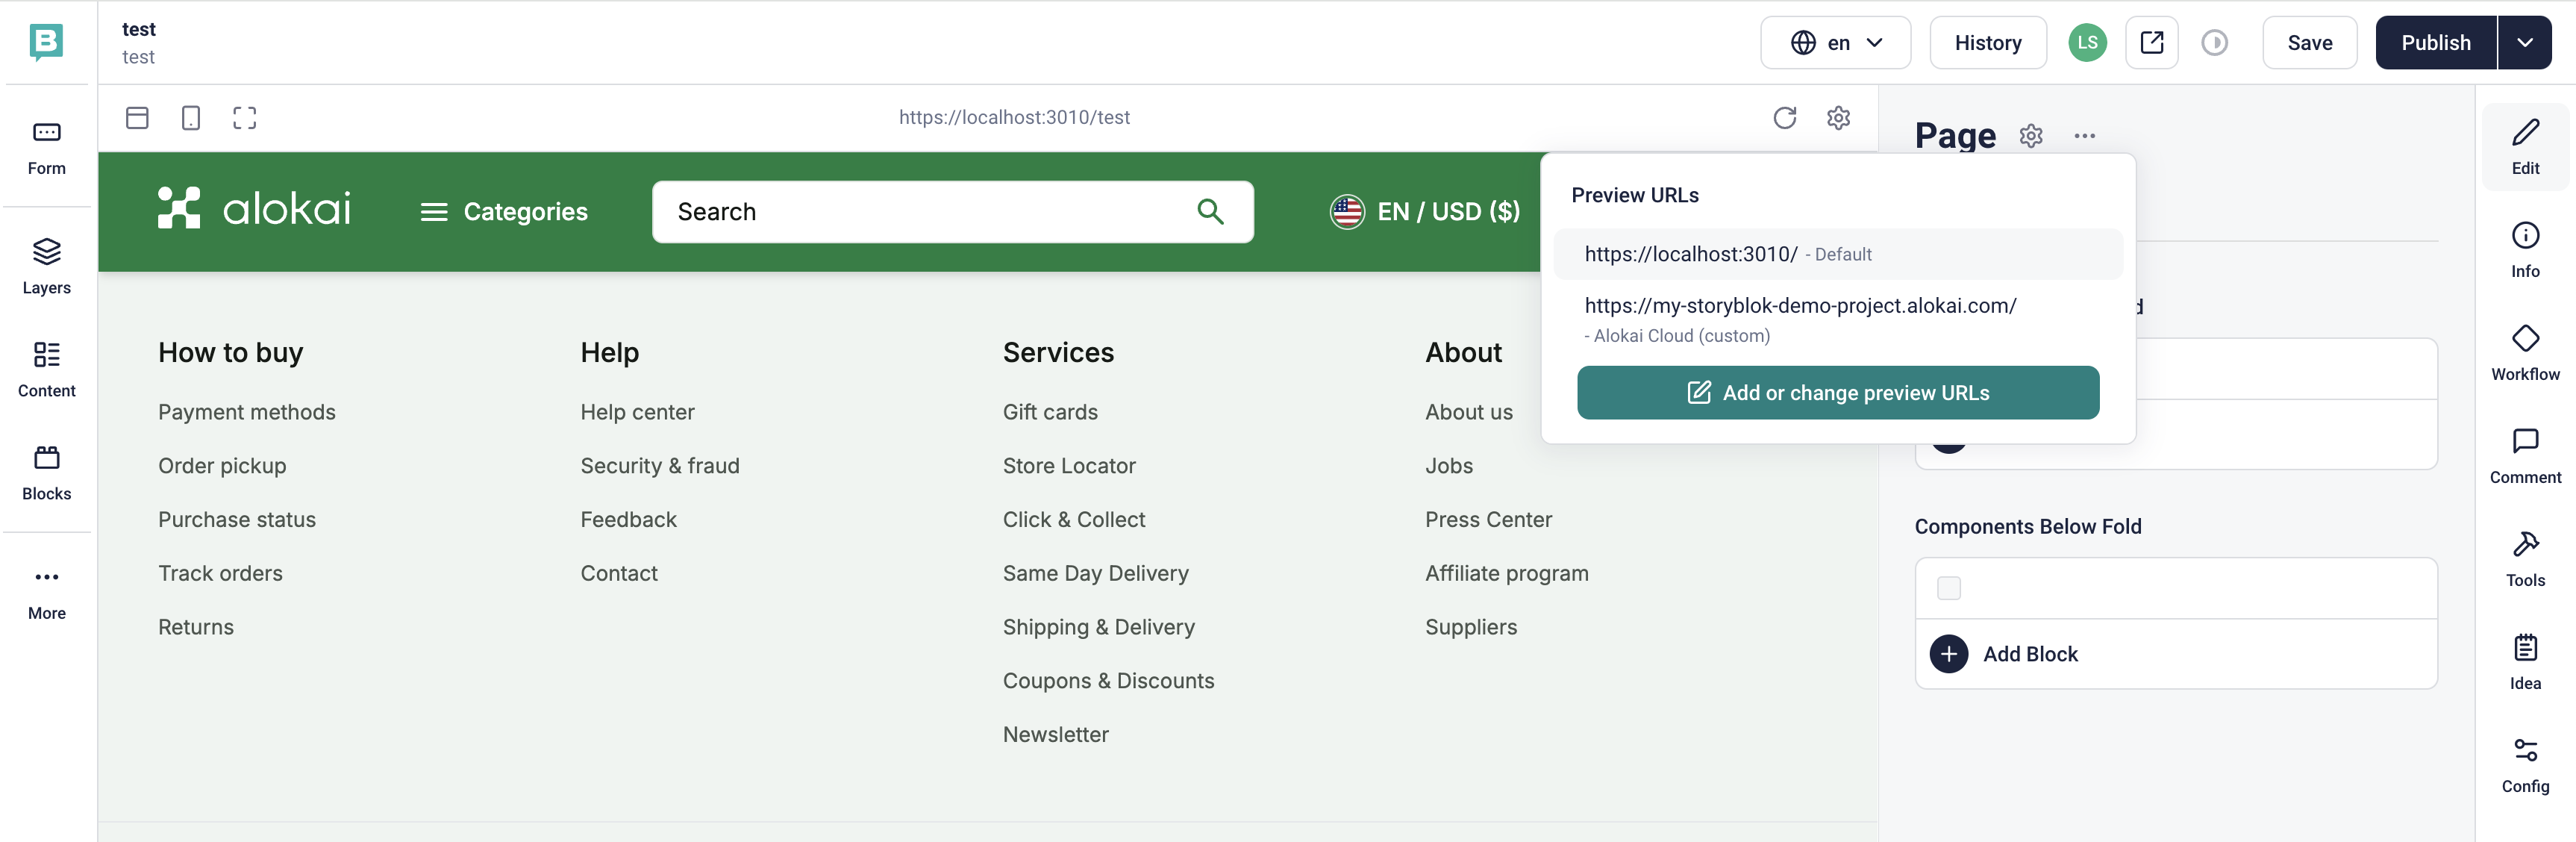
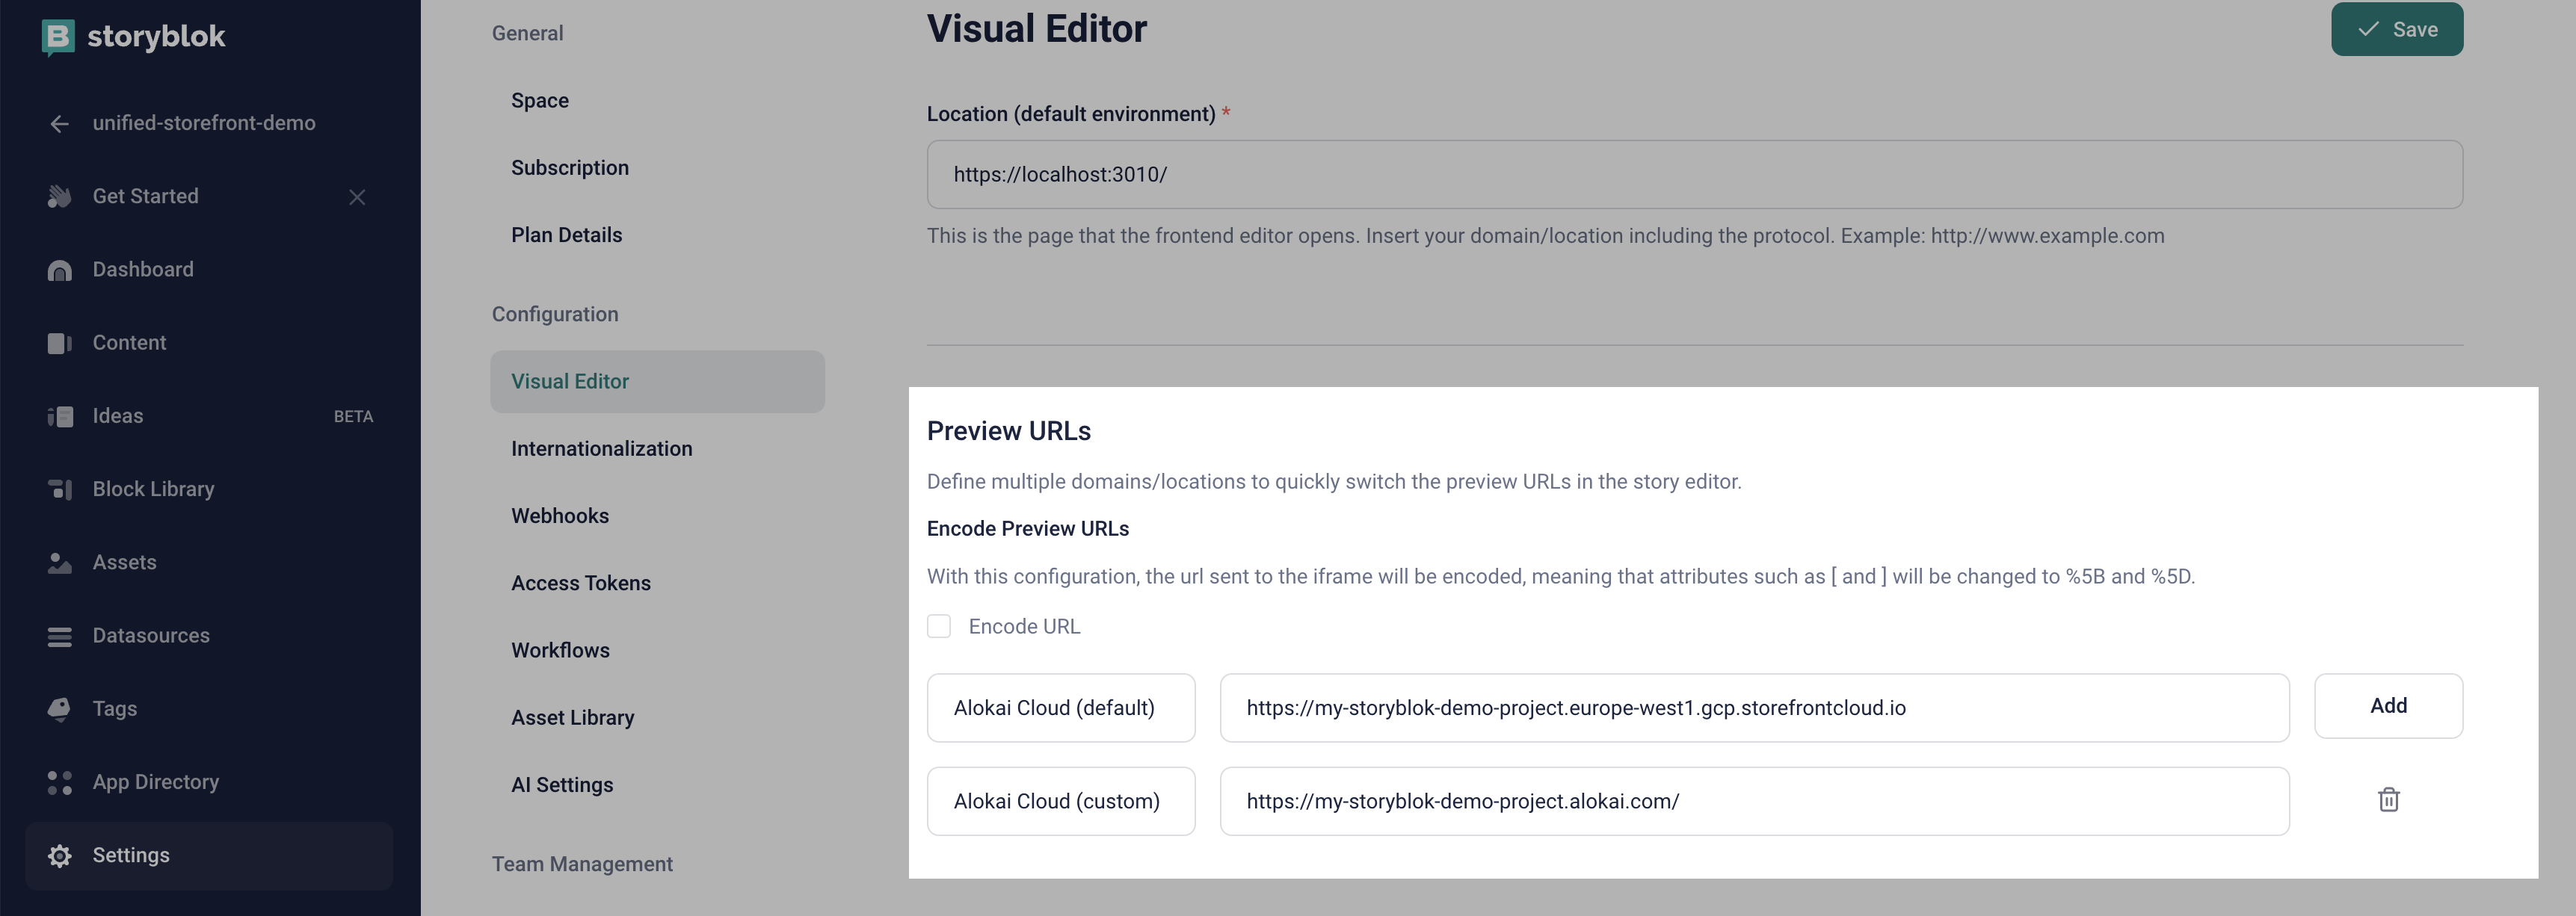
Set up preview URLs (optional)
If you are planning to use the Visual Editor with an app running on multiple URLs (e.g. on localhost for developers and on Cloud for content editors), we recommend configuring additional Preview URLs. You will be able to easily switch between them while editing your stories.
Verify the setup
In your Storyblok space dashboard, navigate to the Content tab. Select an existing story or create a new one. Once it is open, make sure you are in the Visual mode and not Form - you can toggle between them by clicking a dedicated button in the sidebar on the left. Assuming your application is running on the selected Preview URL, you should be able to see it rendered within a frame in the middle of the page.