Adding custom fields to the Unified Data Model / Implementing "Available for pickup" feature
It's a common case to enrich the default data models with custom fields.
In this chapter, you will learn:
- how to add a custom field to the unified product data model in the middleware
- how to utilize that field in the storefront
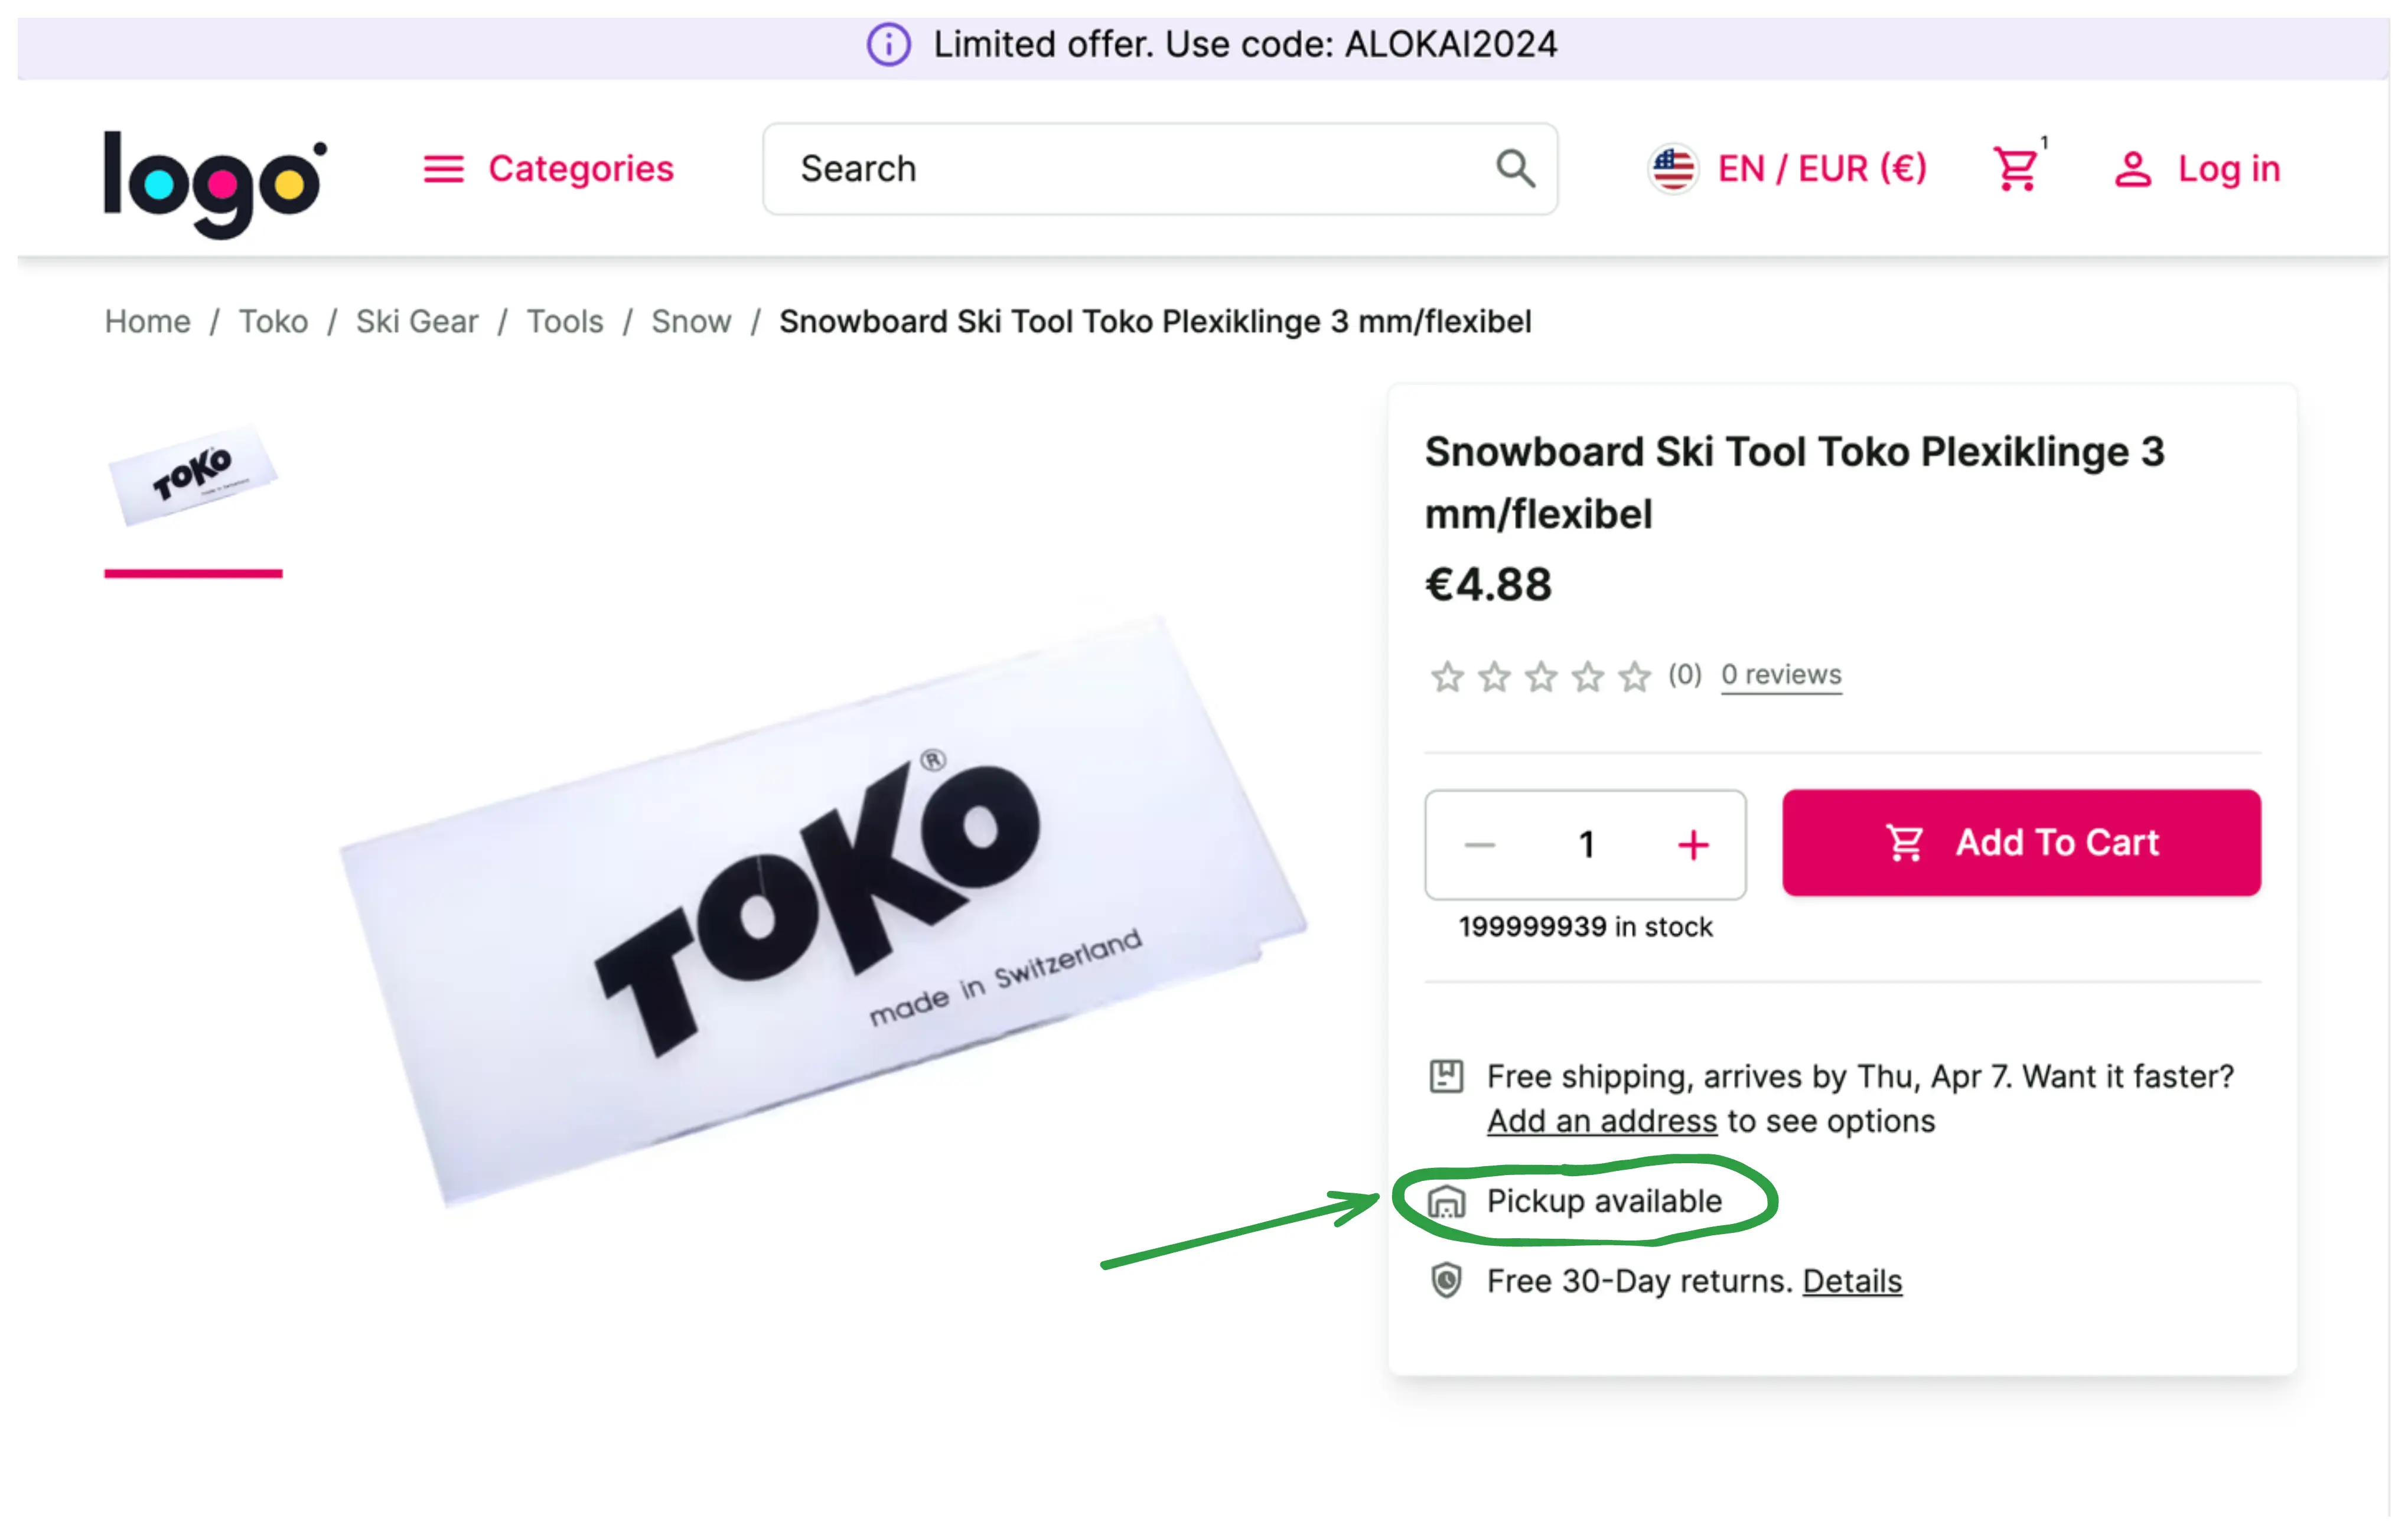
By adding a "pickup availability" feature.
- Open
apps/storefront-middleware/integrations/sapcc/extensions/unified.tsfile and modify the code accordingly:
apps/storefront-middleware/integrations/sapcc/extensions/unified.ts
export const unifiedApiExtension = createUnifiedExtension({
  normalizers: {
    addCustomFields: [
+      {
+        normalizeProduct(context, input) {
+          return {
+            availableForPickup: input.availableForPickup,
+          };
+        },
+      },
    ],
  },
Within addCustomFields, we extend the normalizer functions. We take the raw input (coming from eCommerce) and have to
return a set of custom fields.
Read more about normalizers and custom fields here: https://docs.alokai.com/storefront/unified-data-layer/normalizers
- Now,
availableForPickupfield should be available in the front end, so let's use it. Replace the hardcoded placeholder in thePurchaseCardcomponent:
storefront-unified-nextjs/components/PurchaseCard/PurchaseCard.tsx
- <Trans ns="product" i18nKey="additionalInfo.pickup">
- Pickup not available at Super center.
- <SfLink href="#" variant="secondary">
- Check availability nearby
- </SfLink>
- </Trans>
+ <p>Pickup {product.$custom?.availableForPickup ? '' : 'not'} available</p>
And that's it. You can find a complete project example in this repository: https://github.com/vsf-customer/extensibility-demo If you want to get access to it, contact our sales team.