Adding New API Methods
The Unified Data Model contains the most commonly used data for eCommerce backends, but there will be times when you need additional information, combine data from multiple sources, or create a new data structure.
In such cases, we can either:
- add a new extension to our integration
- or implement a custom integration.
We will focus on the first option. The second one is more suitable for scenarios when we want to cover all API endpoints that a service offers.
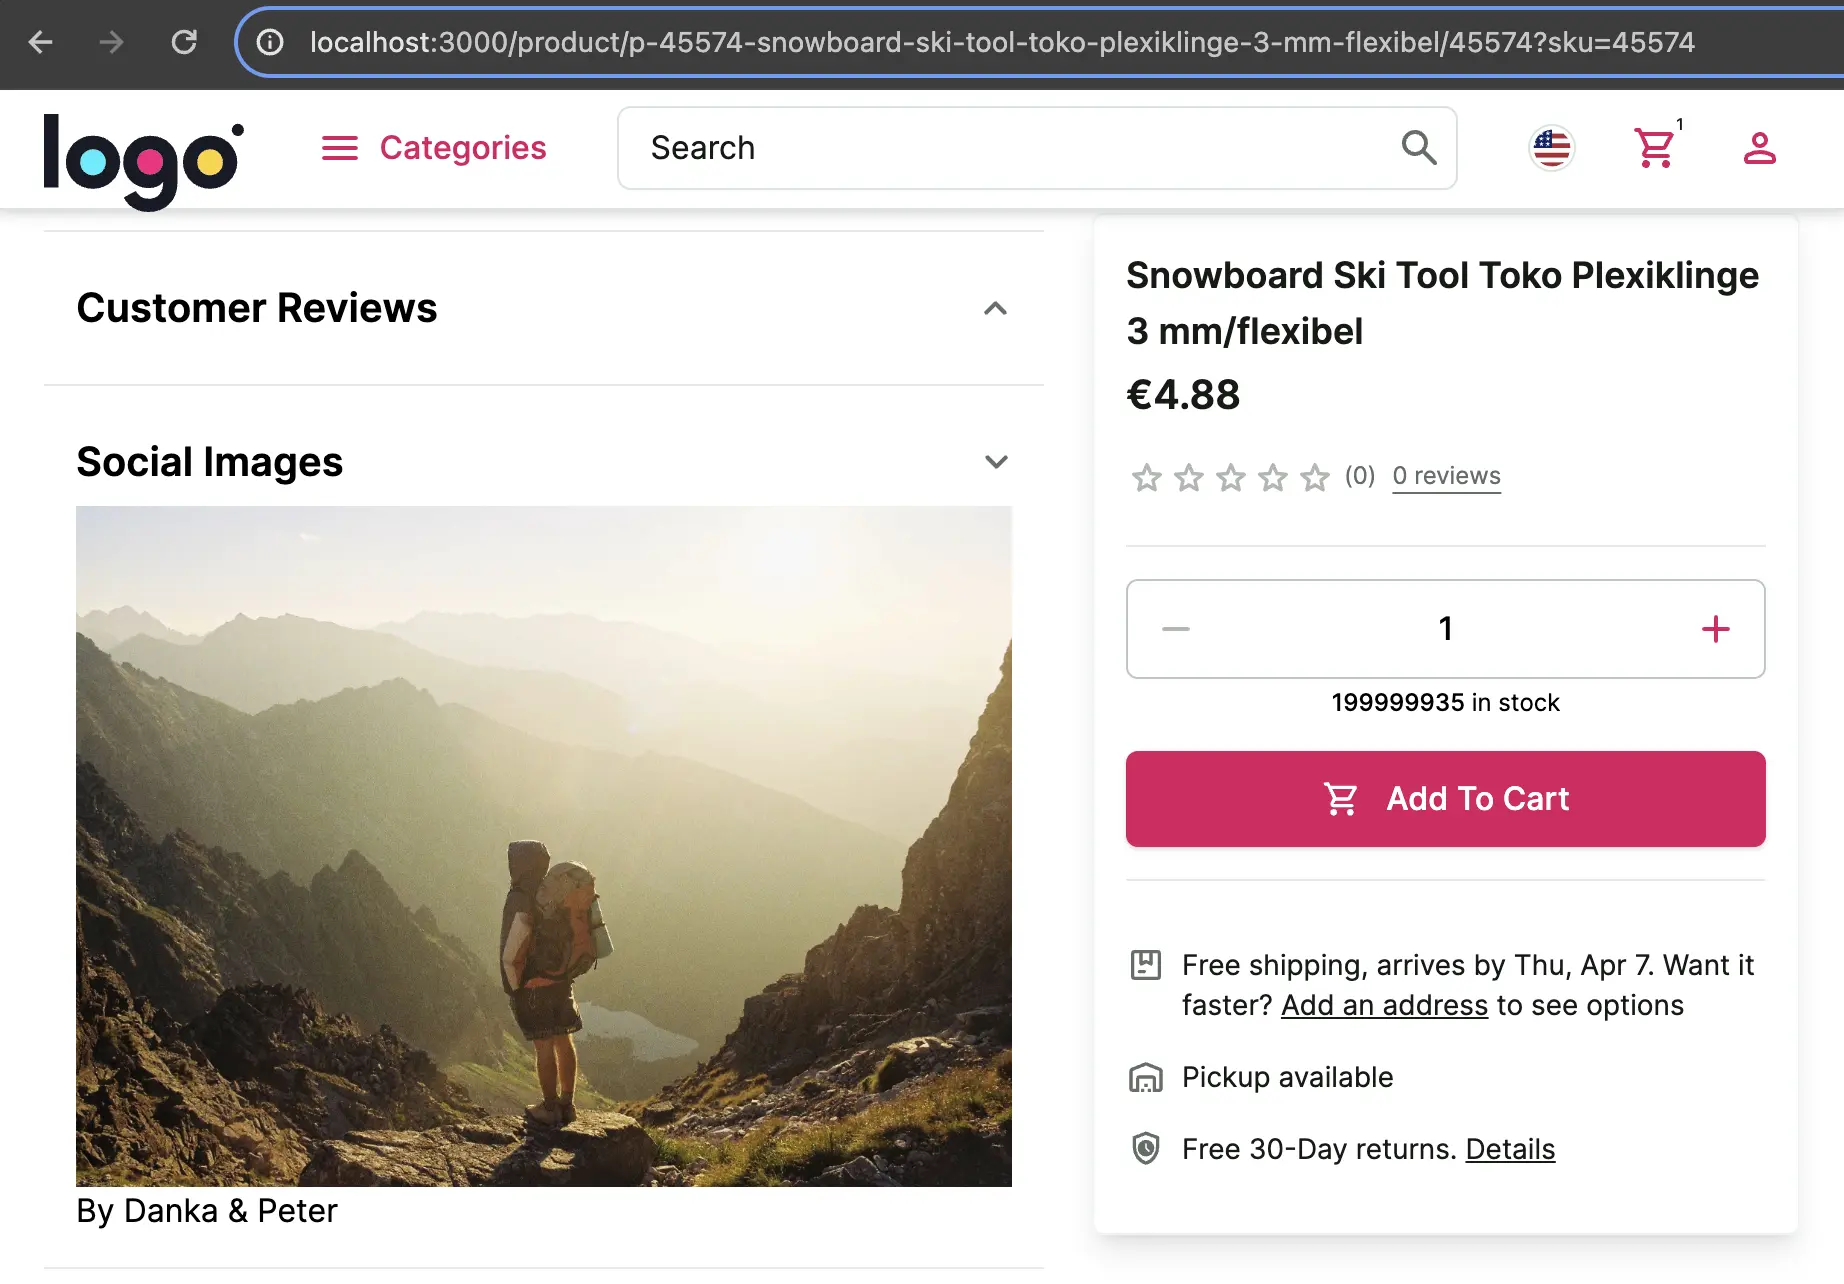
In this guide, we will implement a mock of "social product images" feature - a feature where we display product images posted on social media. For the sake of simplicity we won't reach a real social network, we will use Lorem Picsum API to mock it. The result will look like this:
- Create a new API method in the
/api/socialImagesExtensiondirectory.
First, define the arguments and response types in the /api/socialImagesExtension/types.ts file.
export interface SocialImagesArgs {
  seed: string;
}

export interface SocialImagesResponse {
  id: string;
  author: string;
  width: number;
  height: number;
  url: string;
  download_url: string;
}
Then, implement an API method in the /api/socialImagesExtension/getImages.ts file.
import { SapccIntegrationContext } from "@vsf-enterprise/sapcc-api";
import { SocialImagesArgs, SocialImagesResponse } from "./types";

export async function getSocialImages(
  context: SapccIntegrationContext,
  args: SocialImagesArgs,
): Promise<SocialImagesResponse> {
  const image: SocialImagesResponse = await (
    await fetch(`https://picsum.photos/seed/${args.seed}/info`)
  ).json();
  return image;
}
And export the method in the /api/socialImagesExtension/index.ts file.
export * from "./getImages";
- Create a new Middleware extension in the
apps/storefront-middleware/integrations/sapcc/extensionsdirectory and register custom API method.
import type { ApiClientExtension } from "@vue-storefront/middleware";
import { getSocialImages } from "../../../api/socialImagesExtension";

export const socialImagesExtension = {
  name: "socialImagesExtension",
  extendApiMethods: {
    getSocialImages,
  },
} satisfies ApiClientExtension;
And export the extension in the /integrations/sapcc/extensions/index.ts file.
  export * from "./unified";
  export * from "./multistore";
+ export * from "./socialImagesExtension";
- Export the type of the endpoints, to use them later in the SDK configuration.
+import { WithoutContext } from "@vue-storefront/middleware";
+import { socialImagesExtension } from "./extensions";

 export type { Endpoints as UnifiedEndpoints } from "@vsf-enterprise/unified-api-sapcc";

+export type SocialImagesExtension = typeof socialImagesExtension;
+export type SocialImagesExtensionEndpoints = WithoutContext<SocialImagesExtension["extendApiMethods"]>;
- Register the extension in the integration config file.
+ import { socialImagesExtension } from "./extensions";

export const config = {
  // ...
  extensions: (extensions: ApiClientExtension[]) => [
    ...extensions,
    unifiedApiExtension,
    ...(IS_MULTISTORE_ENABLED ? [multistoreExtension] : []),
+   socialImagesExtension,
  ],
} satisfies Integration<MiddlewareConfig>;
- Export
SocialImagesExtensionEndpointstype from theapps/storefront-middlewareapp.
  export {
+   type SocialImagesExtensionEndpoints,
    type UnifiedEndpoints,
  } from "./integrations/sapcc/types";

  export * from "@vsf-enterprise/unified-api-sapcc/udl";
+ export * from "./api/socialImagesExtension/types";
- Finally, register a new SDK module with the
SocialImagesExtensionEndpointstype under a custom namespace in the SDK configuration. Go toapps/storefront-unified-nextjs/sdk/sdk.config.tsfile.
-import type { UnifiedEndpoints } from 'storefront-middleware/types';
+import type { UnifiedEndpoints, SocialImagesExtensionEndpoints } from 'storefront-middleware/types';

export const { getSdk } = createSdk(options, ({ buildModule, middlewareModule, middlewareUrl, getRequestHeaders }) => ({
  unified: buildModule(middlewareModule<UnifiedEndpoints>, {
    apiUrl: `${middlewareUrl}/commerce`,
    defaultRequestConfig: {
      headers: getRequestHeaders(),
    },
  }),
+  socialImagesExtension: buildModule(middlewareModule<SocialImagesExtensionEndpoints>, {
+    apiUrl: `${middlewareUrl}/commerce`,
+    defaultRequestConfig: {
+      headers: getRequestHeaders(),
+    },
+  }),
Now, thanks to the SDK synchronization, the getSocialImages method will be available and typed under socialImagesExtension
namespace when you use the SDK in your Storefront.
// Storefront project
const { data } = sdk.socialImagesExtension.getSocialImages({/* args */});
- Now let's implement the UI for this feature. Create a new
useSocialImageshook underapps/storefront-unified-nextjs/hooks/useSocialImages/useSocialImages.tswith the following code:
import { useQuery } from '@tanstack/react-query';
import { useSdk } from '~/sdk';
import { SocialImagesArgs } from '~/types';

export function useSocialImages(params: SocialImagesArgs) {
  const sdk = useSdk();

  return useQuery({
    queryKey: ['social-image', params.seed],
    queryFn: () => sdk.socialImagesExtension.getSocialImages(params),
    refetchOnMount: false,
    refetchOnWindowFocus: false,
  });
}
Create SocialImages component under /storefront-unified-nextjs/components/SocialImages/SocialImages.tsx
import Image from 'next/image';
import { useSocialImages } from '~/hooks/useSocialImages';

export function SocialImages({ productId }: { productId: string }) {
  const socialImage = useSocialImages({ seed: productId });

  return (
    <div className="px-4">
      <Image
        alt="social image"
        src={socialImage.data?.download_url ?? ''}
        width={socialImage.data?.width}
        height={socialImage.data?.width}
        unoptimized
      />
      <p>By {socialImage.data?.author}</p>
    </div>
  );
}
Add this component in ProductAccordion component (/storefront-unified-nextjs/components/ProductAccordion/ProductAccordion.tsx)
             <div className="text-neutral-900 px-4" data-testid="customer-reviews">
               <ProductReviews productId={productId} />
             </div>
           </Suspense>
         )}
       </AccordionItem>
+      <Divider className="my-4" />
+      <AccordionItem
+        label={<h2 className="font-semibold md:typography-headline-3 typography-headline-4">Social Images</h2>}
+        open={isOpened('socialImages')}
+        onToggle={() => toggleItem('socialImages')}
+      >
+        <SocialImages productId={productId} />
+      </AccordionItem>
    </>
  );
}
Finally, we have implemented a completely custom feature. You can find a complete project example in this repository: https://github.com/vsf-customer/extensibility-demo If you want to get access to it, contact our sales team.
Read more about adding new API methods here: https://docs.alokai.com/storefront/integration-and-setup/creating-new-api-methods