Enabling visualizations
Amplience offers a valuable feature called Visualizations, enabling content editors to effortlessly edit content items while simultaneously previewing frontend components within an embedded iframe on the Amplience dashboard. This guide is designed to provide clear instructions on how to utilize this feature in conjunction with Alokai.
This guide serves as a streamlined resource to swiftly integrate visualizations into your project. If you wish to explore this topic in more detail, we highly recommend referring to the comprehensive Amplience documentation for authoritative information.
Configuring visualizations in Amplience
Within the Amplience platform, visualizations are established at the Content Type level. It has to be done not only for pages and layouts but also for all individual content types (such as Banners, Heroes, Accordions) due to the structure of content editing forms in Amplience. In essence, any content item you intend for your content editors to visualize must undergo the configuration of visualizations.
To configure visualizations for a specific content type in your Amplience Dynamic Content app, follow these steps:
- Open your Amplience Dynamic Content app and navigate to the Development tab,
- Click on Content types in the menu. This will display a list of available content types,
- Choose the content type for which you wish to set up visualizations.
- Proceed to the Visualizations tab within the selected content type.
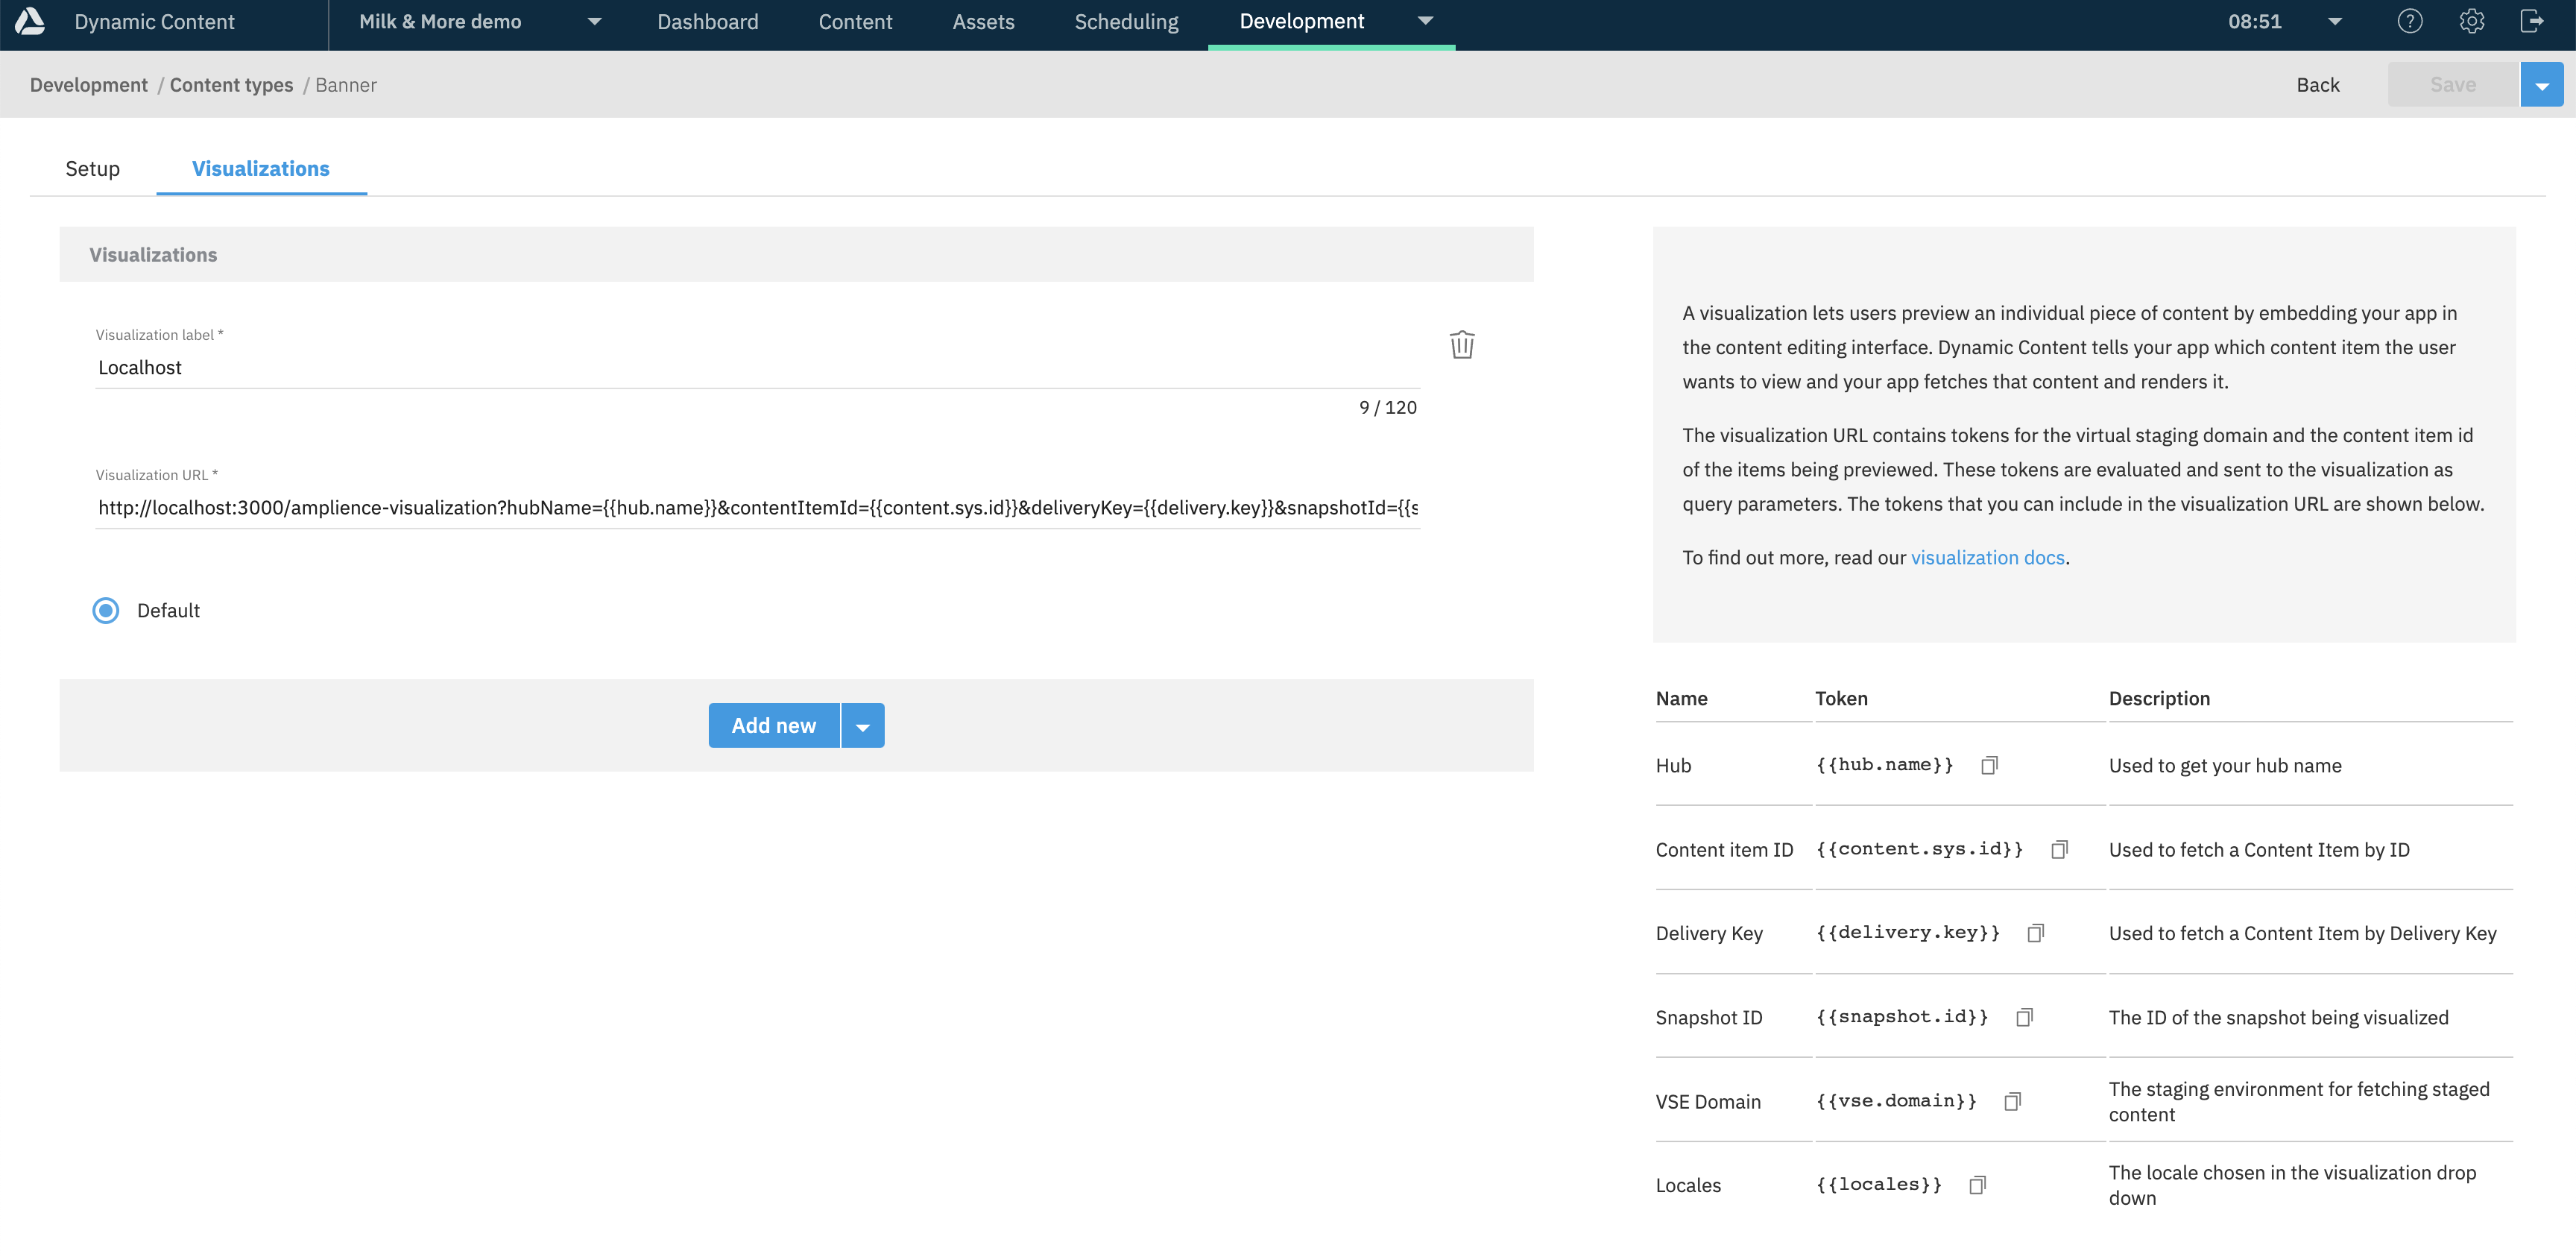
- Create a new entry to define the visualizations for this content type.

Give it the "Localhost" label and the following URL:
http://localhost:3333/amplience-visualization?hubName={{hub.name}}&contentItemId={{content.sys.id}}&deliveryKey={{delivery.key}}&snapshotId={{snapshot.id}}&vseDomain={{vse.domain}}&locales={{locales}}
By following this procedure, we effectively instruct Amplience that when we initiate the editing of a Page, Layout, or Component item and access the Visualizations panel, it should exhibit our application running at http://localhost:3333/amplience-visualizations. Additionally, specific query parameters will be populated with predefined values. As you can see, the URL contains query parameters for all potential visualization tokens. Our default setup does not utilize all of them, but they can prove beneficial in future scenarios.
This concludes the process of configuring visualizations for an individual Content Type. To enable visualization for additional content types, simply replicate the same procedure, utilizing the exact visualization URL for each of them.
Explaining visualizations on the frontend
If you've followed our Nuxt or Next bootstrap guide, your frontend application should already be set up to show Amplience visualizations. Now, we'll explain how it all works.
In our default setup, all visualizations are managed through a separate /amplience-visualizations route, which uses a page component with the same name. This component utilizes the Visualization SDK and handles all the logic for displaying your content item visualizations. When you open the visualizations tab in Amplience, this component:
- initializes the Visualization SDK client,
- fetches the initial content of the editing form,
- extracts individual components from the fetched content using the extractComponents() method,
- renders the extracted components using the
RenderComponentwrapper, - starts listening for further form changes.
From this point onwards, any changes made to the content item form will be reflected in the visualizations tab immediately.
Extracting components
The /amplience-visualizations component is in charge of displaying visualizations for both Components (like Banners, Heroes, and Accordions) and Containers (specifically Layouts and Pages). For Components, they can be extracted and displayed as they are. However, for Containers, we need to:
- extract nested
MegaMenuandFootercomponents from Layouts, - extract components from the nested
componentsAboveFoldandcomponentsBelowFoldarrays in Pages.
To accomplish this, we customize specific resolvers of the extractComponents() method.
Please remember that the default logic in the /amplience-visualizations component is designed to match the default Amplience setup provided by Alokai. If you make changes to your Content Types in Amplience, such as adding new properties to Pages or Layouts, ensure that you also update the logic in the amplience-visualizations component accordingly.
Accessing visualization tokens
When configuring visualization URLs for content types in the previous section, you included all available Amplience visualization tokens as query parameters. In our standard setup, we only use locales. However, should you require any other token in the future, you can access it within your amplience-visualizations component:
const {
  deliveryKey,
  locales,
  _contentItemId,
  _snapshotId,
  _vseDomain,
} = route.query;
Changing the visualization url
We suggest displaying your visualizations on the /amplience-visualizations route, but it's flexible, and you can choose any URL you prefer. If you decide to change it, remember to update the visualization URL in your Content Types accordingly.