Setting for how long the content should be cached (TTL)
Caching can be thought of as storing a copy of the content and serving it to the user without having to regenerate it. TTL (time-to-live) is a setting that determines how long the content should be stored before it is considered outdated.
When a user requests a page, the CDN checks if it has an up-to-date cached version of the page. If it does, it serves the cached version to the user. If it doesn’t, it forwards the request to the origin server, caches the response, and serves it to the user.
We can set the TTL for a page by setting the Cache-Control header in the response.
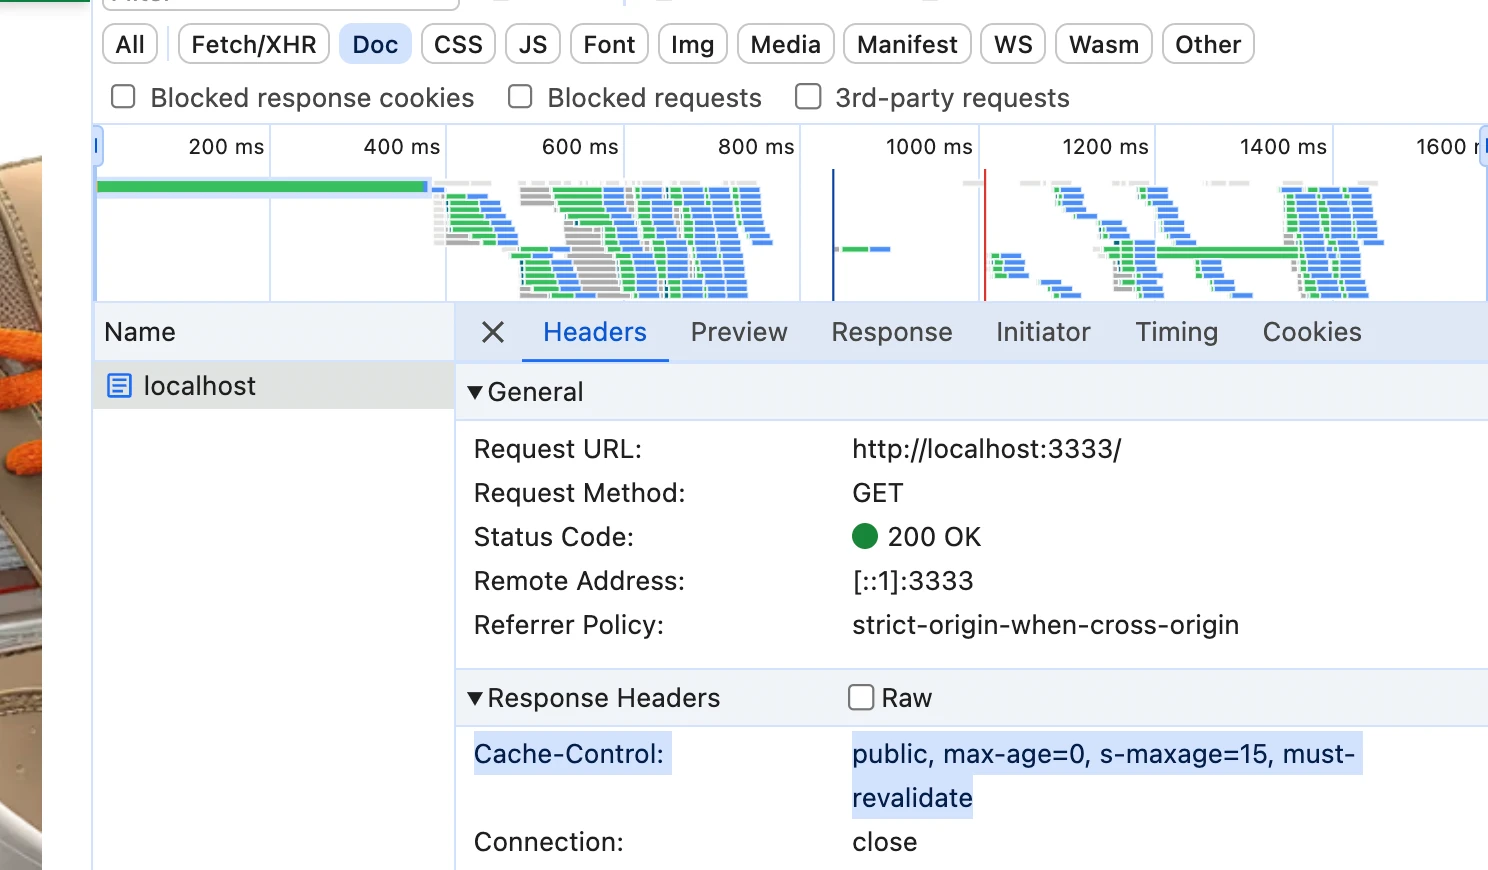
The recommended default setting for the Alokai Storefront is public, max-age=0, s-maxage=15, must-revalidate. This setting disables browser cache but enables CDN TTL for 15 seconds.
It is not recommended to set long TTLs (Time-to-Live) for HTML. This is because HTML dictates what version of the frontend is loaded. If you deploy a new version and the user receives an old HTML, it will make requests to the middleware in an outdated format, which the new version of the middleware may not understand.
Just like the CDN stores the cache between the user's machine and your server, the browser cache stores the cache on the user's machine. This has some consequences. The main ones are that the browser cache is very fast, but it is not shared between users, and you have no easy way to recover from mistakes in setting it. If a page is incorrectly cached in the browser cache, there is no way for you to invalidate the cache on the user’s machine; you have to wait for the TTL to expire.
Prepare development environment
To inform the application about the default cache control value, we need to add it to the .env file.
Modify .env file as follows:
# apps/storefront-unified-nextjs/.env

NEXT_DEFAULT_HTML_CACHE_CONTROL="public, max-age=0, s-maxage=15, must-revalidate"
Creating a TTL Helper
Next.js App Router does not allow setting cache control headers explicitly in components nor application config. To work around this, we will create a cacheControl middleware helper that allows for setting TTL for a page using a middleware routing. This helper will allow us to easily set the cache control header per page. Check out the Next.js documentation on Caching for more information.
// apps/storefront-unified-nextjs/proxy.ts

import { type NextRequest, NextResponse } from 'next/server';
import { createAlokaiMiddleware, env } from '@vue-storefront/next';
import { match } from 'path-to-regexp';

function cacheControl({ matchers = {} }: { matchers: Record<string, string> }) {
  return (
    request: NextRequest,
    response: NextResponse,
    defaultCacheControl?: string
  ) => {
    Object.entries(matchers).map(
      ([rule, headerValue]: [string, string]): void => {
        // Match the URL pathname with the rule
        const urlMatch = match(rule, {
          decode: decodeURIComponent,
        });
        // Skip if the rule doesn't match
        if (!urlMatch(request.nextUrl.pathname)) {
          return;
        }

        // Set the Cache-Control header based on the rule
        response.headers.set('Cache-Control', headerValue);
      }
    );

    if (!response.headers.get('Cache-Control') && defaultCacheControl) {
      // Set the default Cache-Control header if no rule matched
      response.headers.set('Cache-Control', defaultCacheControl);
    }
    return response;
  };
}
This helper factory function allows us to set the cache control header based on the URL pathname. If no rule matches, it sets the default cache control header.
Usage
To invoke the TTL Helper within the middleware function, follow these steps:
Initialize the cacheControl helper with the cache control rules for selected pages.
Use the result function to set the cache control headers within the middleware function.
Here is how you can do it:
// apps/storefront-unified-nextjs/proxy.ts

import { createAlokaiMiddleware, env } from '@vue-storefront/next';

const cacheControlMiddleware = cacheControl({
  matchers: {
    '/cart': 'private, no-store, no-cache',
    '/checkout': 'private, no-store, no-cache',
    '/login': 'private, no-store, no-cache',
    // other pages
  },
});

export default createAlokaiMiddleware(async (request) => {
  //...

  // Set Cache-Control headers based on the pathname
  const defaultCacheControl = env('NEXT_DEFAULT_HTML_CACHE_CONTROL');
  response = cacheControlMiddleware(request, response, defaultCacheControl);

  return response;
});
Production Deployment
NEXT_DEFAULT_HTML_CACHE_CONTROL environment variable can be set directly in the Alokai Console environment settings. Check out Alokai Console documentation on Environment variables for more information.
Prepare development environment
To inform the application about the default cache control value, we need to add it to the .env file.
Modify .env file as follows:
# apps/storefront-unified-nuxt/.env

NUXT_DEFAULT_HTML_CACHE_CONTROL="public, max-age=0, s-maxage=15, must-revalidate"
Update Your Runtime Config
To update your runtime config and inform NuxtJS about the Cache-Control settings, add a new public runtime entry that sets the default cache control setting for the HTML.
Define defaultHtmlCacheControl value in the nuxt.config.ts file:
// apps/storefront-unified-nuxt/nuxt.config.ts
export default defineNuxtConfig({
  // ...
  runtimeConfig: {
    defaultHtmlCacheControl: process.env.NUXT_DEFAULT_HTML_CACHE_CONTROL,
  },
});
Create a Cache Control Composable
To create a composable that allows for easily setting the cache control header per page, Create the composable in /composables/useCacheControl.ts.
// apps/storefront-unified-nuxt/composables/useCacheControl/useCacheControl.ts

export const useCacheControl = function () {
  const event = useRequestEvent();
  const config = useRuntimeConfig();

  function setCacheControl(value?: string) {
    // Client-side check
    if (!event) {
      return;
    }
    const cacheControl = value ?? config.defaultHtmlCacheControl;
    if (!cacheControl) return;
    event.node.res.setHeader('Cache-Control', cacheControl);
    event.node.res.setHeader('Vary', 'Accept-Encoding');
  }
  return {
    setCacheControl,
  };
};
Usage
Here's how you can use the useCacheControl composable in a page to set the cache control header:
<script setup lang="ts">
const { setCacheControl } = useCacheControl();
setCacheControl();
</script>
Production Deployment
NUXT_DEFAULT_HTML_CACHE_CONTROL environment variable can be set directly in the Alokai Console environment settings. Check out Alokai Console documentation on Environment variables for more information.
Validating setup
Run your project in a production mode.
yarn build && yarn startOpen the network tab of your browser’s dev tools.
The first request upon visiting the page - the one that downloads initial HTML - should receive Cache-Control header attached to the response.