Create new Alokai Next.js Project
For the base of our project, we will use the Alokai Next.js starter project. This project is a great starting point for building an Alokai application with Next.js. It includes everything you need to get started, including a basic project structure, configuration files, and a set of pre-configured tools.
You can find the Alokai Next.js starter project on GitHub.
Next.js Starter Project - https://github.com/vuestorefront-community/nextjs-starter
This is a bare minimum monorepo setup created with Turbo. During this guide, we will use the nextjs-starter project to create a new Alokai project. We will install all the necessary dependencies and configure the project to work with Alokai.
Prerequisites
For this guide we will use SAP Commerce Cloud as the backend, but you can use any backend of your choice. Make sure you have your SAP Commerce Cloud instance up, running and accessible via REST API.
Get the Alokai Next.js Starter Project
To create a new Alokai project with Next.js, you will need to clone the nextjs-starter project from GitHub. You can do this by running the following command in your terminal:
git clone git@github.com:vuestorefront-community/nextjs-starter.git
Once you have cloned the nextjs-starter project, navigate to the project directory and install the project dependencies by running the following command:
cd nextjs-starter
npm install
This will install all the necessary dependencies for the project.
Prepare the Project
Now that you have the nextjs-starter project set up, you need to prepare the project to allow for both the Next.js application and the Alokai Middleware to run in the monorepo.
Let's first configure the middleware application. Run the following Turbo command to install the middleware application:
npx turbo gen workspaceIt will prompt you to give a name to your workspace, as well as the name of the application. We will use middleware as the name of the application. In this case the name is the name of the workspace used by Turbo to manage the monorepo.
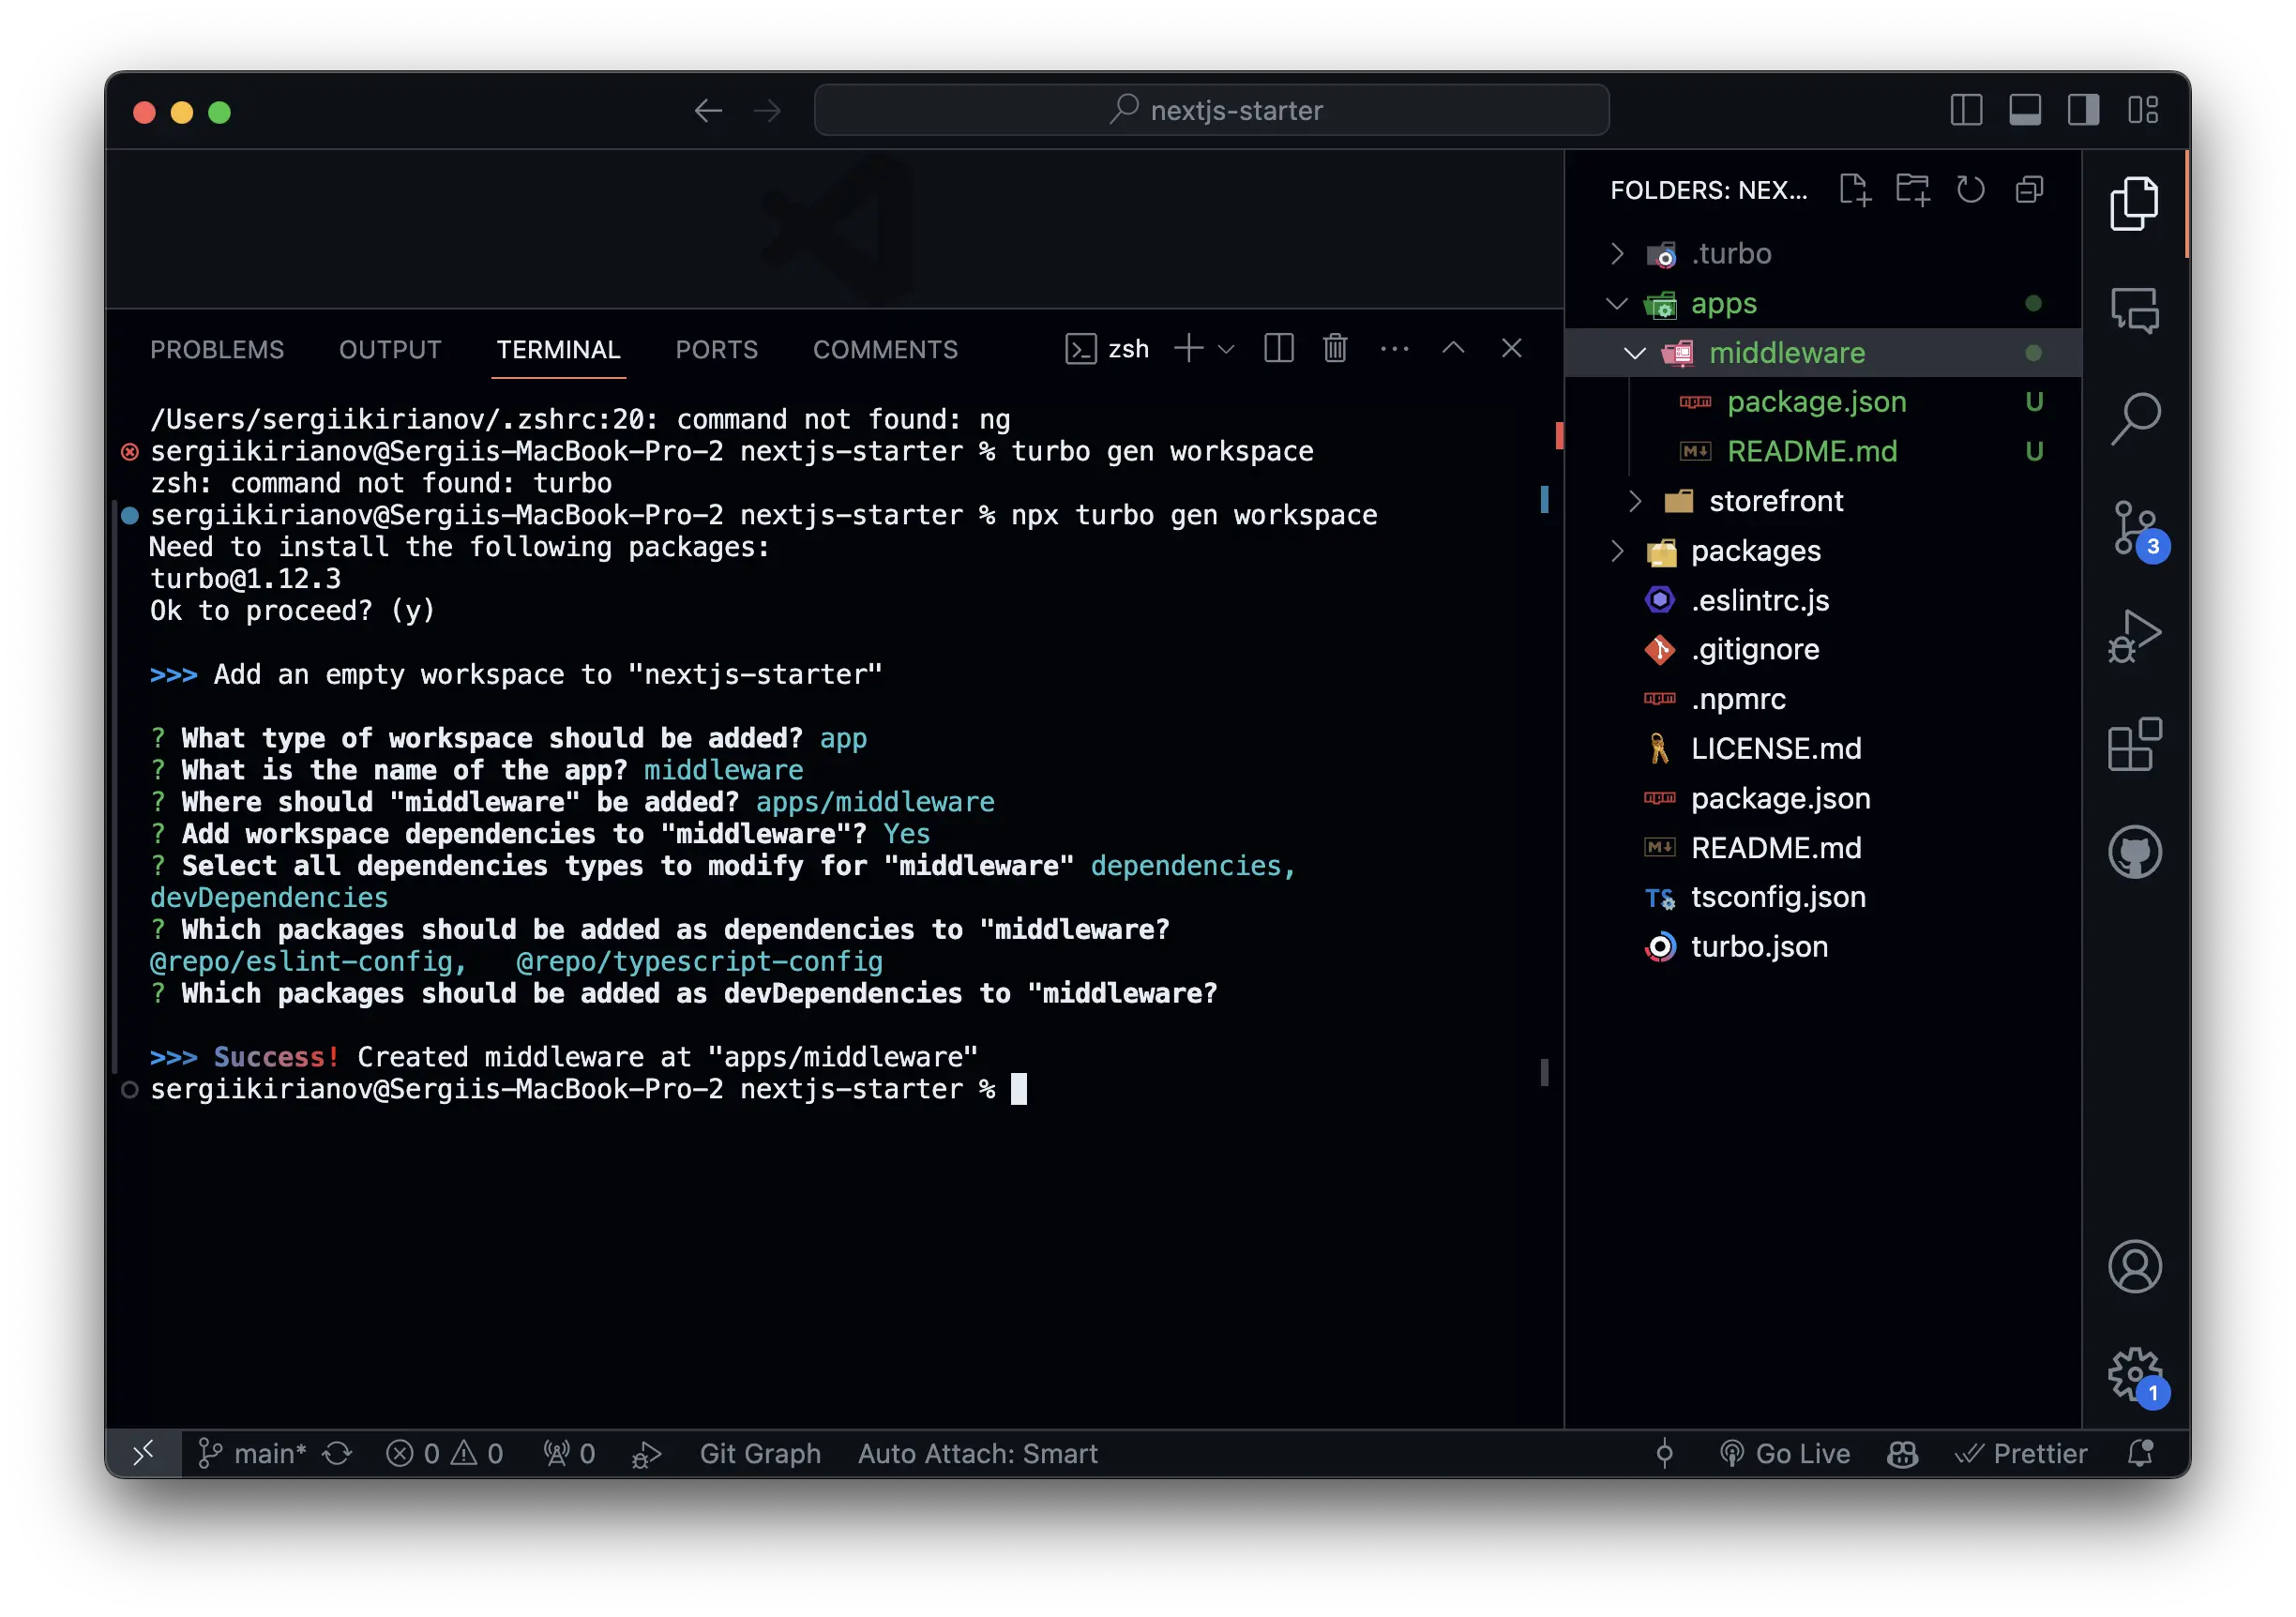
Once the workspace is generated, you will see a new middleware directory in the apps directory.
Great, our workspace is ready. Now we can move on to the next step and configure the middleware application.
Summary
In this section, we have learned how to create a new Alokai project with Next.js. We have cloned the nextjs-starter project from GitHub and installed all the necessary dependencies. We have also prepared the project to allow for both the Next.js application and the Alokai Middleware to run in the monorepo.
In the next section, we will configure the middleware application and run it alongside the Next.js application.