



Getting started
Define your first feature, see it in the panel, and read its values back in the storefront.
This section is for developers. If you're here to edit content in the panel, read Using the Panel instead.
Alokai Connect Admin is a storefront module. It's not a separate product you host or subscribe to - it ships as a module inside your existing Alokai project, like the other Alokai modules. The module serves the admin panel from your middleware, and gives you a small API for defining what the panel shows.
This module is installed into your project by the Alokai team. To get access to this module and installation assistance, please contact the Alokai sales team or reach out to your Customer Support Manager.
This page takes you from zero to a working feedback loop: by the end of it you'll have one editable form in the panel and a storefront component that renders what you saved.
If your project has no apps/storefront-middleware/sf-modules/connect-admin/ directory, the module isn't installed yet - reach out to the Alokai team before going further.
The integration key is the URL prefix
The panel is served under the integration key. Keep it as connect-admin - renaming it moves every URL, including the workflow webhook.
Define your first feature
A feature is one area of your app you administer. It groups views, and each view is one screen in the panel.
Create the feature
import { defineFeature } from '@alokai/connect-admin/server';

export const siteBanner = defineFeature({
  description: 'The promotional banner on the homepage.',
  enabled: true,
  id: 'site-banner',
  name: 'Site Banner',
  views: [
    {
      defaults: {
        banner: { headline: 'Free shipping this week', showBanner: true, tone: 'info' },
      },
      id: 'banner',
      kind: 'form',
      label: 'Banner',
      schemas: {
        banner: {
          fields: [
            { kind: 'text', label: 'Headline', name: 'headline', required: true },
            { kind: 'boolean', label: 'Show the banner', name: 'showBanner' },
            {
              kind: 'select',
              label: 'Tone',
              name: 'tone',
              options: () => ['info', 'success', 'warning'],
            },
          ],
        },
      },
    },
  ],
});
Register the feature
Features reach the panel through the module's integration config, already in place in your project. Import your feature and add it to configuration.features:
import { defineConfig } from '@alokai/connect-admin/server';

import { siteBanner } from './features/site-banner';

export const config = defineConfig({
  configuration: {
    features: [siteBanner],
  },
  location: '@alokai/connect-admin/server',
});
The first feature is the landing page
Opening /connect-admin redirects to the first view of the first feature in configuration.features - keep that in mind when deciding where in the list to add yours.
See it in the panel
Open the panel
Start the middleware and open http://localhost:4000/connect-admin (use your middleware port). It redirects to the first registered view and asks you to sign in - see Getting around for how signing in works and where the credentials come from.
Edit and save
Site Banner appears in the sidebar, and its form lives at /connect-admin/banner - the view id is the URL.
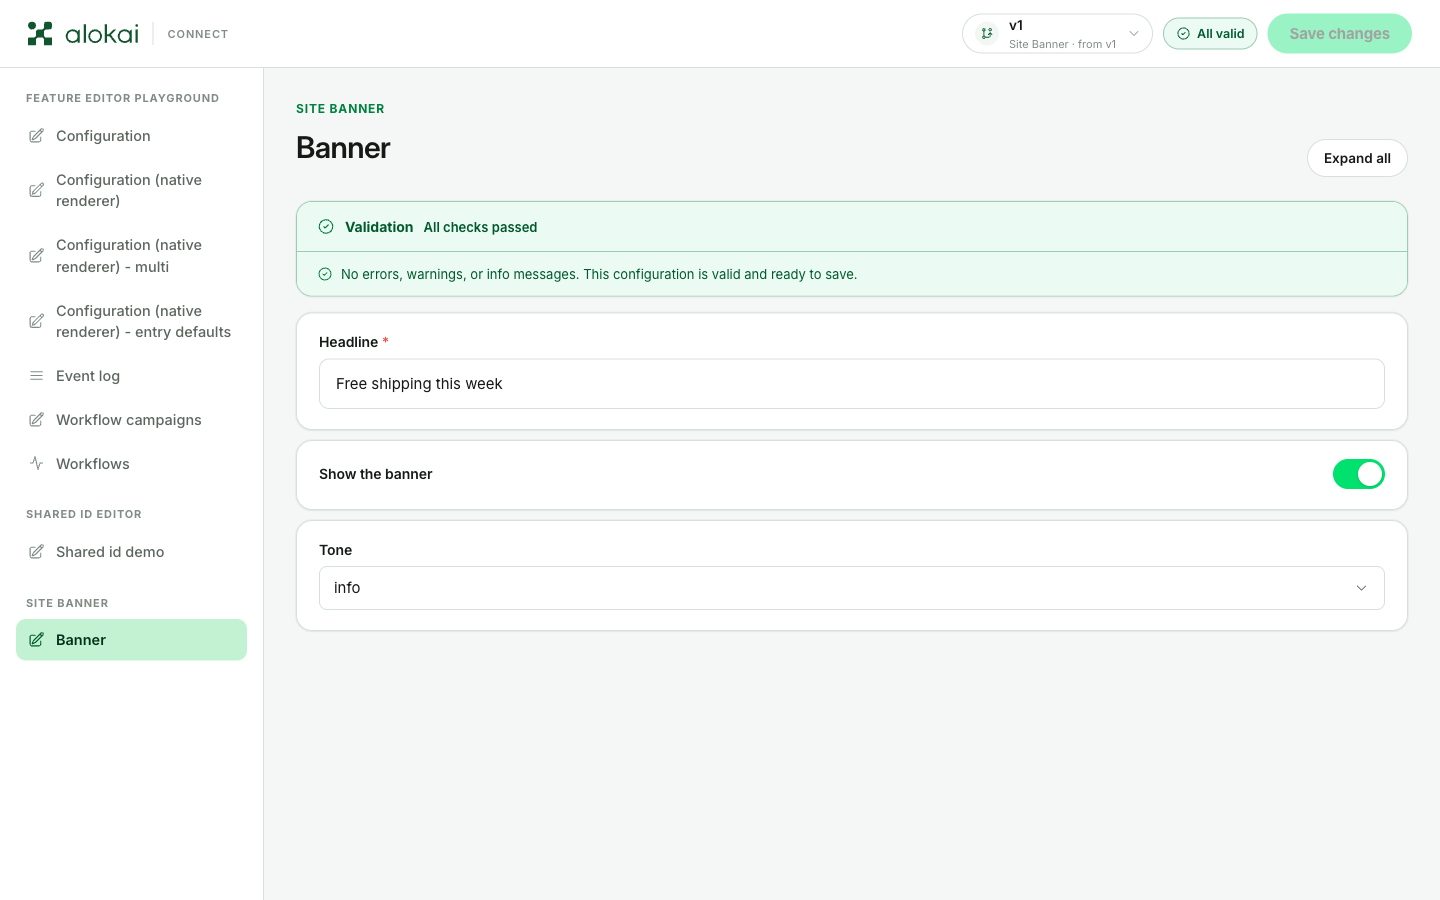
Change the headline. The editor saves on its own about a second after you stop typing (the Save changes button does the same thing). On a fresh feature you're editing the live version in place - the storefront picks the new value up on its next read, no publish step needed. When you want to stage changes instead of editing live, create a new version from Version history and make it live when it's ready.
Read the values in the storefront
The installation already registers a connectAdmin SDK module for you - sdk/modules/connect-admin.ts in Next.js, sdk-modules/connect-admin.ts in Nuxt - so the SDK client can read the panel's values right away:
const response = await sdk.connectAdmin.getFormValues({ viewId: 'banner' });

const banner = response?.values.banner;
// { headline: 'Free shipping this week', showBanner: true, tone: 'info' }
The result is keyed by the view's schema keys (banner here). Before anyone saves anything, you get the defaults from the code, so the call is safe to render from. The one exception: if the view declares templateVariables and that resolver throws, the call throws too instead of handing you the defaults.
viewId is the only required parameter, but getFormValues accepts more:
| Parameter | What it does |
|---|---|
viewId | Which form view to read. Required, and only kind: 'form' views can be read. |
featureId | Which feature's view, when more than one feature declares the same viewId. Without it, an ambiguous id resolves to the first feature that declares it - the same rule the panel's URLs follow. |
versionId | Read one specific version from the feature's history instead of the live one. |
inputs | Values for the view's templateVariables inputs, keyed by input id - the runtime context a variable resolver needs to do its work, for example the current SKU. |
interpolate | Whether to resolve {{ }} template tokens before returning (default true). Set it to false to get the raw authored text with the tokens intact. |
The full story of runtime reads - the version resolution order, previews, and what a disabled feature returns - is in the Reading values chapter of the Forms page.
Query it outside the storefront
getFormValues is a plain HTTP endpoint on the middleware, and the read side never requires signing in - so you can inspect it with curl or Postman. The middleware convention is a POST to /connect-admin/getFormValues with the method's arguments as a JSON array in the body:
curl -X POST http://localhost:4000/connect-admin/getFormValues \
  -H 'content-type: application/json' \
  -d '[{ "viewId": "banner" }]'
In Postman that's a POST to the same URL with the array as the raw JSON body. The response wraps the values exactly the way the SDK hands them to you - keyed by the view's schema keys under values:
{
  "values": {
    "banner": {
      "headline": "Free shipping this week",
      "showBanner": true,
      "tone": "info"
    }
  }
}
When nothing matches - no such feature, no such form view - the endpoint answers with null instead.
A view marked serverOnly answers null here, as if it didn't exist - it can only be read from code inside the middleware. See Keeping a view off the internet.