



Forms
Fill in forms, save your work, preview it, and make it live.
Forms are where most of the everyday work happens. This page explains what a form is made of, what the checks tell you while you type, how your work is kept in versions, how to combine two versions into one, and how a change travels from your screen to something every visitor of your site can see.
Editing a form
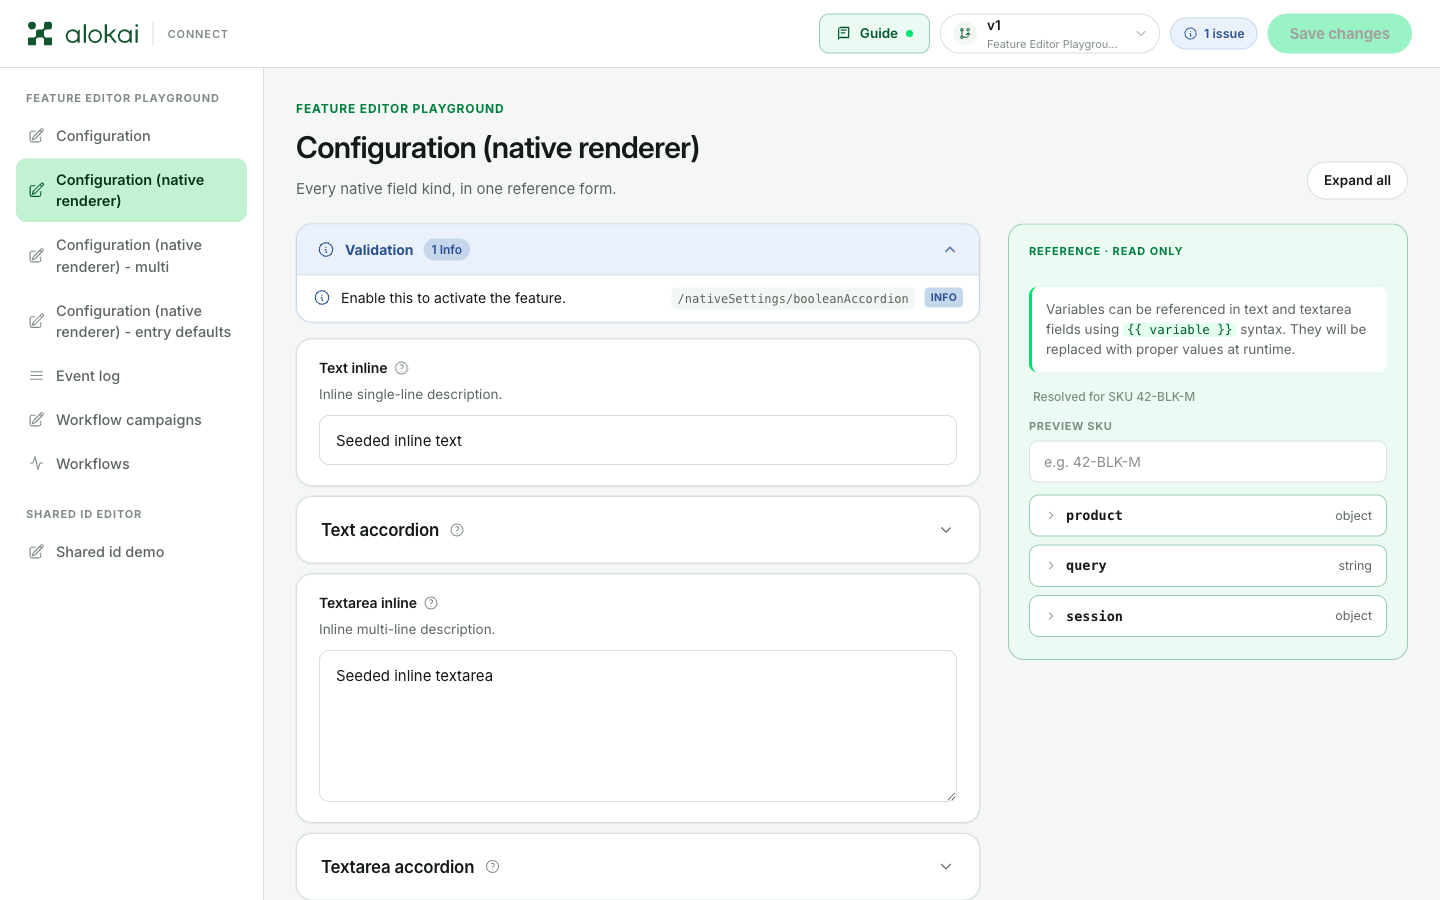
A form is a set of fields. A red star next to a label means the field is meant to be filled in, and the small ? icon next to some labels shows a short hint when you point at it.
Fields come in a handful of shapes:
- Text boxes - a single line for short values, or a taller box for longer text.
- Number boxes - type a number, or nudge it with the little arrows.
- Switches - turn something on or off with one click.
- Choice rows - a row of buttons where exactly one is selected at a time.
- Dropdowns - pick one option from a list; long lists have a search box built in.
- Multi-pick fields - pick several options at once, either as clickable chips or as a dropdown with checkboxes; a counter tells you how many are selected.
- Tag lists - type a value and press Enter to add it as a small tag; click a tag's × to take it out.
- Editable lists - rows of values you can drag into the order you want and remove. Some let you type the value; others give you a list to pick from, and the row then shows what you picked.
- Sentence rules - a whole rule written out as one plain sentence, where every part you decide is a small chip you fill in; a + repeats part of the sentence, so one rule can carry several conditions.
- Groups - related fields collected under one heading; some fold shut to keep the page tidy.
- Key-value tables - add an entry, give it a name, then fill in its value.
Your exact form depends on what your developers set up for your project - but every field on it is one of these.
The lists you pick from are loaded when you open the screen. If somebody adds a new value on your side while you have it open - a new category, a new attribute - reload the page to see it.
You don't have to press anything to keep your work: the panel saves your changes on its own, moments after you stop typing. If you'd rather save immediately - or the automatic save reports a problem - the Save changes button at the top does it on the spot.
Picking from lists
Most of the choices you make in a form come from lists - groupings, categories, colours, attributes. A few things about those lists explain what you'll sometimes see on a field.
A value that's no longer on the list
A list can change after you've picked from it: somebody deletes a grouping, or a category is renamed. The panel never removes your pick on its own. It keeps the value and marks it instead - the value reads (unavailable), and the field turns amber so it stands out. In the rule below, "Shower screens" was picked back when it was still a grouping:
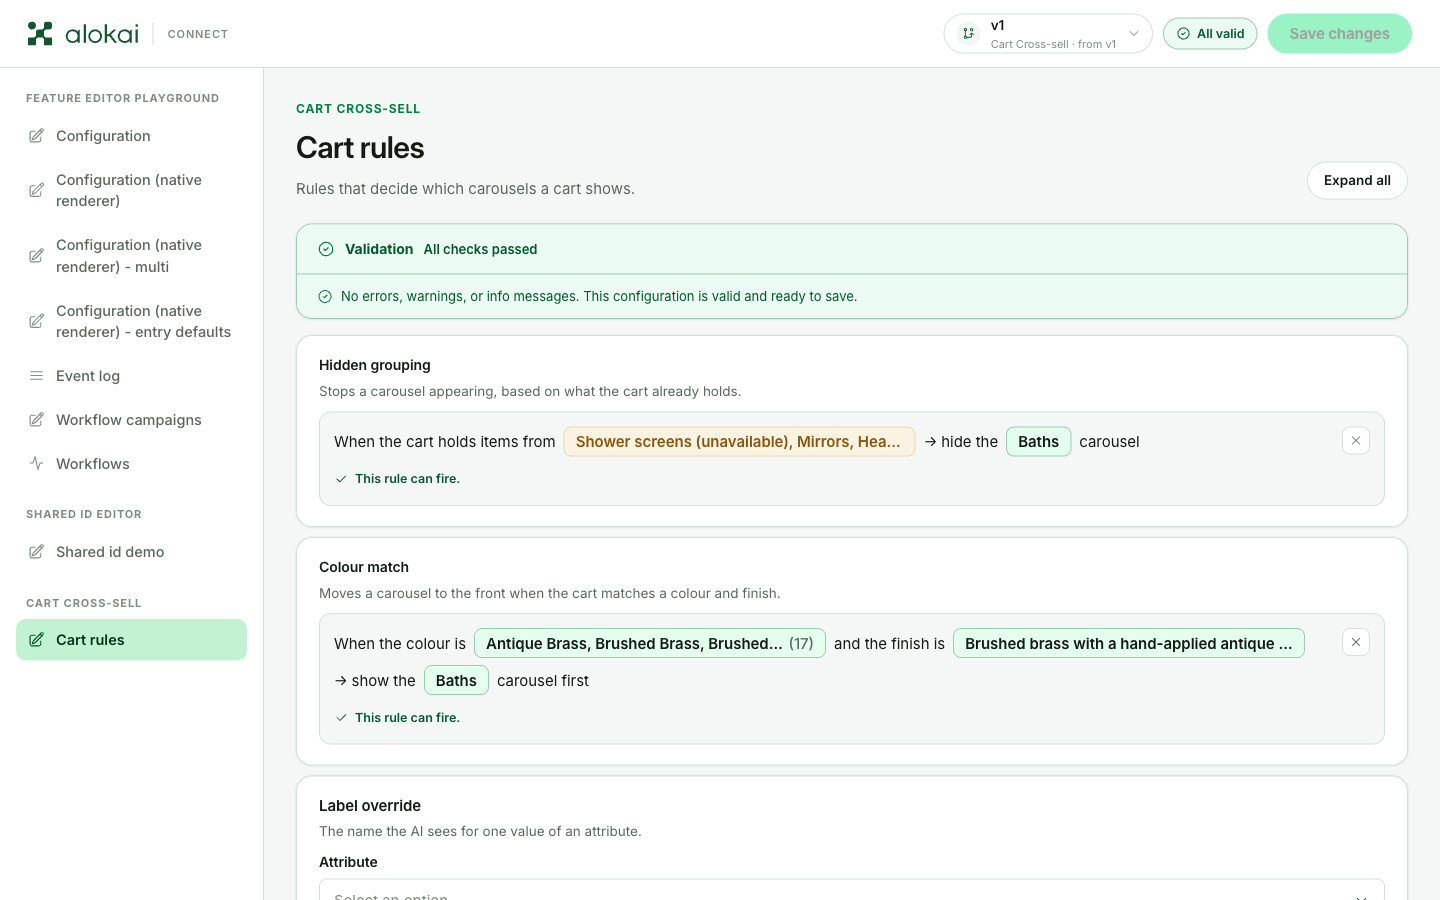
Open the field and the value is at the top of its list, ticked, in the same amber. Untick it to take it out of the rule. Once it's gone you can't pick it again, because the list no longer has it.
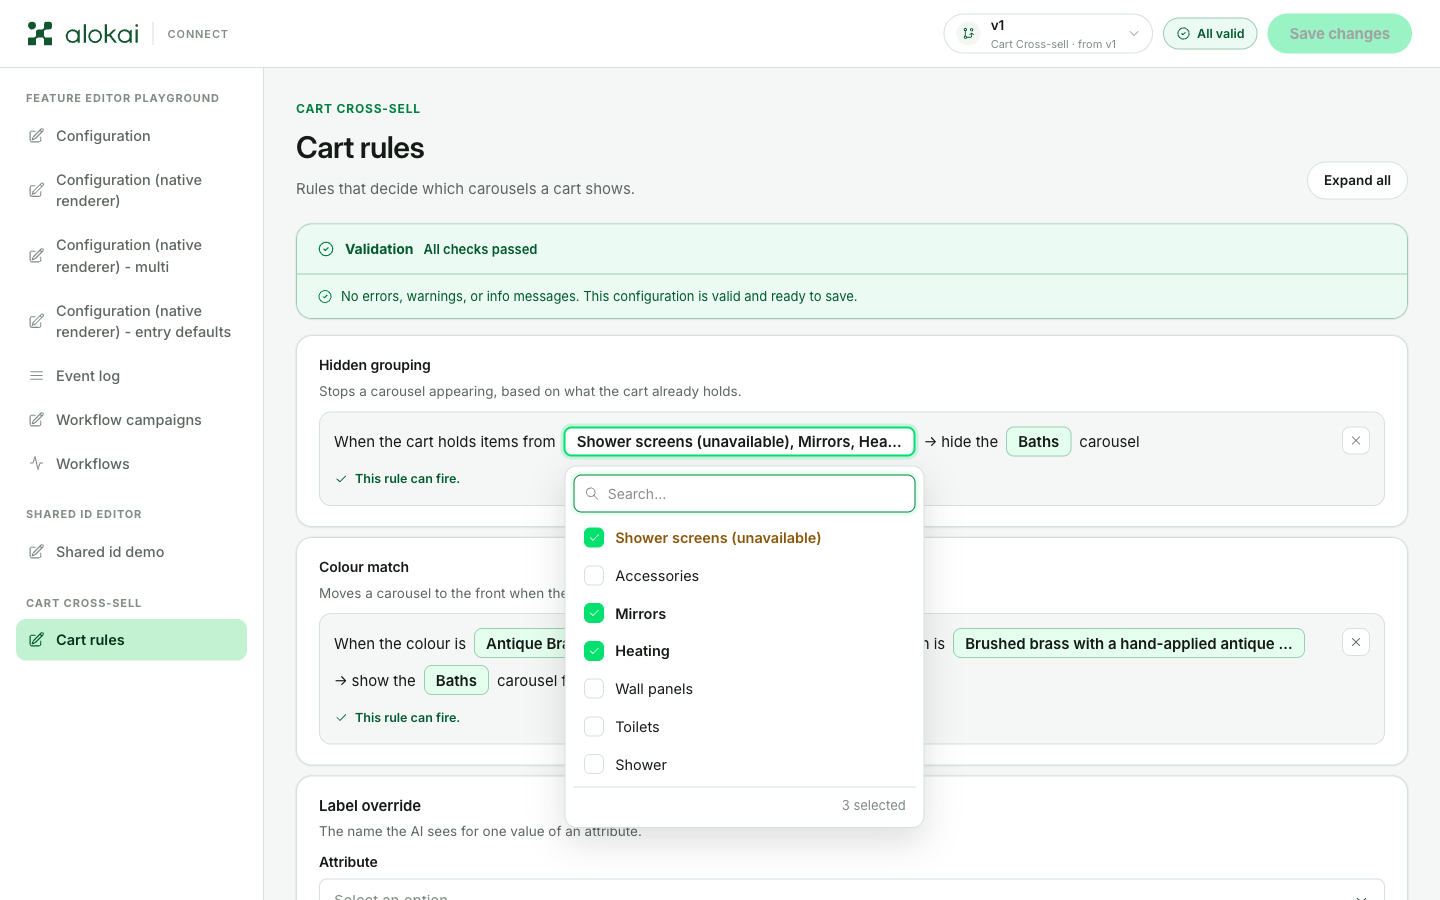
Nothing is changed for you, so opening a form never rewrites a rule you didn't touch - your saved work stays exactly as it was until you untick the value yourself. If the value comes back to the list later, because the grouping is created again, it simply becomes a normal pick.
A list that waits for another field
Some lists depend on what you picked in another field. The values you can hide for an attribute, for example, depend on which attribute you chose. Until that other field is filled in, the dropdown is greyed out and tells you what to pick first:
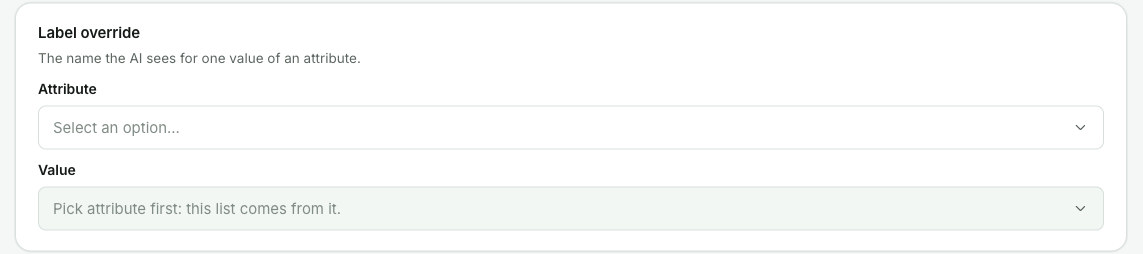
Once you pick it, the list follows your choice. If you change that choice later, anything you'd already picked that doesn't fit the new one stays in place and is marked unavailable, as described above, so you can decide what to do with it.
Long lists
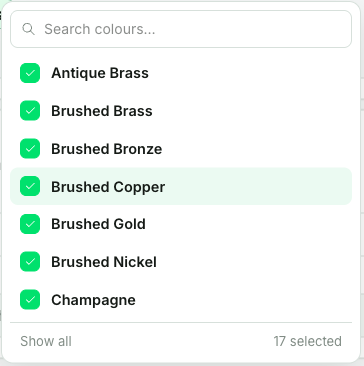
When a list with more than ten options has something ticked, a Show selected button appears at the bottom of it. It narrows the list to just your picks, so you can check them without scrolling through everything; Show all brings the rest back.
Chips that hold a lot
A chip in a sentence rule always stays on one line, so the rule keeps reading like a sentence. With more than three values picked, the chip names the first three and adds the count in brackets - Antique Brass, Brushed Brass, Brushed… (17) in the first screenshot of this section. A value that's too long for the chip ends in "…". Point at the chip to read all of it.
Validation
While you type, the panel checks your values and tells you what it found. The checks never stop you from saving - the panel always keeps what you typed, even while a value is wrong or half-finished. They're there to tell you what to fix before you make this version live for everyone.
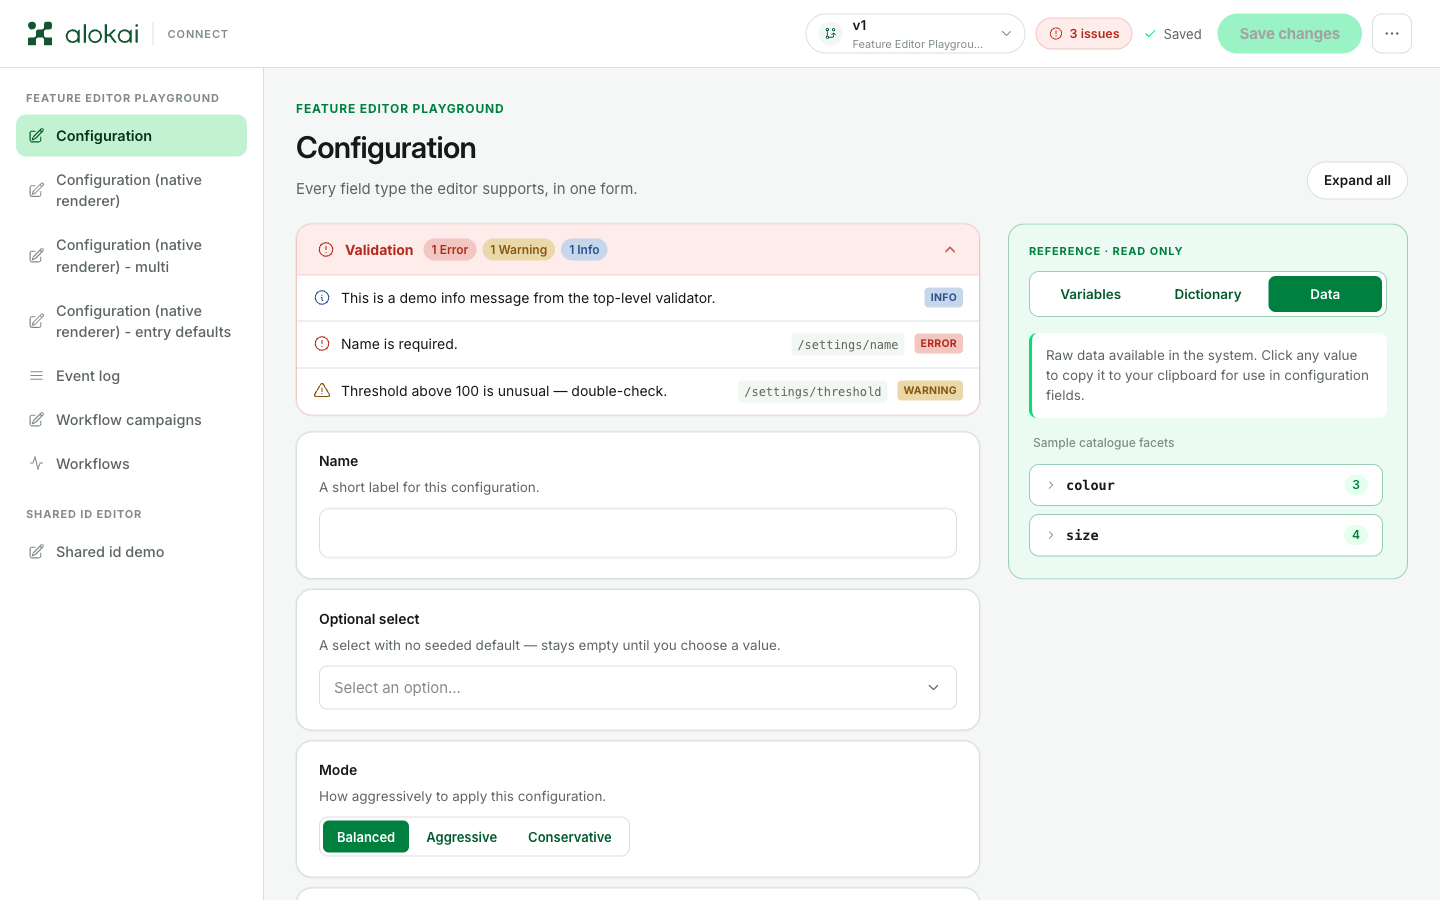
Messages don't appear under the fields. They all collect in one Validation card at the top of the form, and the card counts them by kind - the card also takes the color of the most serious message in it. The bar at the top of the screen shows the same thing in short: 3 issues, or All valid when everything passes. Click it to jump to the card, and click any message in the card to jump straight to the field it talks about.
The color of a message tells you how serious it is:
- Red is an error. Something about the value is wrong. Fix it before you make this version live.
- Yellow is a warning. The value is allowed, but the message gives you advice worth reading.
- Blue is information only - a hint, not a problem.
Messages appear a moment after you stop typing - about a third of a second. A red message on a half-typed value is completely normal: finish typing, and it goes away on its own.
Versions: how your work is stored
The header shows how saving is going: Unsaved changes, then Saving…, then Saved.
If saving fails, keep the tab open
When saving fails you'll see Couldn't save in the header. Don't close the tab until it says Saved again - the panel keeps no second copy of your work, so anything that never reached the server is lost with the tab.
A feature keeps a history of versions. Exactly one version is live - that's the one your site shows to visitors. Making a different version live is how you publish.
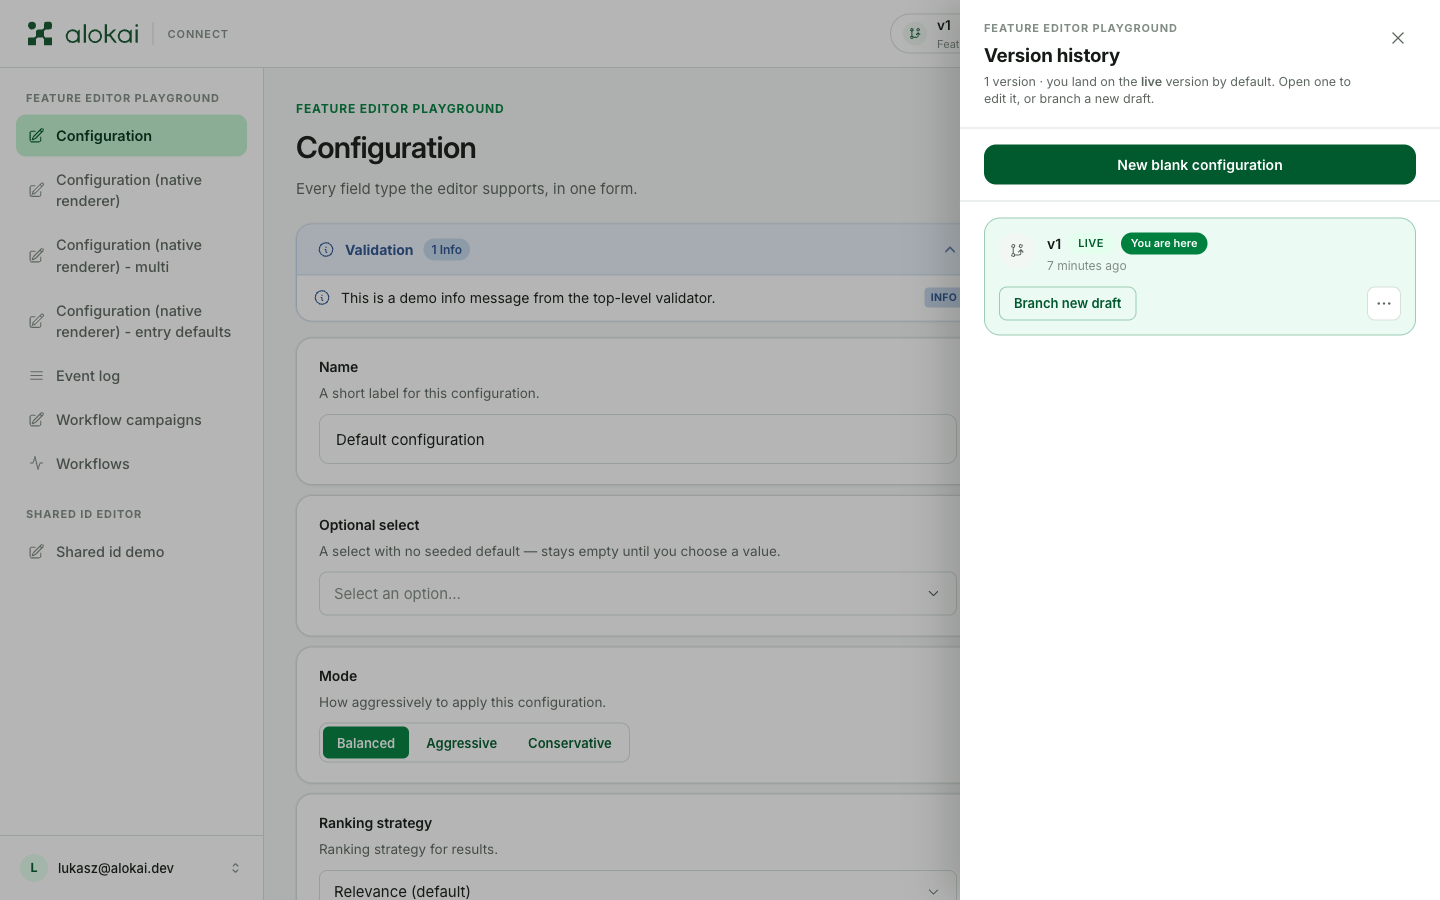
Every version in the history has a ⋯ menu (the three dots on the right). What it offers depends on the version:
- Set as live - make this version the one visitors see. Only on a saved version that isn't already live.
- Set live only for me - see Previewing before you publish.
- Merge into current - bring this version's values into the one you're editing. See Merging two versions.
- Rename - give the version a name you'll recognize later.
- Discard draft - throw away a draft you don't want to keep.
- Remove - delete a saved version.
There's no undo and no restore button. To go back to an older version, open it from the history and choose Set as live.
Editing the live version changes the site
Because your typing is saved automatically, editing the version that's currently live means your changes reach the real site as you type. If you're preparing a change, work on a new version and make it live when it's ready.
What if two people edit at the same time?
This happens more often than you'd think, and the panel handles it safely. If a colleague changes the same version while you're editing it, your work doesn't overwrite theirs. The panel saves your changes as a new draft sitting next to their version and tells you so. Both sets of changes are kept.
A draft can't be made live as it is. Save it once - the panel gives it a version number, and Set as live then appears in its menu. From there you can compare the two, adjust yours if you need to, and make it live when it's ready.
One more thing worth knowing: version history belongs to the whole feature, not to a single screen. If a feature has several form screens, they share one history - so a colleague saving on a different screen of the same feature adds to the same timeline you see.
Merging two versions
Sometimes you end up with two versions that each hold something worth keeping - yours and a colleague's, or a fresh draft and the version that's live. You don't have to copy values across by hand: the panel has a merge editor.
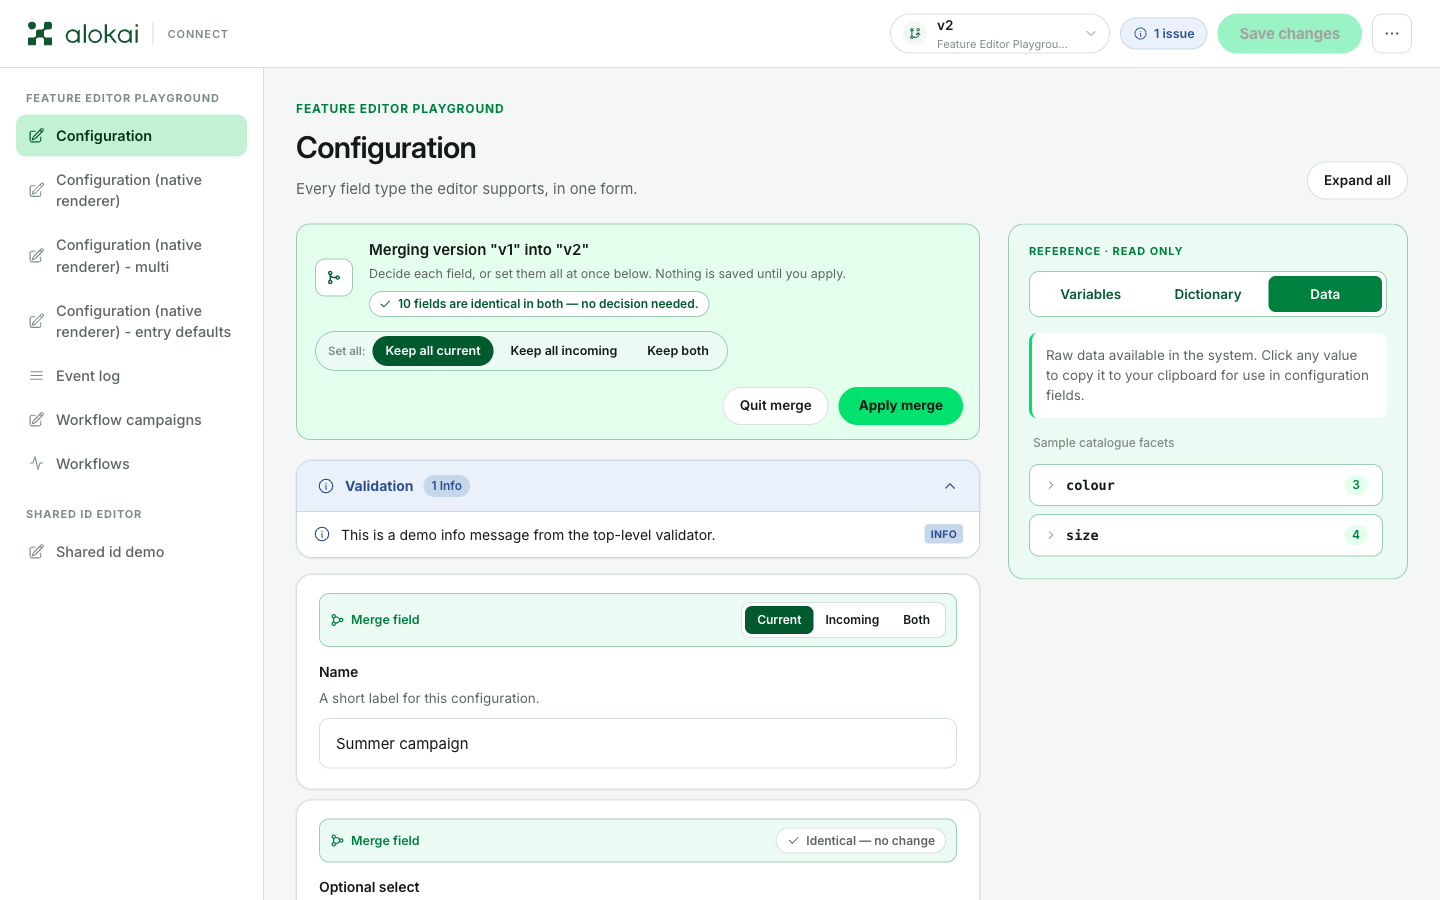
In the version history, open the ⋯ menu of the version you want to pull values from and choose Merge into current. The version you're editing stays your base - the panel calls it current - and the version you picked becomes incoming.
The form then switches into merge mode:
- Fields with the same value on both sides are marked as identical - the banner counts them, and there's nothing to decide about them.
- Every field that differs gets a small picker above it: Current keeps your value, Incoming takes the other version's value, and Both combines the two - texts are joined, lists are put together. Both only appears where combining makes sense, and while it's selected, each item is labeled with the version it came from and you can still edit the combined result by hand.
- Every field starts on Current, so if you touch nothing and apply, nothing changes.
- The Set all buttons in the banner decide every field at once: Keep all current, Keep all incoming, or Keep both.
On screens that hold a list of entries rather than one set of fields, the panel pairs the entries up first. Pairs that differ are marked Needs review. An entry that exists in only one of the two versions gets a simple Keep or Reject choice instead of a picker.
Nothing is saved while you're deciding - the automatic save pauses for the whole merge, exactly as the banner promises. When you're done, Apply merge puts the combined values into your version as unsaved changes, so you can read the result before it saves. Quit merge asks for confirmation and then puts everything back exactly as it was, with none of your decisions applied.
Previewing before you publish
Publishing straight to the site can feel risky, and you don't have to. In the version history, each version's ⋯ menu offers Set live only for me. Turn it on and that version becomes the one your browser reads, while everyone else still gets the live one. The version then shows a Live only for me badge, and the same menu offers Stop preview (live for me) to switch it off again.
Whether the preview also shows up on your site depends on how your project is set up - on many production setups it only works on a test version of the site. If you switch it on and your site doesn't change for you, ask your developers whether your setup supports it.
So the safe way to prepare a change is:
- Create a new version (or continue the one you were working on).
- Edit it - your typing is saved into it automatically.
- Turn on Live only for me and check the result.
- Happy with it? Choose Set as live. Now everyone sees it.
Three limits to remember:
- The preview works only in your own browser. You can't share it by sending someone a link - if they open it, they'll see the live version, not yours.
- The preview switches itself off after 8 hours.
- Turn it off when you're done. If you forget, your browser keeps showing you values that nobody else sees, which gets confusing quickly.