Amplience
Amplience is a powerful dynamic content management system that allows developers to manage, deliver, and optimize content for various digital experiences. This guide presents how to add the Amplience module to your Storefront.
Read more
Check the Content Management System Overview to learn more about the features of the Amplience module.
Bootstrapping Amplience with Alokai Storefront
To get access to this module and installation assistance, please contact the Alokai sales team or reach out to your Customer Support Manager.
Update variables
By default, the module installation will connect your Storefront to our demo Amplience hub. To connect it to a different hub, update both .env.example and .env files in the Middleware directory.
- AMPL_HUB_NAME=<alokai-amplience-hub-name>
+ AMPL_HUB_NAME=<your-amplience-hub-name>
- AMPL_STAGING_ENV=<alokai-amplience-staging-env>
+ AMPL_STAGING_ENV=<your-amplience-staging-env>
Read the Amplience docs to find out where to get your hub_name and staging_environment.
Make sure you have bootstrapped your Amplience hub before connecting it to your Storefront.
Bootstrapping Amplience
Before you start using our Amplience integration with your Amplience hub, you need to import Alokai schemas into your hub. They are aligned with our out-of-the-box frontend components.
Prerequisites
Before you start, make sure you have an empty Amplience hub with:
- two locales:
de-DEanden-GB, - an Amplience repository called
Content.
Import integration schemas
If you have installed the Amplience module in your Storefront, you will find the default schemas provided by Alokai in the apps/storefront-middleware/sf-modules/cms-amplience/schemas directory. They contain:
- the latest version of content type schemas meant to be used with the integration's frontend components,
- example content items for pages.
To import the schemas into your hub, install and use the CLI tool provided by Amplience. In the terminal, execute the following commands in the specified order, replacing <your_client_id>, <your_client_secret> and <your_hub_id> with correct values.
Your clientId and clientSecret should be granted to you by the Amplience team while setting up your hub. The hudId can be obtained in the dashboard.
1
Navigate to the schemas directory
cd apps/storefront-middleware/sf-modules/cms-amplience/schemas
2
Import content type schemas
dc-cli content-type-schema import ./content-type-schemas \
--clientId <your_client_id> \
--clientSecret <your_client_secret> \
--hubId <your_hub_id>
3
Import content types
dc-cli content-type import ./content-type \
--clientId <your_client_id> \
--clientSecret <your_client_secret> \
--hubId <your_hub_id>
4
Import content items. You can skip this step if you don't want to import the example content items.
dc-cli content-item import ./content-item \
--clientId <your_client_id> \
--clientSecret <your_client_secret> \
--hubId <your_hub_id>
Keep in mind that importing content items will not import associated media files into your Content Hub.
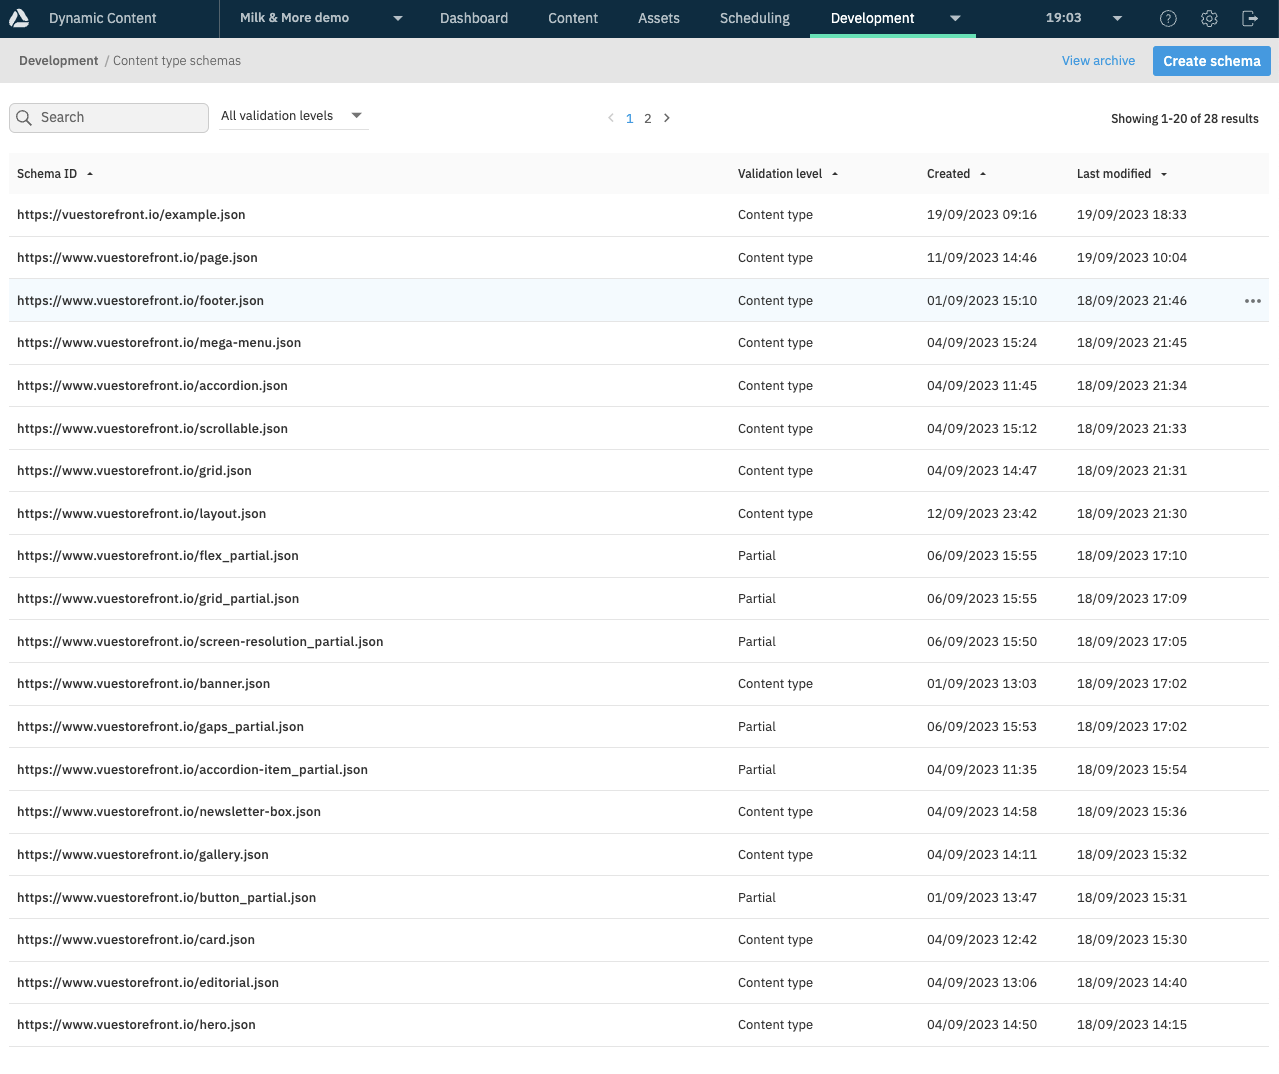
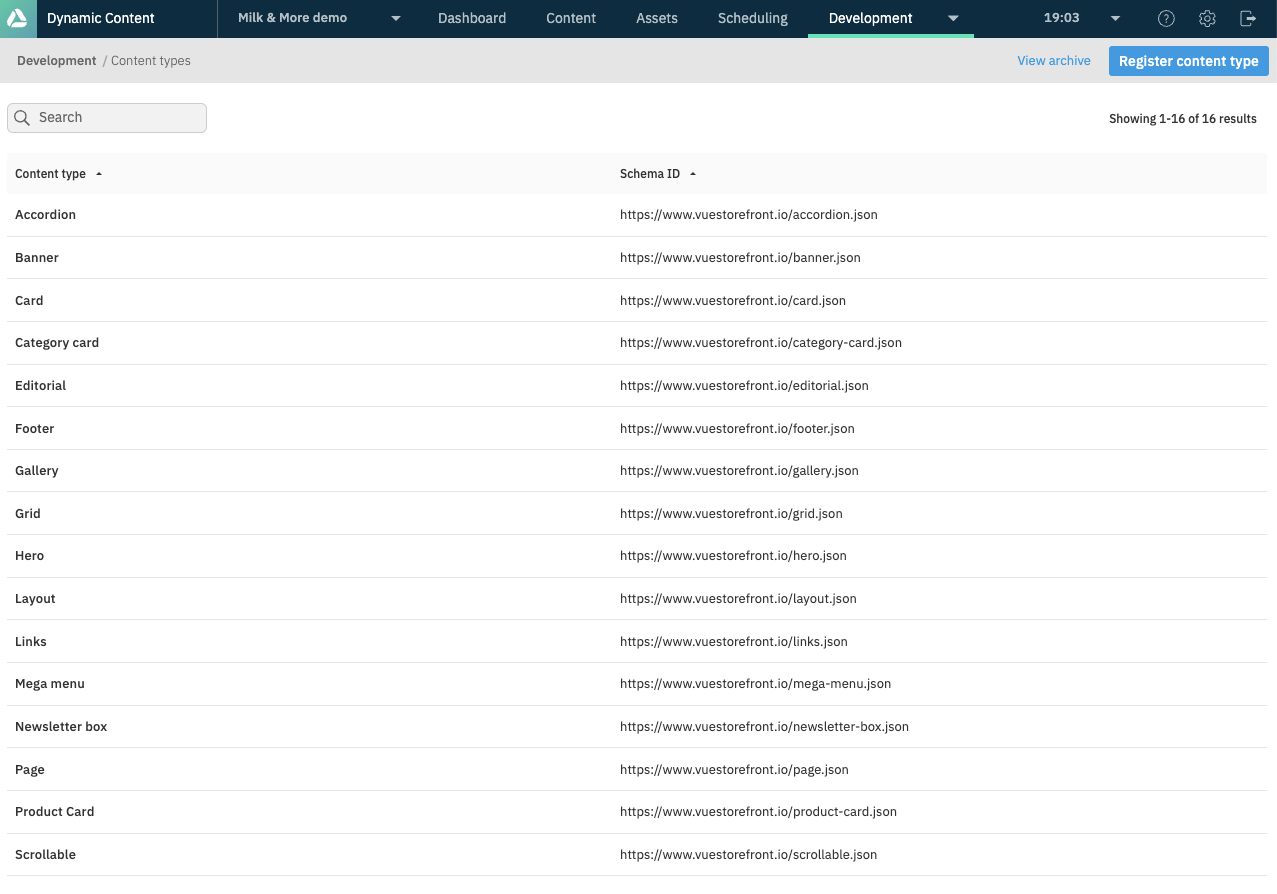
As a result, the default schemas and content types should appear in your Amplience hub:
Enable visualizations
Amplience offers a valuable feature called Visualizations, allowing content editors to effortlessly edit content items while simultaneously previewing frontend components within an embedded iframe on the Amplience dashboard.
Visualizations are established at the Content Type level. They can be set up not only for pages but also for any individual content type (such as Banners, Heroes, Accordions). An Amplience module comes with a dedicated /amplience-visualization page that can be used to preview content items.
To configure visualization for a specific content type in your Amplience Dynamic Content app, follow these steps:
1
Open your Amplience Dynamic Content app and navigate to the Development tab,
2
Click on Content types in the menu. This will display a list of available content types,
3
Choose the content type for which you wish to set up visualizations.
4
Proceed to the Visualizations tab within the selected content type.
5
Set up a new visualization. Amplience allows setting up multiple visualizations for a single content type, so you can create one for a local environment and another for a staging/production environment.
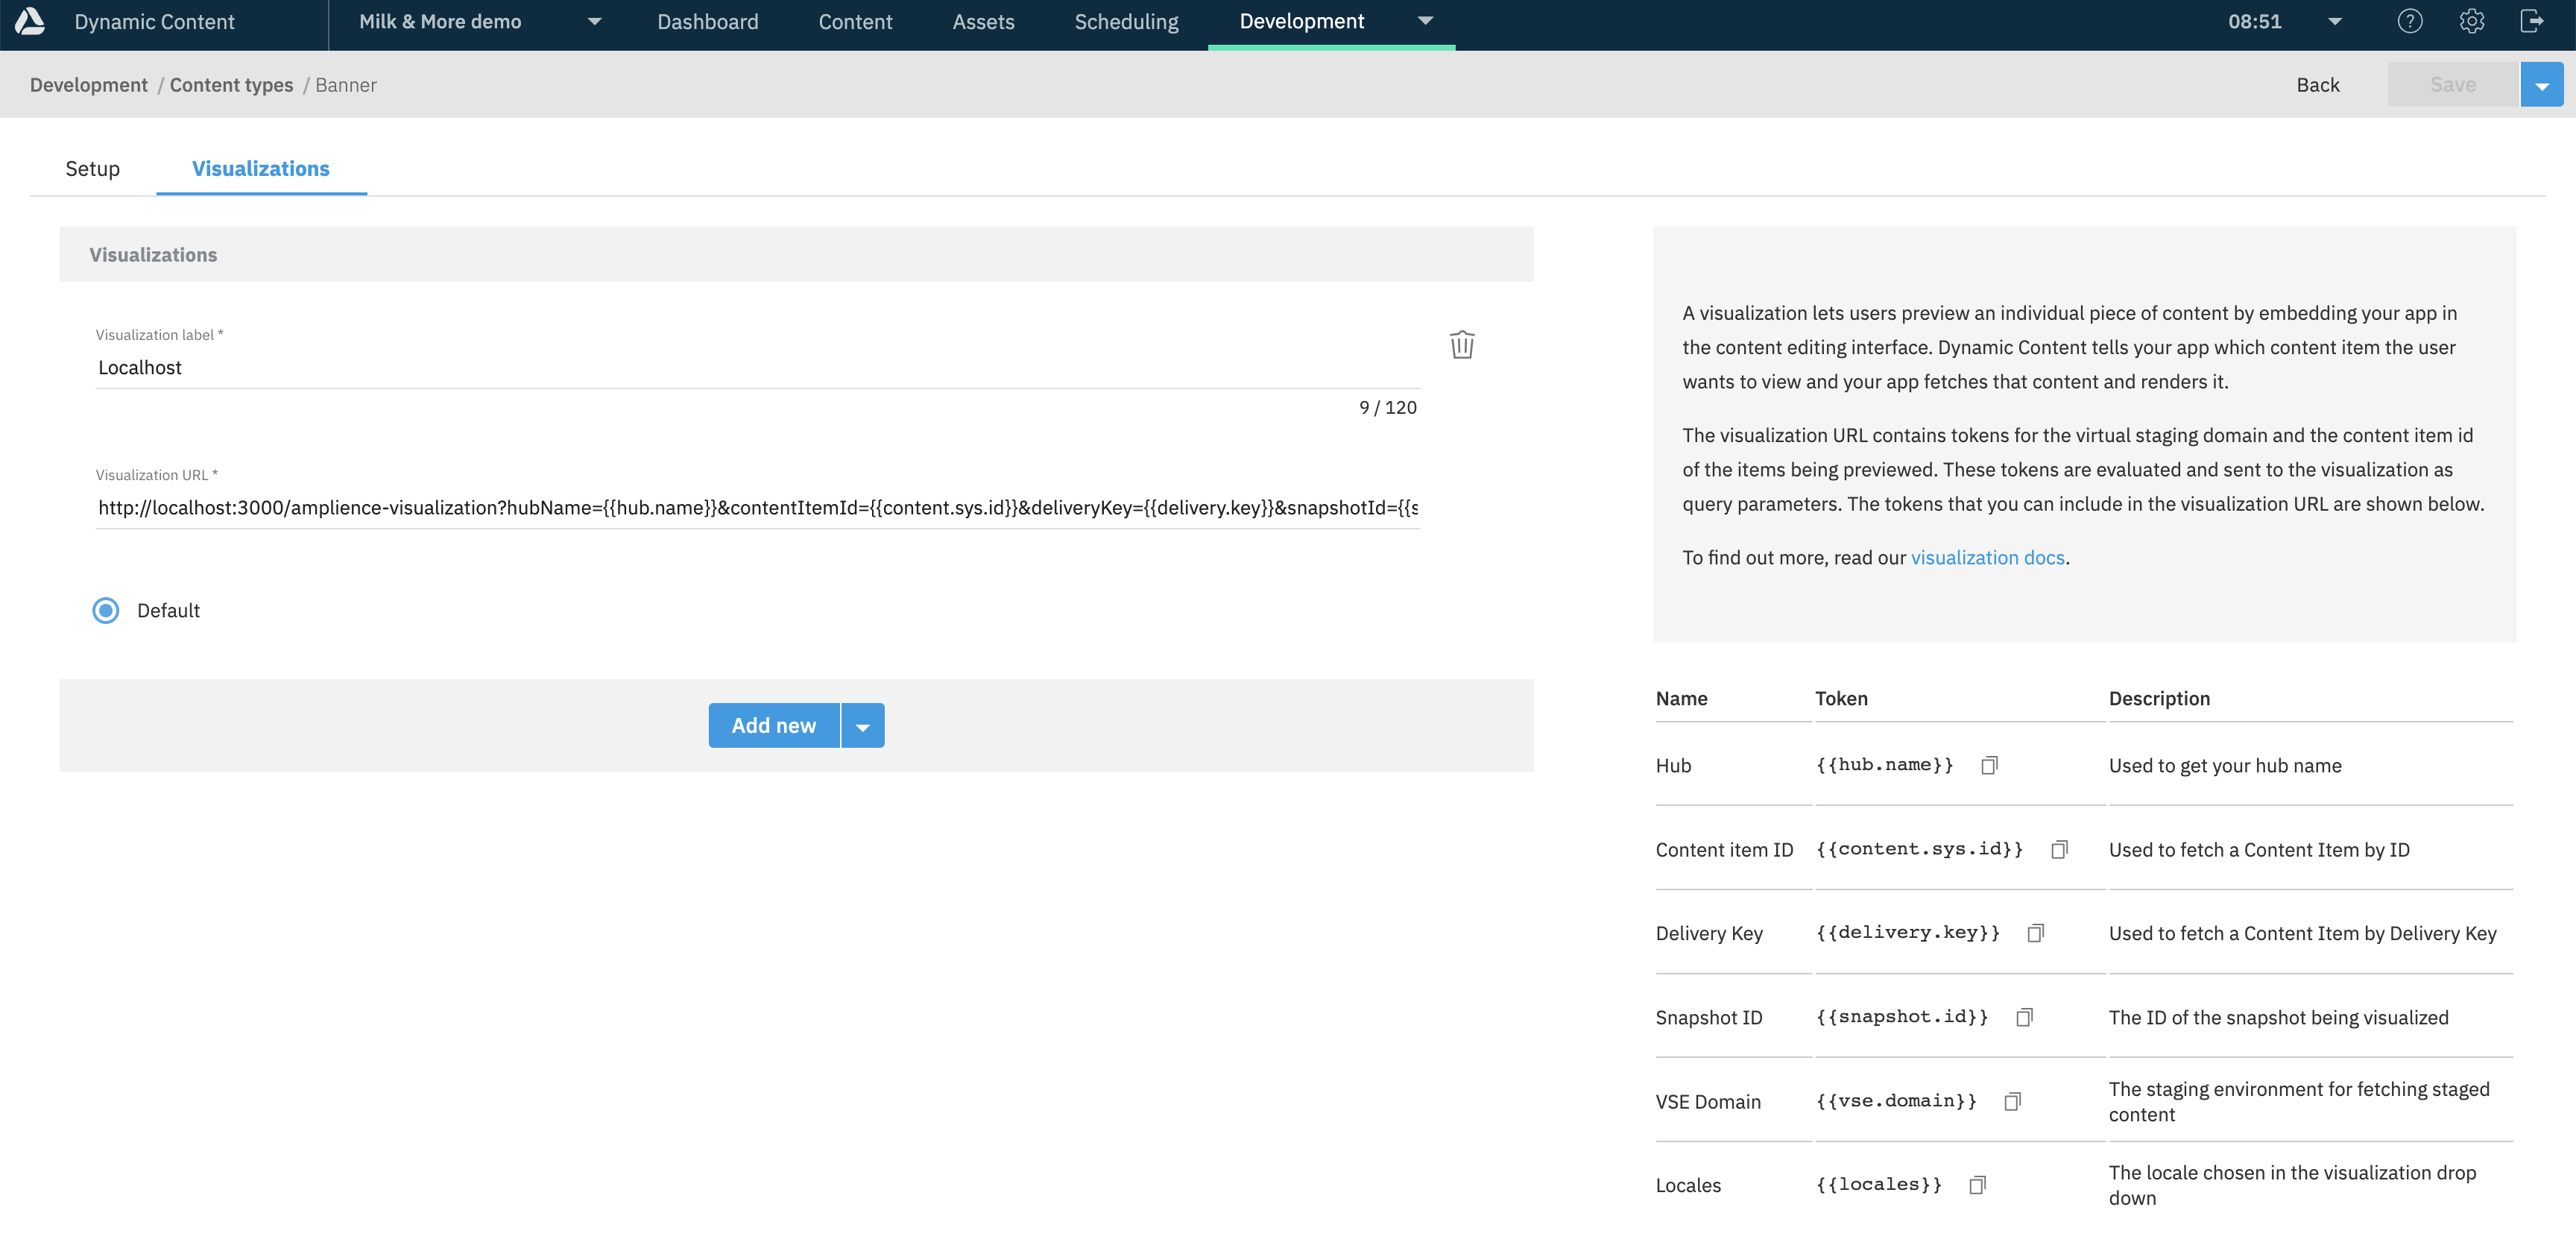
Set the following URL as the visualization URL:
http://your-app-host/amplience-visualization?hubName={{hub.name}}&contentItemId={{content.sys.id}}&deliveryKey={{delivery.key}}&snapshotId={{snapshot.id}}&vseDomain={{vse.domain}}&locales={{locales}}

EXAMPLE:
http://localhost:3000/amplience-visualization?hubName={{hub.name}}&contentItemId={{content.sys.id}}&deliveryKey={{delivery.key}}&snapshotId={{snapshot.id}}&vseDomain={{vse.domain}}&locales={{locales}}
For the Page content type, you can skip the /amplience-visualization part of the URL, as the dynamic page component will be used to render the preview of the page.