Contentstack
Contentstack is a headless content management system (CMS) designed to help businesses manage, deliver, and optimize digital content across various platforms and channels. This approach allows for greater flexibility and scalability, especially in omnichannel content delivery.
Read more
Check the Content Management System Overview to learn more about the features of the Contentstack module.
Bootstrapping Contentstack with Alokai Storefront
To get access to this module and installation assistance, please contact the Alokai sales team or reach out to your Customer Support Manager.
Update variables
By default, the module installation will connect your Storefront to our demo Contentstack Stack. To connect it to a different Stack, update both .env.example and .env files in the Middleware (apps/storefront-middleware) directory.
- CNTS_DELIVERY_KEY=<alokai-contentstack-token>,
+ CNTS_DELIVERY_KEY=<your-contentstack-content-environment>,
- CNTS_DELIVERY_TOKEN=<alokai-contentstack-token>,
+ CNTS_DELIVERY_TOKEN=<your-contentstack-content-environment>,
- CNTS_CONTENT_ENV=<alokai-contentstack-token>,
+ CNTS_CONTENT_ENV=<your-contentstack-content-environment>,
- CNTS_CONTENT_BRANCH=<alokai-contentstack-token>,
+ CNTS_CONTENT_BRANCH=<your-contentstack-content-environment>,
- CNTS_REGION_KEY=<alokai-contentstack-token>,
+ CNTS_REGION_KEY=<your-contentstack-content-environment>,
- CNTS_PREVIEW_TOKEN=<alokai-contentstack-token>,
+ CNTS_PREVIEW_TOKEN=<your-contentstack-content-environment>,
- CNTS_PREVIEW_HOST=<alokai-contentstack-token>,
+ CNTS_PREVIEW_HOST=<your-contentstack-content-environment>,
These values can be found in your Contentstack panel inside the Settings tab.
Make sure you have bootstrapped your Contentstack Stack before connecting it to your Storefront.
Bootstrapping Contentstack
Before you start using our Contentstack integration with your Contentstack Stack, you need to import Alokai schemas into your Stack. They are aligned with our out-of-the-box frontend components.
Importing Integration Schemas
If you have installed the Contentstack module in your Storefront, you will find the default schemas provided by Alokai in the apps/storefront-middleware/sf-modules/cms-contentstack/schemas directory. To import them into your own Contentstack Stack, use the CLI tool provided by Contetstack.
Using Contentstack CLI
1
Install the CLI
npm install -g @contentstack/cli
# or
yarn global add @contentstack/cli
# or use preferred Node.js package manager
# check if the CLI tool was installed properly
csdx --version
csdx is the console (terminal) alias used by the Contentstack CLI
Just after you'll install the CLI tool please follow further steps to log into your account.
2
Set Stack region.
csdx config:set:region
# select your stack region
3
Log into your account.
csdx login
# ? Enter your email address
# ? Enter your password
4
Save your management token under an alias.
csdx auth:tokens:add -a <token-alias> -t <management-token>
Exporting schemas
To update the schemas present in this repository, run the following command from the schemas directory:
csdx cm:stacks:export -k <stack-api-key> -a <token-alias> -d .
Originally, the schemas were exported from the Alokai Demo Stack. If you would like to add them again, the <stack-api-key> and <management-token> can be delivered by the Alokai Team.
Remember that you can always remove them and replace (import) with your very own ones. Be aware though that by doing this you are at risk to break the Storefront application.
Importing schemas
To import the schemas present in this repository - delivered by Alokai - into the desired Stack, run the following command from the schemas directory:
csdx cm:stacks:import -k <stack-API-key> -a <token-alias> -d .
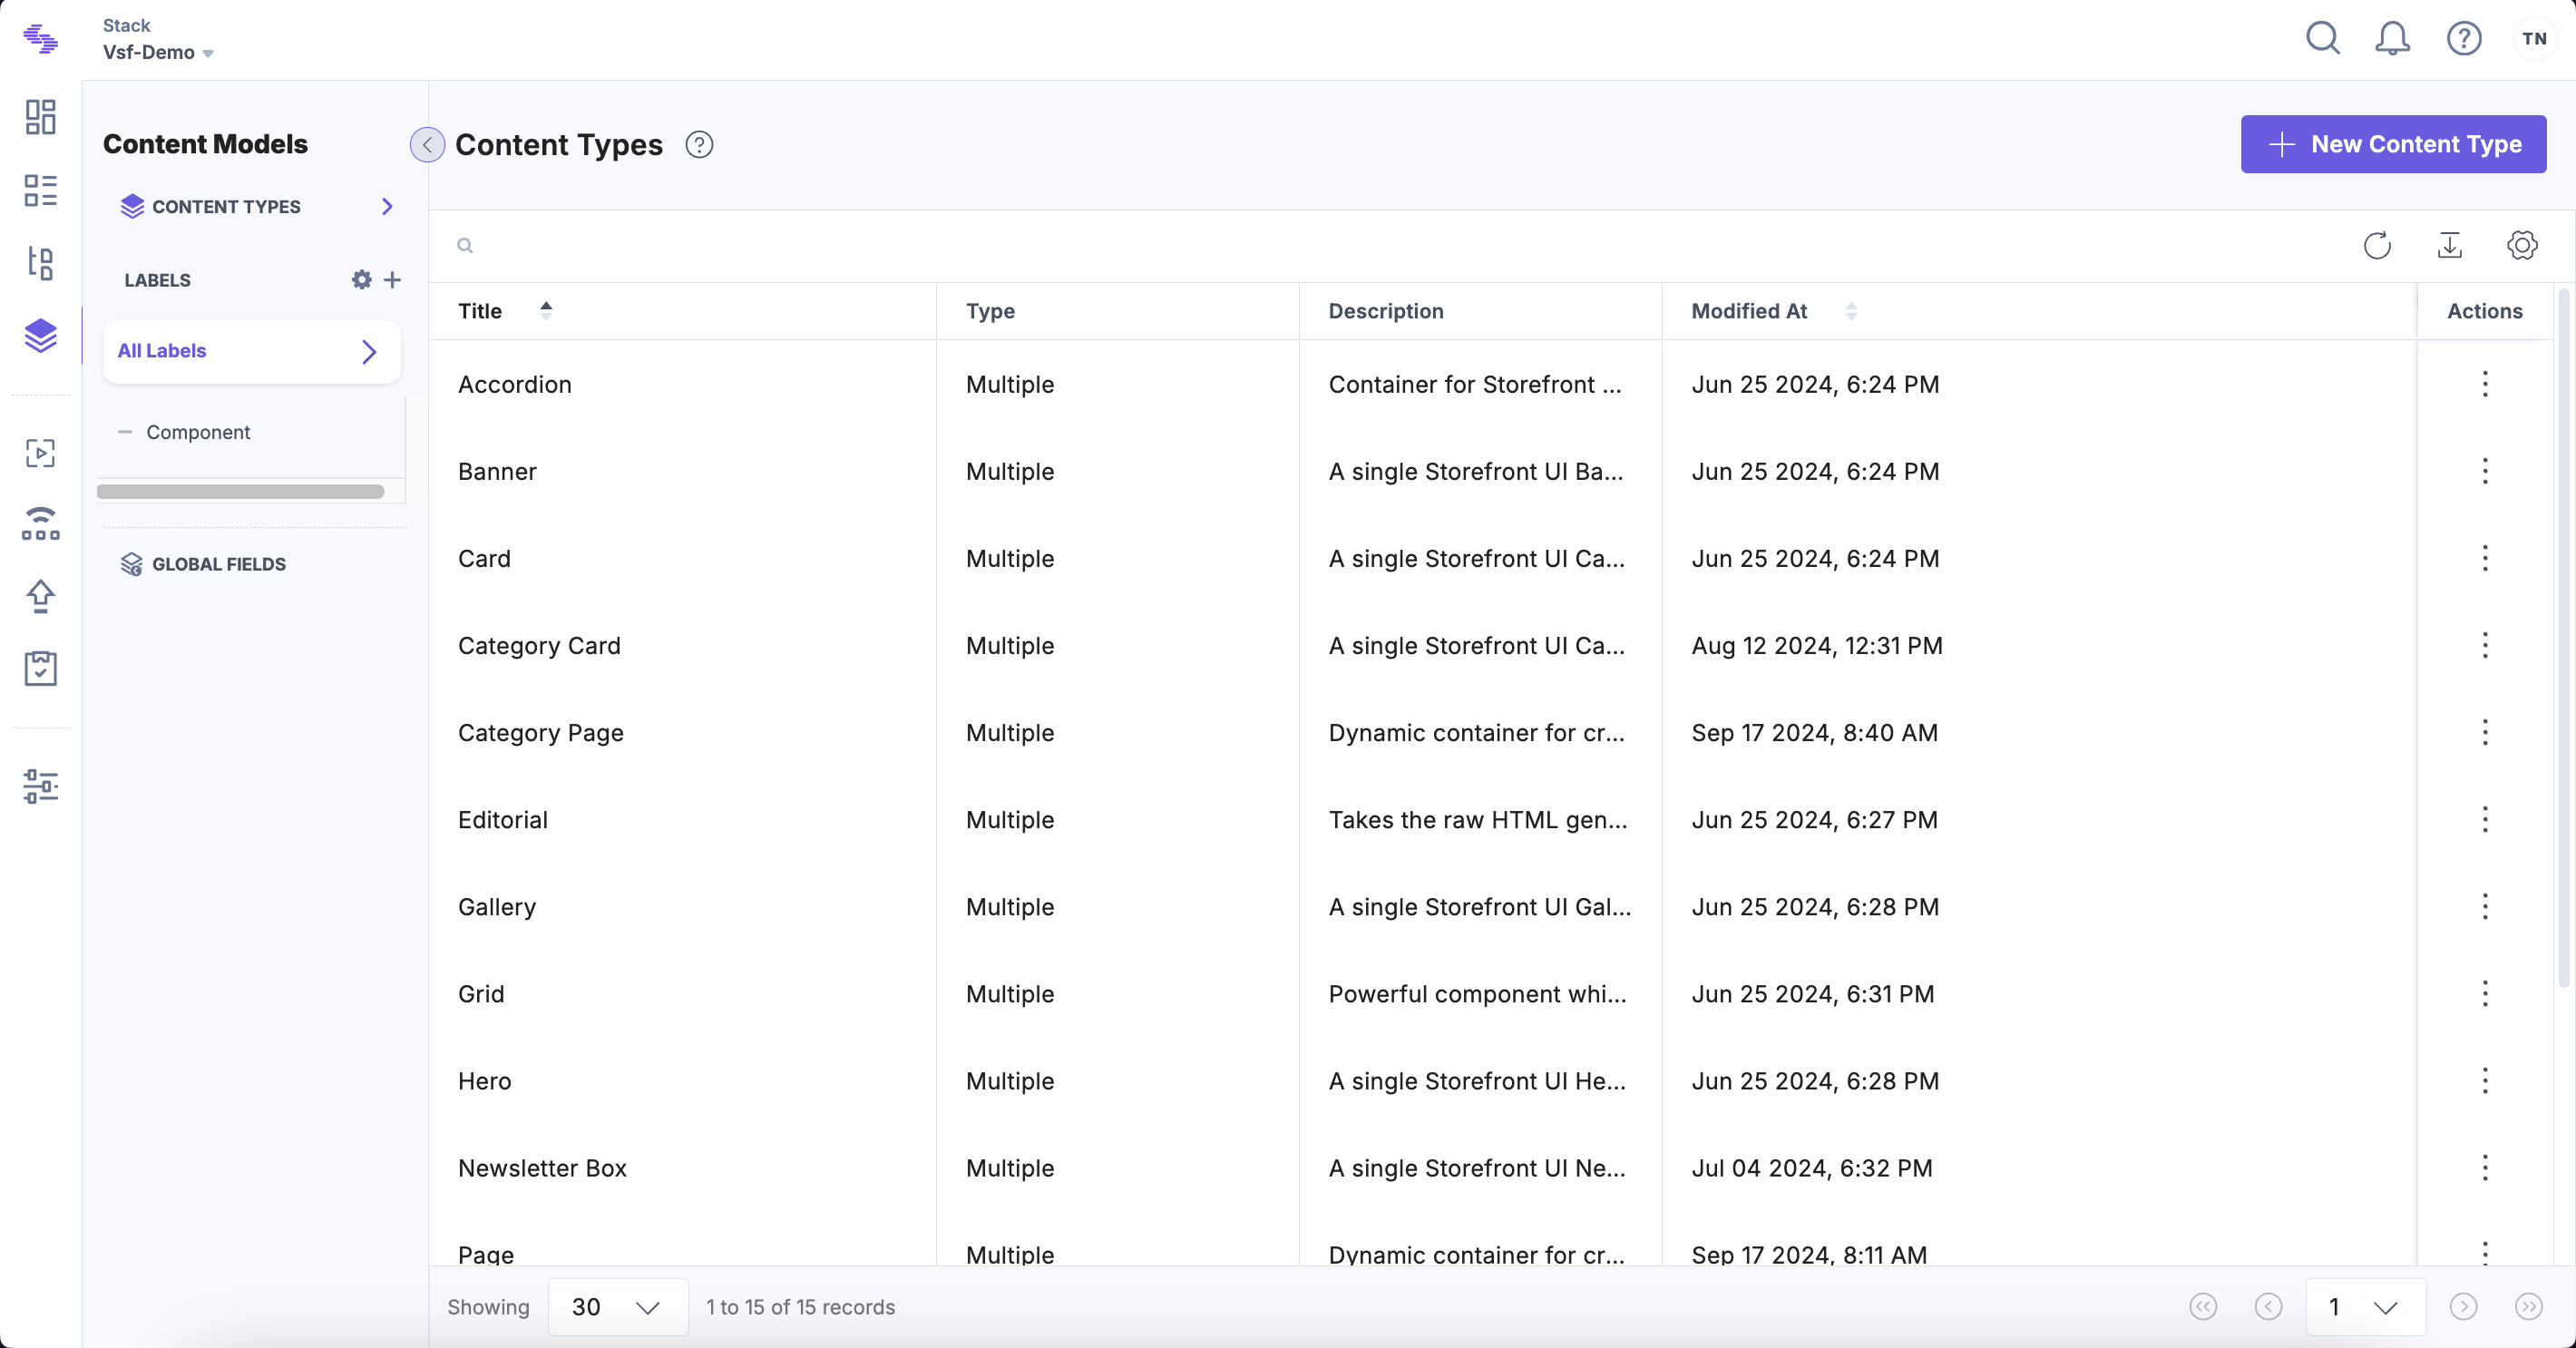
Once done, the default Content Types should appear under the Content model tab in your Contentstack Stack.
Enabling Live Preview
Because of known issue with the Contentstack Live Preview SDK this feature might not work as expected. Here you can find more details and track the issue itself.
Contentstack's Live Preview feature is a valuable tool for content creators and editors, providing a real-time preview of how content will appear across different channels and devices before it is published. This feature enhances the content creation process by offering immediate visual feedback, allowing teams to ensure accuracy and consistency across various formats and platforms.
Contentstack Live Preview will be enabled by default within your Storefront. Initialization script can be found inside the Contentstack module:
apps/storefront-unified-nextjs/@sf-modules/cms-contentstack/components/live-preview.tsx
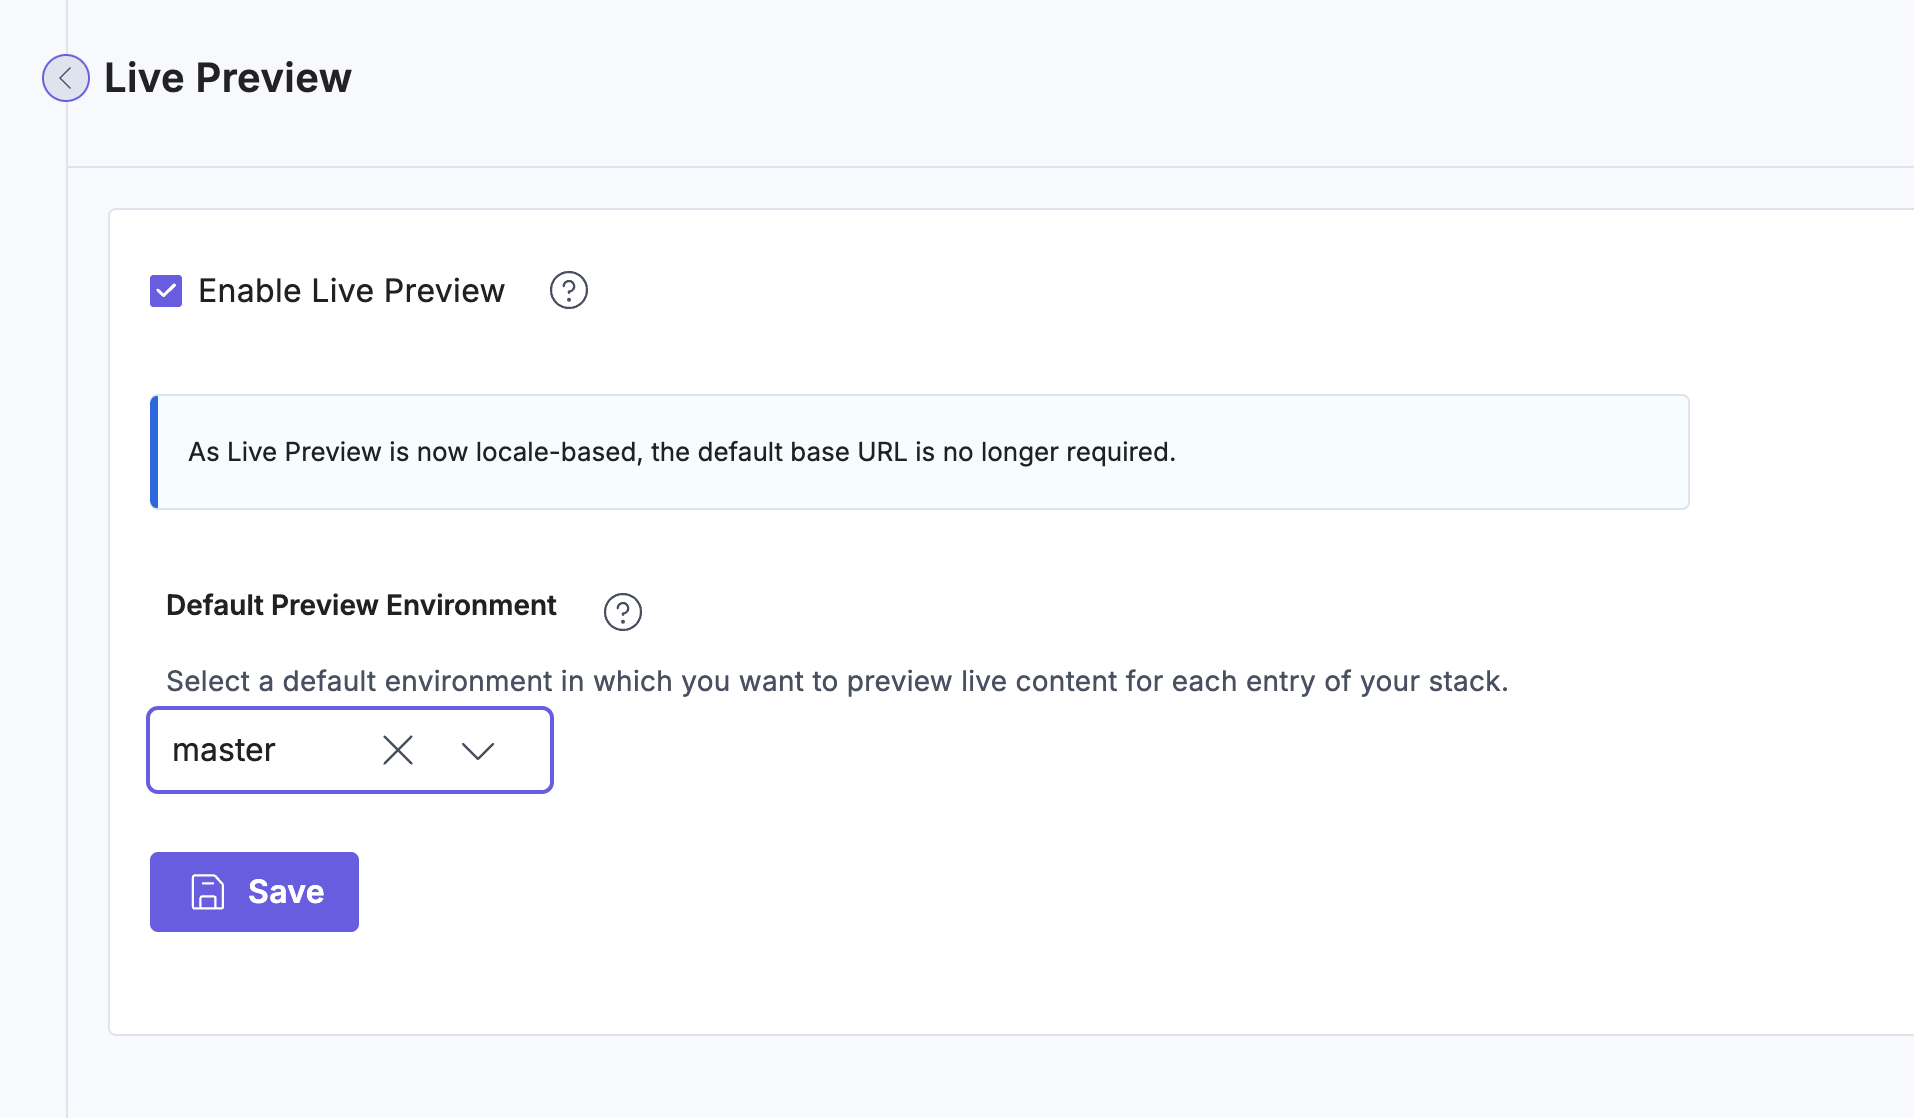
To enable Live Preview within the Contentstack please navigate to Settings -> Live Preview and switch it on.
Finally, to live preview your content while editing click on to the right-pane-icon.
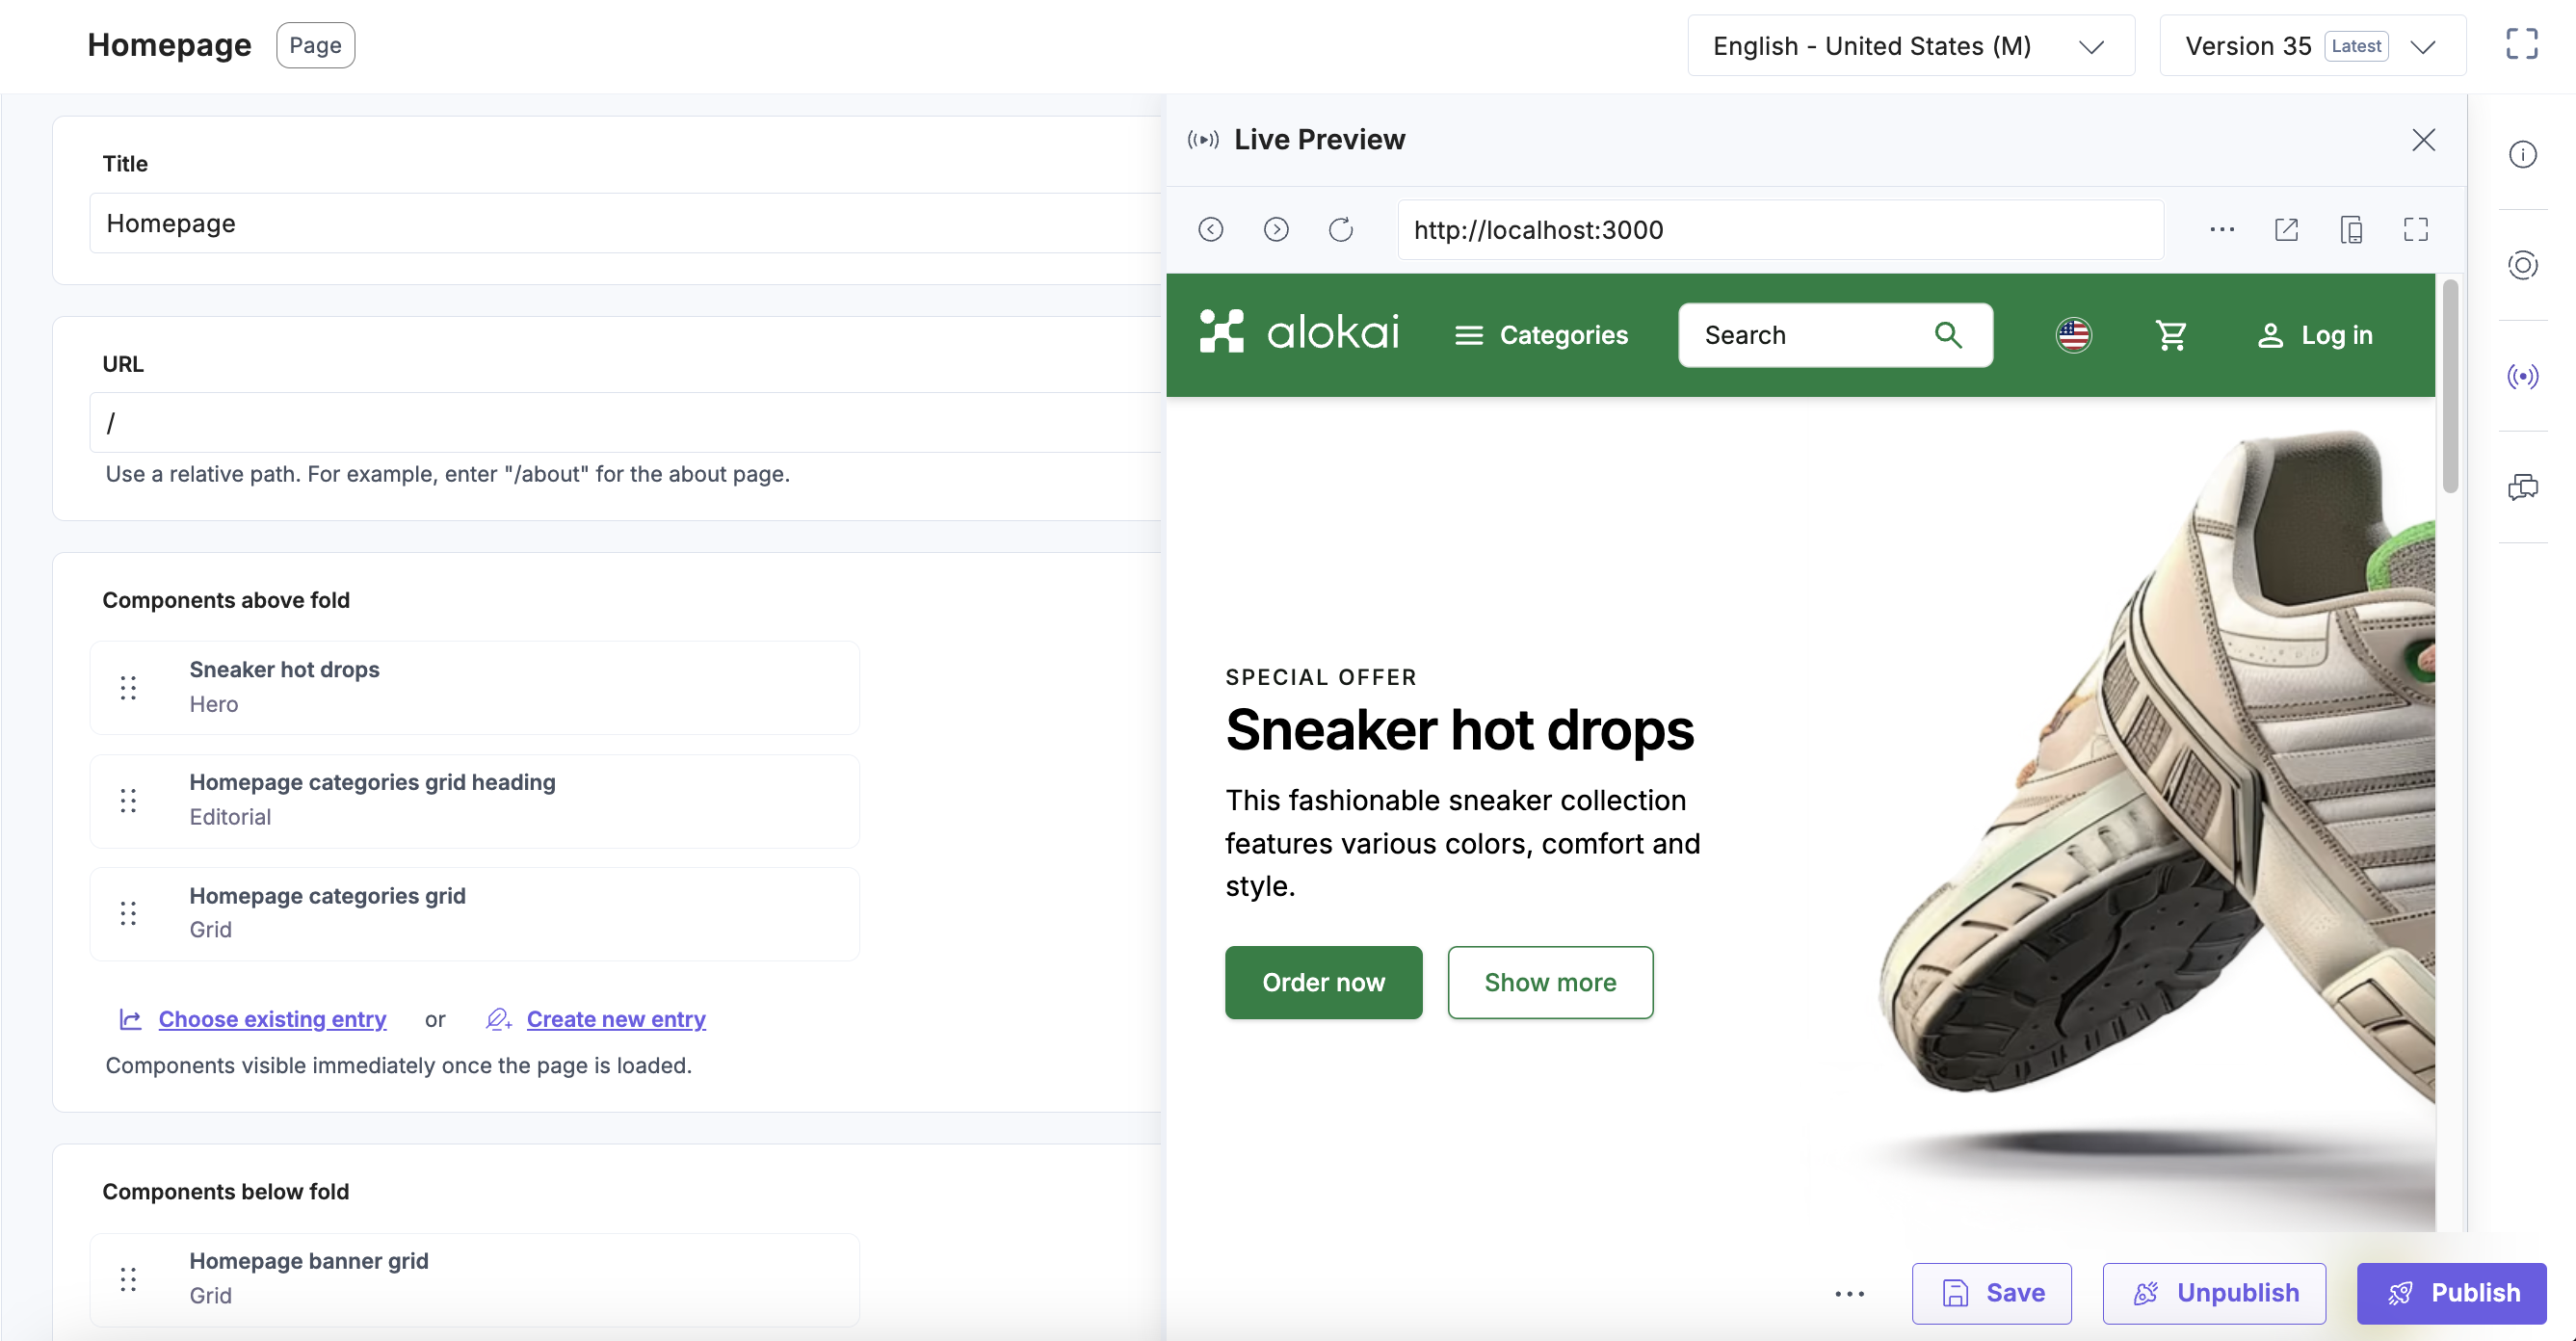
No additional actions are required in your Alokai Storefront. The only thing you need to do is to make sure your frontend app is running on the same port as the one you've set up in Contentstack. By default, it's 3000 for Next.js and 3333 for Nuxt.
Field Naming Convention (snake_case)
Starting from version 2.0.0, the Contentstack API normalizers preserve original snake_case field names from the CMS instead of converting them to camelCase. This means that the API returns field names that match your Contentstack schema exactly, enabling use of auto-generated TypeScript types.
By default, the Contentstack module's ConnectCmsPage and RenderCmsContent wrapper components automatically convert the snake_case fields back to camelCase, so no changes are required in your storefront code. Page-level properties like componentsAboveFold, componentsBelowFold, componentsTop, and componentsBottom continue to work as before.
Opting in to native snake_case
If you prefer to use Contentstack's native snake_case field names (for example, to align with auto-generated TypeScript types from your Contentstack schema), you can disable the automatic conversion. Search for [CONTENTSTACK-CAMELCASE] in your Contentstack module files to find all conversion points. To disable:
- Remove the
camelCasePageKeysfunction and its usage inConnectCmsPage - Remove the camelCase conversion in
RenderCmsContent - Update your page components to use snake_case field names:
// Dynamic pages
- const { componentsAboveFold, componentsBelowFold } = page;
+ const { components_above_fold, components_below_fold } = page;

// Category pages
- const { componentsTop, componentsBottom } = page;
+ const { components_top, components_bottom } = page;

// Component props
- backgroundImage={data.backgroundImage}
+ backgroundImage={data.background_image}